
Windscreen (page 2 of 3)
- Make
- Land Rover
- Model
- Freelander Workshop Manual
- Year
- 1998–2000
- Section
- Screens
BodyWindscreen · page 2 of 3
- Attach suction cups and use assistance to remove glass from body.
CAUTION: Lay glass on felt covered supports. Do not stand on edge. Any chipping of glass edge may develop into cracks.
- Collect screen support blocks.
Refit
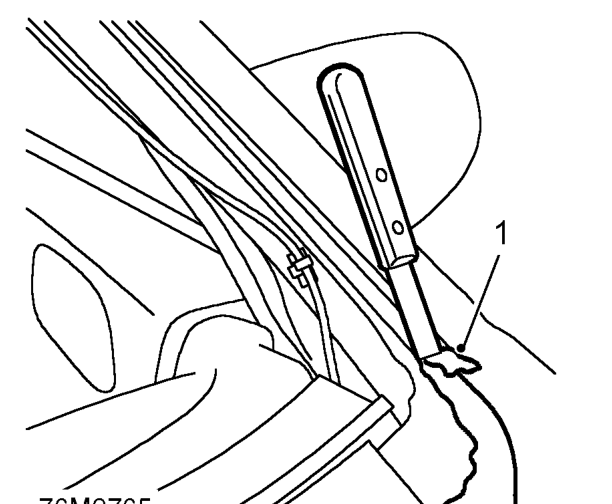
- Carefully remove excess sealer from body leaving a smooth surface.
- Use a vacuum cleaner to clear away any waste.
- Original glass: Carefully cut back old sealer to obtain a smooth surface without damaging obscuration band on glass.
- Fit spacer blocks to body.
- With assistance, locate screen to body.
- Apply masking tape reference marks to aid fitment.
- With assistance, remove screen and place aside.
- Clean frame and edge of screen with solvent.
CAUTION: Do not touch cleaned or primed surfaces with fingers.
- Apply etch primer to any bare metal on frame.
- Apply bonding agent to screen and allow to cure.
- Apply primer over etch primer on frame.
- Apply activator over old sealer on frame.
- Allow activator to cure.
- Fit pre-cut nozzle to sealer cartridge, remove lid and shake out crystals, and install in applicator gun.
NOTE: Nozzle will need modification to achieve required bead section.
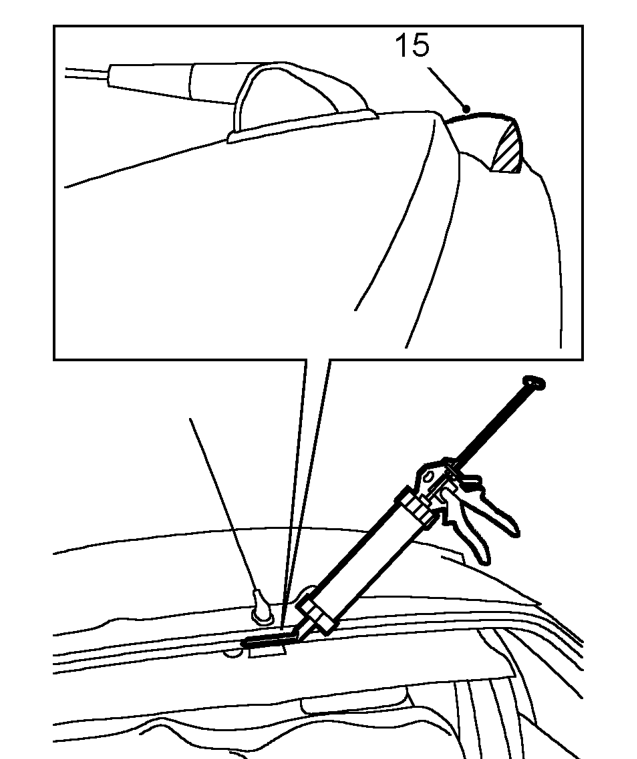
- Apply a continuous bead of sealer around edge of frame as shown.
- Check for breaks and air bubbles in sealer.
Parts & tools for this job For 1998 Land Rover Freelander
- TOOLTrim removal tool kitSearch: trim removal tool kit
- PARTTouch-up paintSearch: Land Rover touch up paint
- PARTPanel clip assortmentSearch: Land Rover panel clips assortment
Links open Amazon search results in a new tab. As an Amazon Associate I earn from qualifying purchases.