Freelander Service Procedures

BRAKES
70-2
ADJUSTMENTS
Cable - handbrake - check and adjust
$% 70.35.10
Check
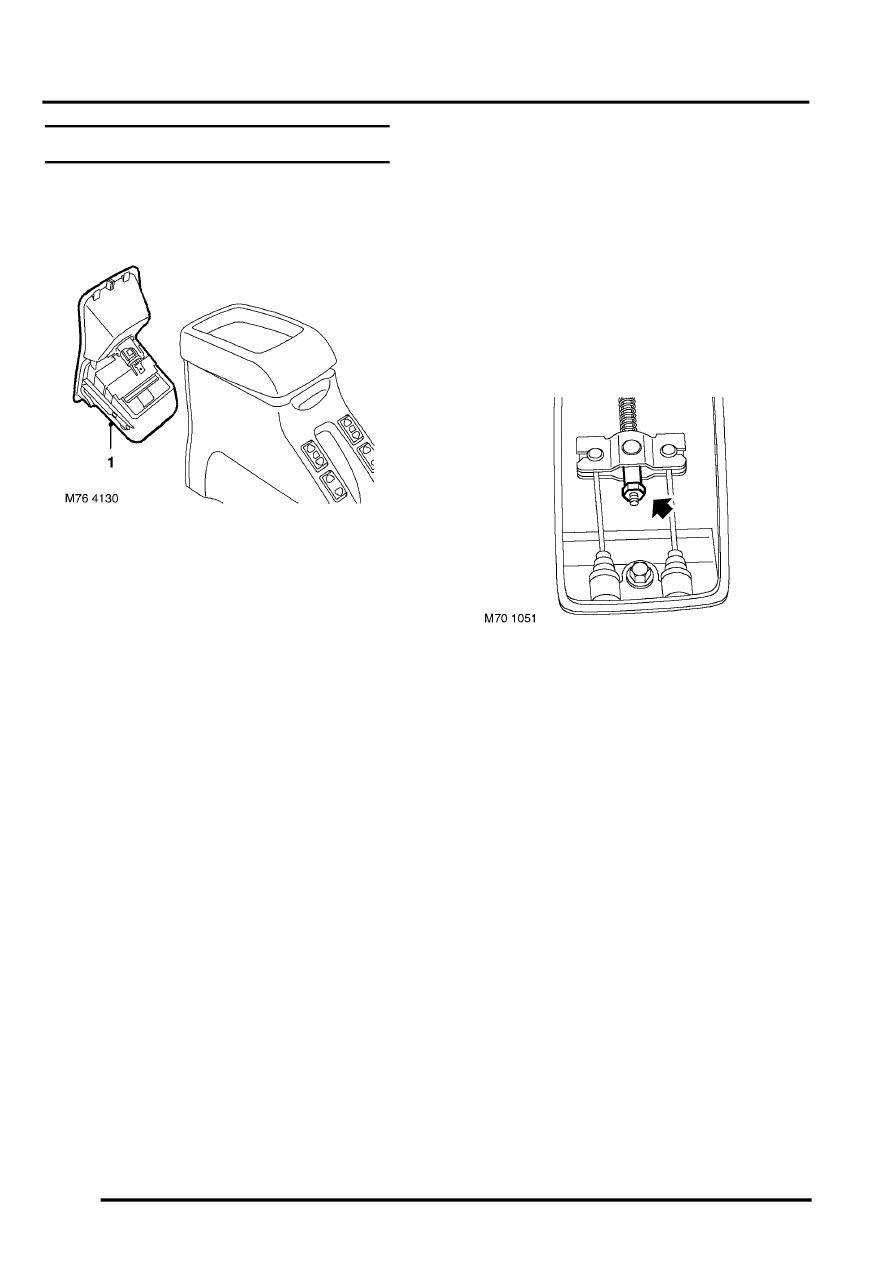
1. Release ash tray panel from rear console,
disconnect multiplug from power socket and
remove ash tray panel.
2. Fully release handbrake lever.
3. With engine running, apply footbrake a
minimum of thirty times, to ensure full
adjustment of rear brake shoes.
4. Switch off engine.
5. Apply handbrake lever one notch at a time and
count the number of notches required to apply
the brakes firmly, equivalent to a pull of 20 kgf.
applied at mid point of handbrake lever grip.
Handbrake lever travel = 4 to 7 notches.
6. Adjust handbrake cable tension if travel is
outside limits.
CAUTION: Hand brake travel must be within
the limits given or the automatic adjusters
may not work.
Adjust
1. If carrying out handbrake adjustment after
brake drum installation, apply brake pedal a
min. of 30 times, to ensure full adjustment of
rear brake shoes.
2. Raise rear of vehicle.
WARNING: Do not work on or under a
vehicle supported only by a jack. Always
support the vehicle on safety stands.
3. Check handbrake cable connections for free
movement in handbrake equalizer.
4. Apply handbrake lever one notch.
5. Tighten equalizer adjusting nut until rear
wheels drag slightly when turned.
6. Release handbrake lever and check that rear
wheels do not drag when turned. Adjust if
necessary.
7. Apply handbrake one notch at a time and count
the number of notches until both rear wheels
lock. This should be a minimum of 4 and a
maximum of 7 clicks. Adjust if necessary.
8. Release handbrake
9. Fit ash tray panel and cigar lighter to rear
console.
10. Remove stands and lower vehicle.
