
Rubber/felt - glass channel - front door
- Make
- Land Rover
- Model
- Freelander Service Procedures
- Section
- REPAIRS › Rubber/felt - glass channel - front door
DOORS
76-1-8
REPAIRS
Rubber/felt - glass channel - front door
$% 76.31.13
Remove
1. Remove exterior mirror.
2. Lower door glass.
3. Remove inner seal.
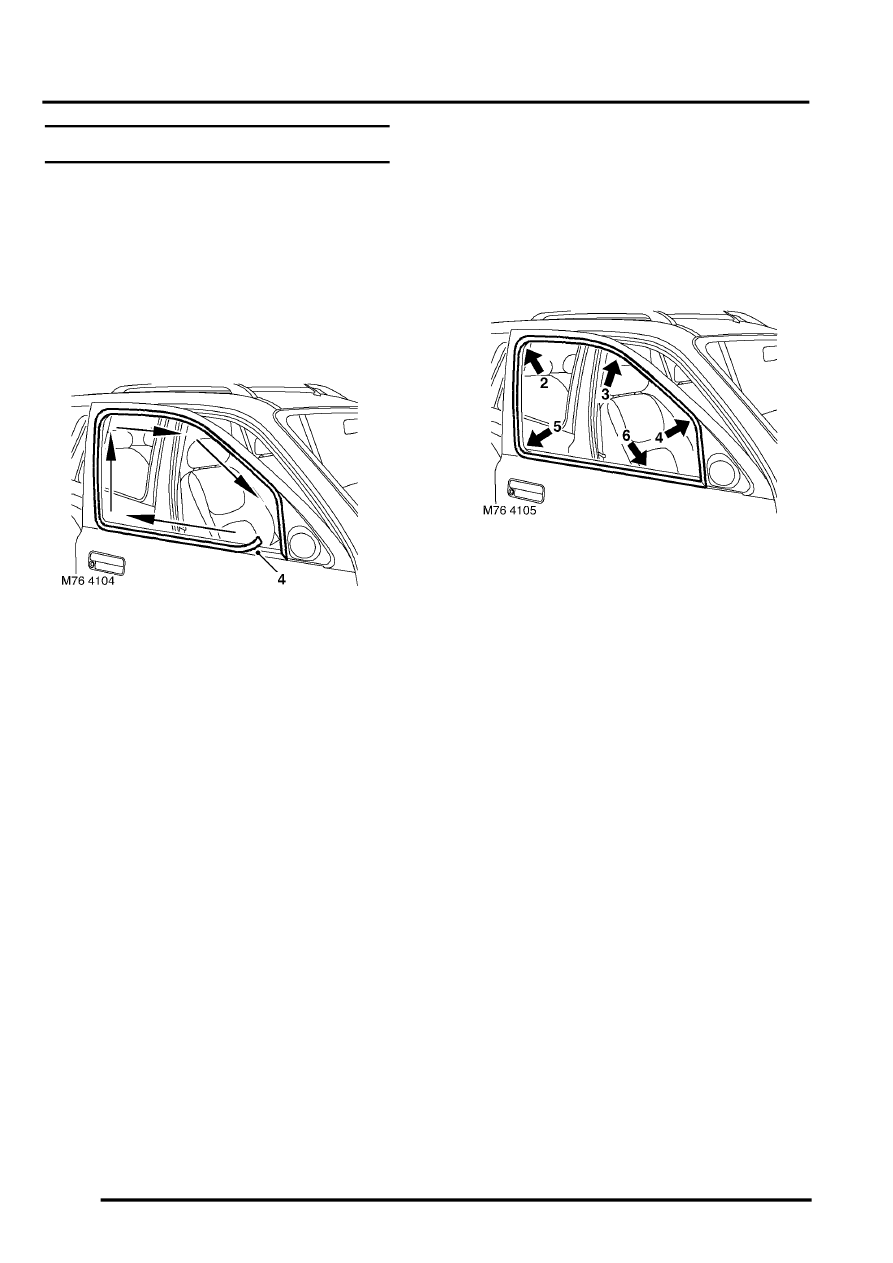
4. Carefully release seal from door flange, starting
from the cheater panel, working along the waist
rail and around the door flange.
Refit
1. Lubricate corners of seal with soapy water.
CAUTION: This seal assembly uses an
internal metal former. Take care not to bend
the seal during fitment, or the former will
become kinked.
2. Starting at the rearmost top corner of the glass
aperture, seat the seal onto the flange,
ensuring that the radius of the seal matches the
door profile.
3. Secure seal to flange across cantrail and down
'A' post.
4. Secure seal in corner at base of 'A' post.
5. Carefully pull 'B' post length of seal away from
flange until bottom corner is just clear of flange,
seal will then locate over flange. Ensure seal
has not become twisted. Starting from the top,
push the seal onto the flange.
NOTE: The bottom radius should match the
door profile.
6. Secure the seal to the bottom flange by rotating
the seal onto the flange and pushing evenly on
its length along the waist rail.
7. Fit inner seal.
8. Raise and lower glass to check seal fit.
9. Fit exterior mirror.
Parts & tools for this job For Land Rover Freelander
- TOOLTrim removal tool kitSearch: trim removal tool kit
- PARTTouch-up paintSearch: Land Rover touch up paint
- PARTPanel clip assortmentSearch: Land Rover panel clips assortment
Links open Amazon search results in a new tab. As an Amazon Associate I earn from qualifying purchases.