
Switch - master window - 5 door - from 04MY
- Make
- Land Rover
- Model
- Freelander Service Procedures
- Section
- REPAIRS › Switch - master window - 5 door - from 04MY
WINDOWS
86-5-2
REPAIRS
Motor & control unit - front door - 5 door
$% 86.25.01
Remove
1. Remove front door plastic sheet.
DOORS, REPAIRS, Plastic sheet -
2. Disconnect multiplug from door glass motor.
3. Loosen 2 screws clamping control unit to glass.
4. Release cable from door clip.
5. Remove 5 screws securing control unit to door.
6. Release cable from door clip and manoeuvre
motor and control unit out from door aperture.
Refit
1. Position motor and control unit in door aperture
and locate to glass.
CAUTION: It is very important when fitting
the control unit that the cable with the anti-
rattle sleeve is next to the trim casing and
the motor cable next to the glass.
2. Fit and tighten screws securing control unit to
door.
3. Secure cable in door clip.
4. Tighten clamps securing control unit to glass, to
9 Nm (7 lbf.ft).
5. Connect multiplug to door glass motor.
6. Fit front door plastic sheet.
DOORS, REPAIRS, Plastic sheet -
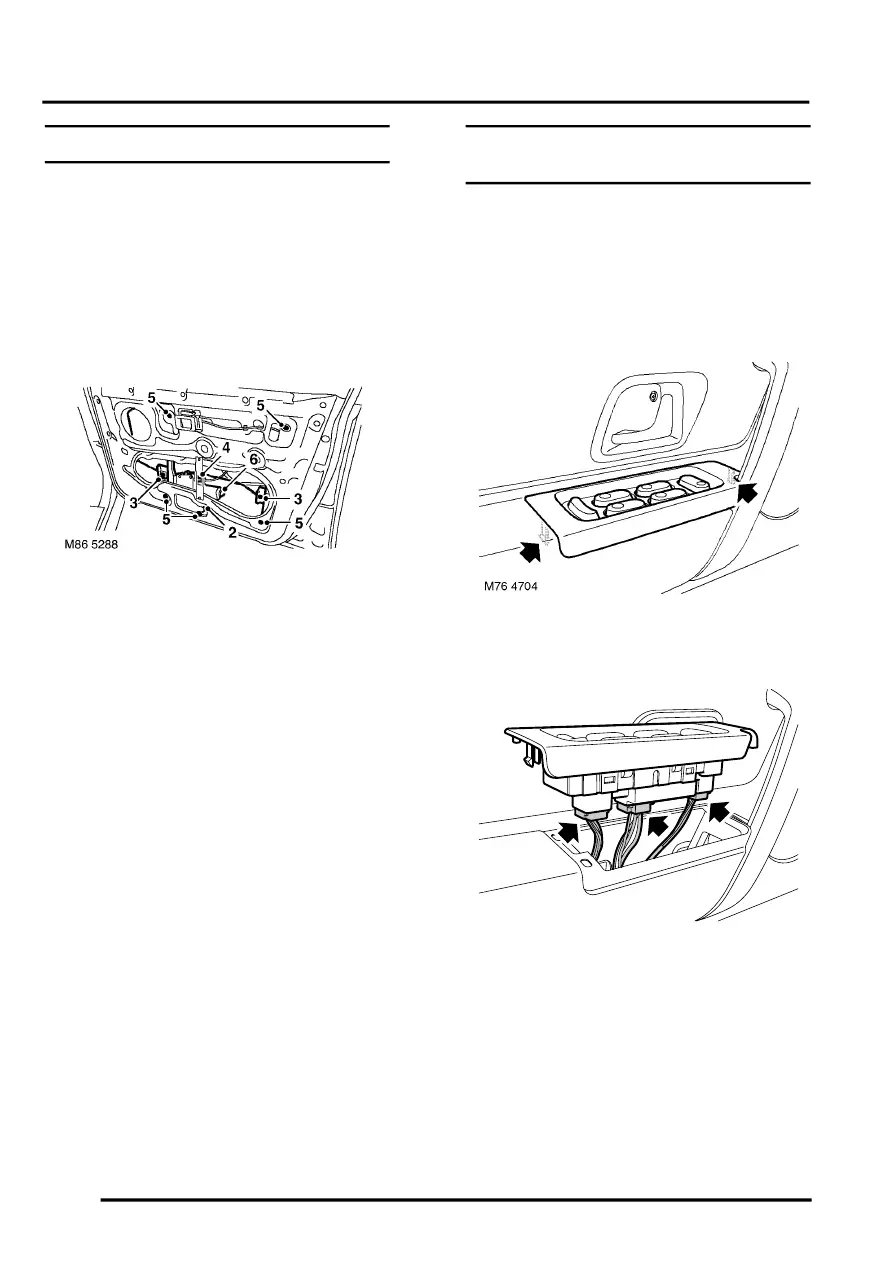
Switch - master window - 5 door - from
04MY
$% 86.25.08
The procedure to remove the window lift and door
panic lock switches is similar to the one shown
below.
Remove
1. Carefully release window lift switch pack from
door trim casing.
2. Disconnect 3 multiplugs from window lift switch
pack and remove switch pack.
NOTE: Do not carry out further dismantling if
component is removed for access only.
3. Carefully release and remove window lift switch
pack from bezel.
Refit
1. Fit window lift switch pack to bezel.
2. Position switch pack, connect multiplugs and
secure switch pack to trim casing.
M76 4698
Parts & tools for this job For Land Rover Freelander
- TOOLOBD2 scannerSearch: OBD2 scanner
- TOOLDigital multimeterSearch: automotive digital multimeter
- TOOLBack-probe test leadsSearch: back probe test leads
Links open Amazon search results in a new tab. As an Amazon Associate I earn from qualifying purchases.