
L322 Range Rover Service Procedures
DOORS
76-1-20 REPAIRS
Handle - outside - front door
$% 76.58.07
This procedure is also applicable to the rear door
handle.
Remove
1. Remove plastic sheet.
DOORS, REPAIRS, Plastic sheet -
DOORS, REPAIRS, Plastic sheet -
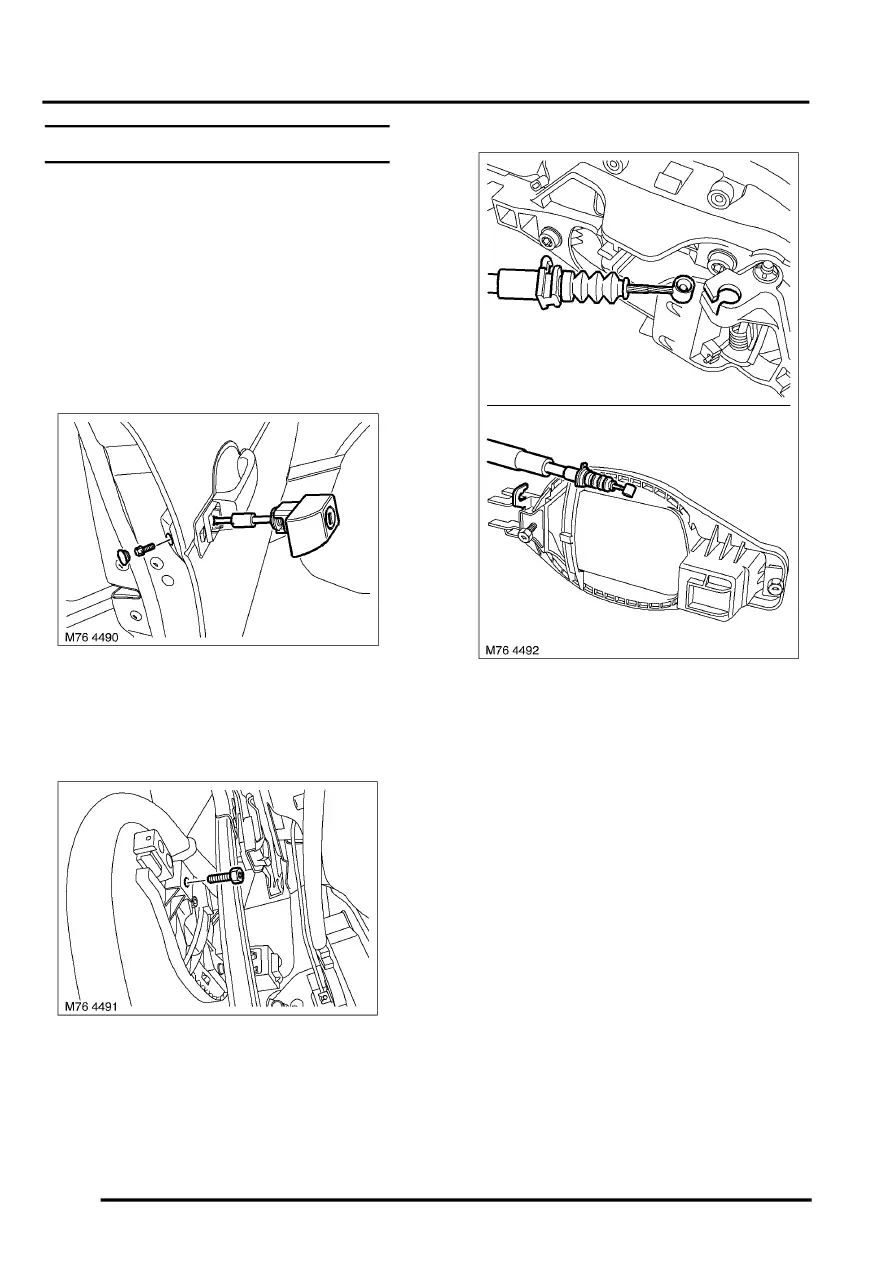
2. Drivers door: Remove grommet for access to
lock retaining screw.
3. Drivers door: Remove Torx screw securing
lock and remove lock assembly.
4. Remove Torx screw securing door handle
assembly.
5. Release handle assembly from door.
6. Disconnect release cable from handle
assembly.
7. Remove door handle.
8. Release cable from clip and collect
reinforcement.
Refit
1. Connect latch release cable to door handle.
2. Position inner reinforcement to door.
3. Locate cable to inner reinforcement and secure
in clip.
4. Position handle to door align and lightly tighten
securing screw.
5. Drivers door: Position door lock, fit and lightly
tighten Torx screw.
6. Check alignment and tighten Torx bolts to 10
Nm (7 lbf.ft).
7. Check operation of handle and lock.
8. Fit grommet to door.
9. Fit plastic sheet.
DOORS, REPAIRS, Plastic sheet -