
L322 Range Rover Service Procedures
DOORS
REPAIRS
76-1-9
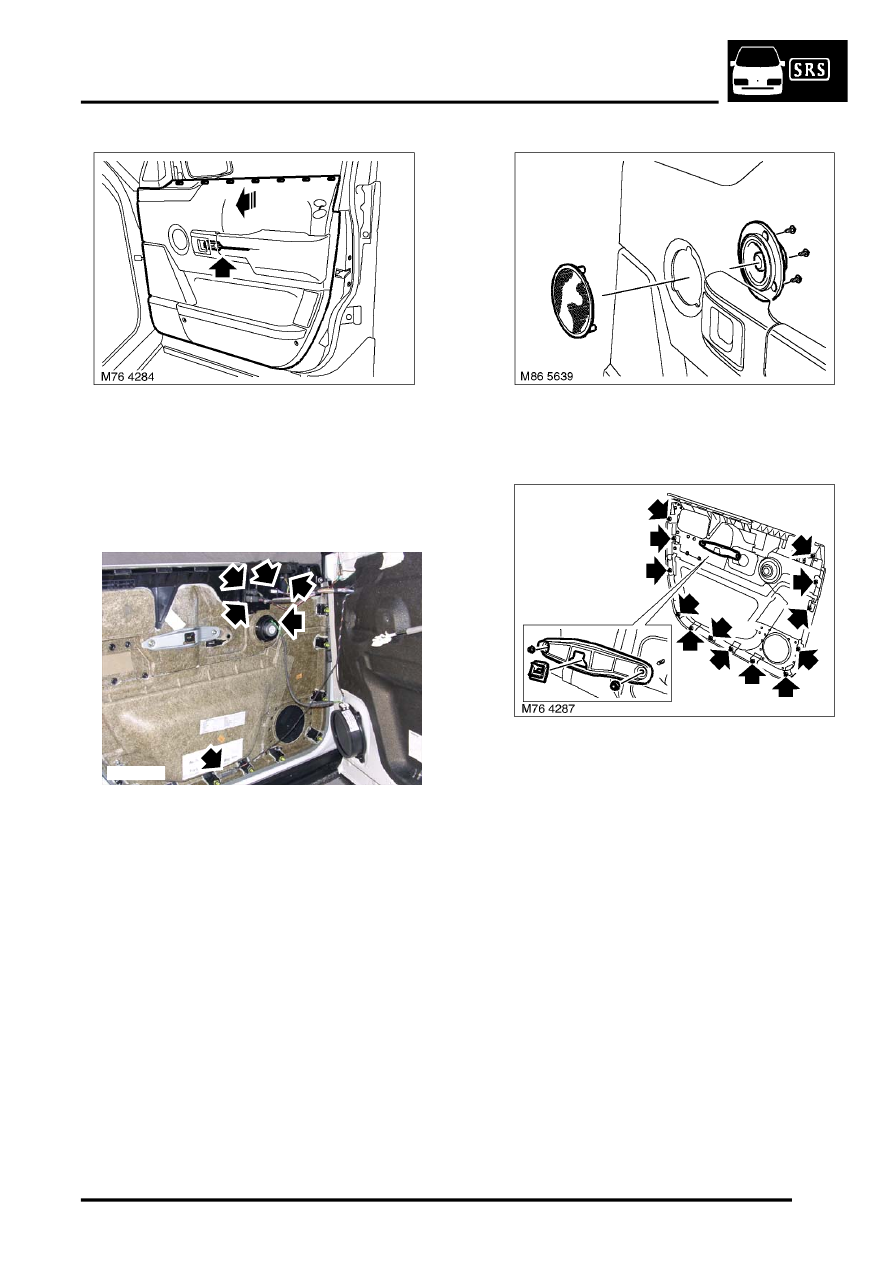
5. Pull trim casing horizontally from 7 clips
securing the upper edge to inner glass seal,
avoid damage to the locking button on final
release.
6. Release door operating cable from door casing
and move aside.
7. Disconnect 6 multiplugs from door harness and
remove trim casing.
NOTE: Do not carry out further dismantling if
component is removed for access only.
8. Remove 3 Torx screws securing speaker to
trim casing and remove speaker
9. Remove 13 clips from door casing.
10. Remove retaining clip from door handle
reinforcement bracket.
11. Remove 2 nuts securing door handle
reinforcement bracket. Remove bracket.
M76 4286