L322 Range Rover Service Procedures

DOORS
76-1-10 REPAIRS
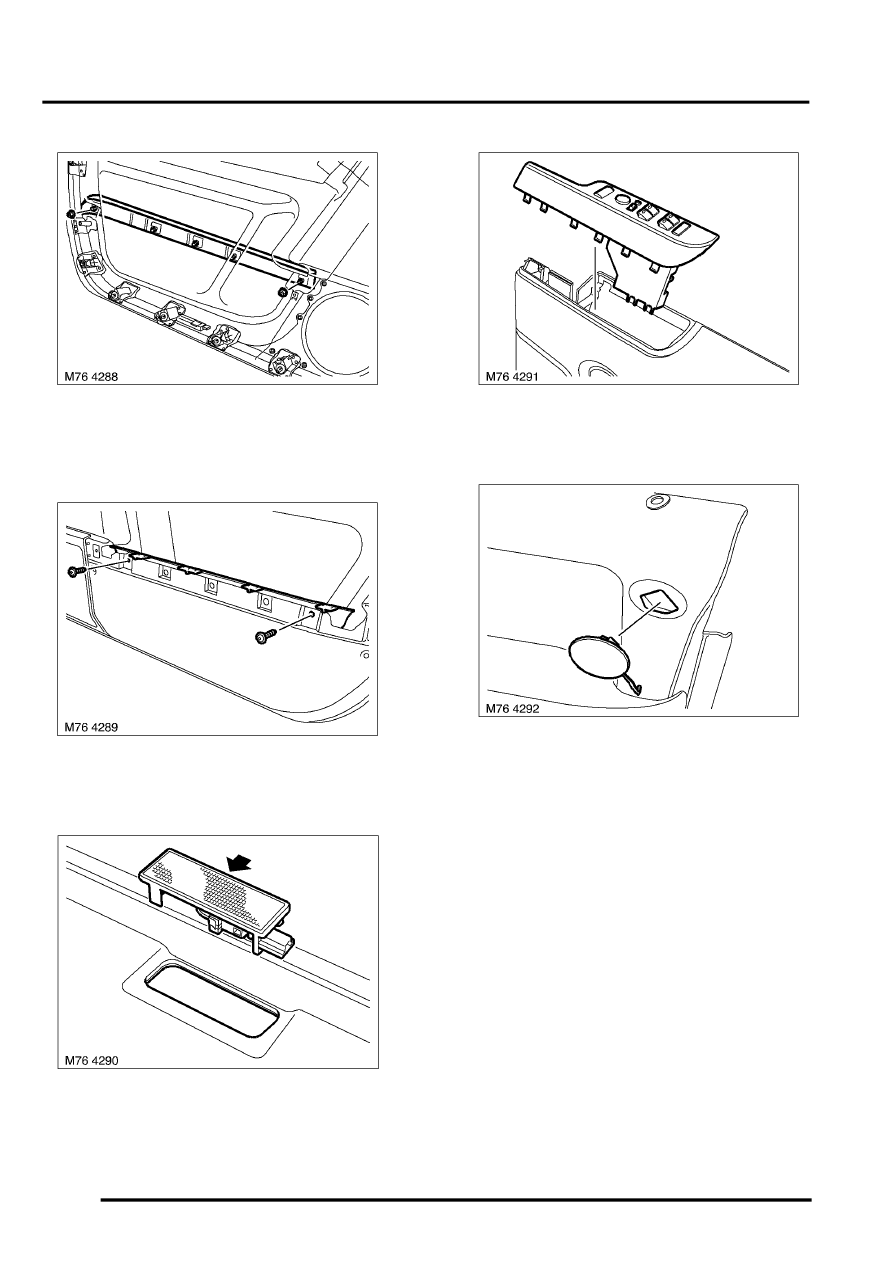
12. Remove 2 nuts securing door pocket finisher,
carefully release finisher from 3 clips and
remove finisher.
13. Remove 2 Torx screws securing inner door
pocket finisher to casing. Remove finisher.
14. Depress clip and remove trim casing light
assembly.
15. Carefully release window lift switch pack from
door trim casing.
16. Remove access cover from door casing.
Refit
1. Fit access cover to door casing.
2. Position switch pack to door casing, align and
secure clips.
3. Fit light assembly to door casing.
4. Fit inner door pocket finisher and secure with
screws.
5. Position outer door pocket finisher to clips, fit
nuts and tighten to 3 Nm (2.2 lbf.ft).
6. Position door handle reinforcement bracket, fit
nuts and tighten to 6 Nm (4.4 lbf.ft).
7. Fit and secure clip to reinforcement bracket.
8. Fit door casing retaining clips.
9. Fit speaker to trim casing and secure with Torx
screws.
10. Connect multiplugs.
11. Connect cable to interior door release.
12. Fit front door trim casing.
13. Fit screws securing door trim casing.
14. Position and secure screw cover.
