
L322 Range Rover Service Procedures
ENGINE - V8
12-2-4
REPAIRS
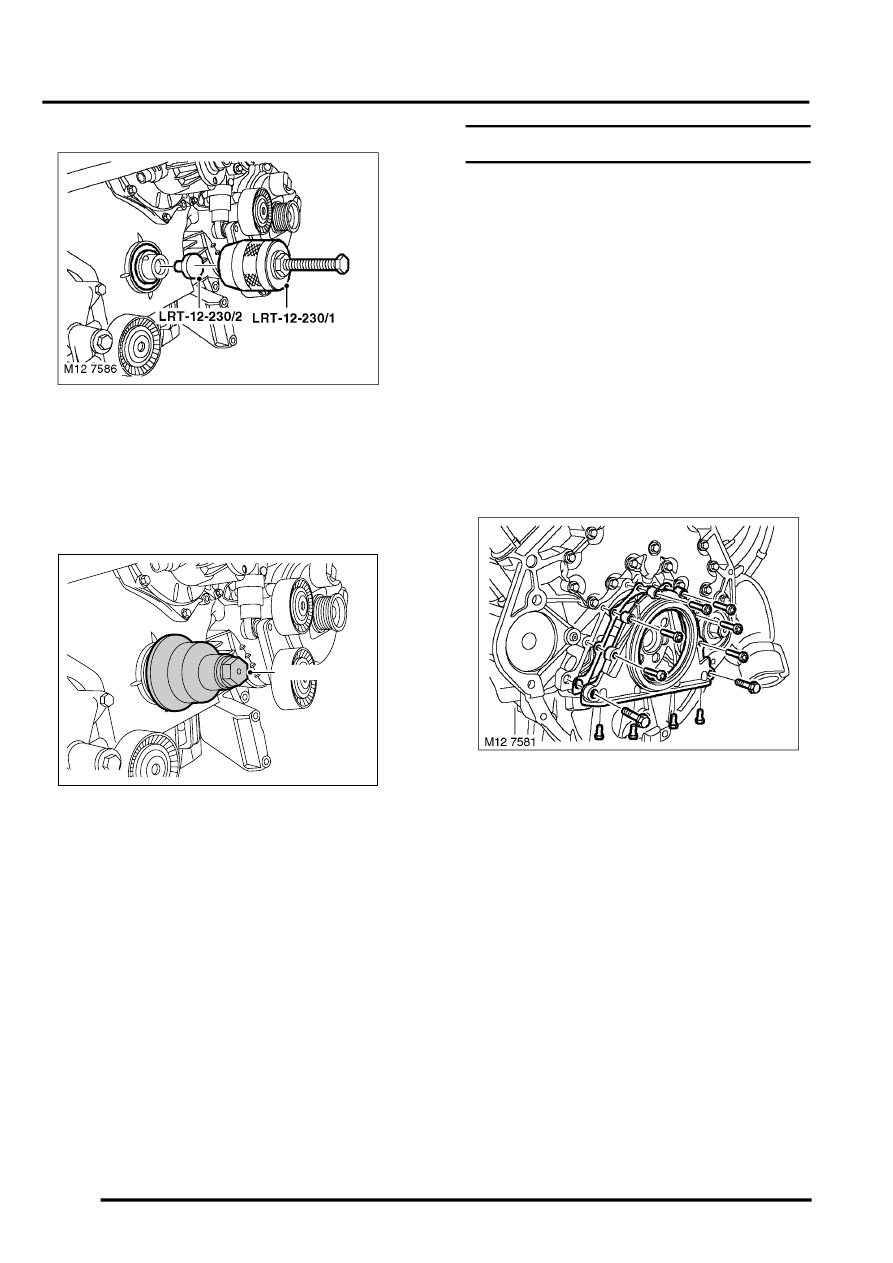
8. Fit LRT-12-230/1 and LRT-12-230/2 to
crankshaft seal and remove crankshaft oil seal.
9. Discard oil seal.
Refit
1. Clean seal mating faces.
2. Fit new crankshaft oil seal to front cover using
LRT-12-231.
NOTE: Front crankshaft oil seal should be fitted
flush to front timing cover.
3. Remove LRT-12-231.
4. Clean crankshaft pulley hub and mating faces,
fit crankshaft pulley hub to crankshaft.
5. Fit new bolt to crankshaft, lock crankshaft using
LRT-12-229 and initially tighten crankshaft bolt
to 100 Nm (74 lbf.ft). Using an angle torque
gauge tighten in the following sequence. Stage
1; 60
°
. Stage 2; 60
°
. Stage 3; 30
°
.
6. Remove LRT-12-229 from crankshaft pulley
hub.
7. Fit crankshaft pulley.
Engine - V8, REPAIRS, Pulley -
8. Connect battery earth lead.
Oil seal - crankshaft - rear
$% 12.21.20
Before disconnecting the battery, ensure all text and
cautions in the battery disconnection section are
observed.
GENERAL INFORMATION, Electrical
Remove
1. Position vehicle on lift.
2. Disconnect battery earth lead.
3. Drain engine oil.
Engine oil and filter - V8 engine.
4. Remove torque converter drive plate.
5. Remove 6 Torx bolts and 6 bolts securing
crankshaft rear oil seal housing to cylinder
block.
6. Remove crankshaft rear oil seal housing.
7. Discard gasket from crankshaft rear oil seal
housing.
8. Remove crankshaft rear oil seal from housing.
Refit
1. Clean crankshaft rear oil seal housing, locating
dowels and mating faces on cylinder block and
crankshaft oil seal running surface.
M12 7587
LRT-12-231