L322 Range Rover Service Procedures

FRONT DIFFERENTIAL
REPAIRS
54-5
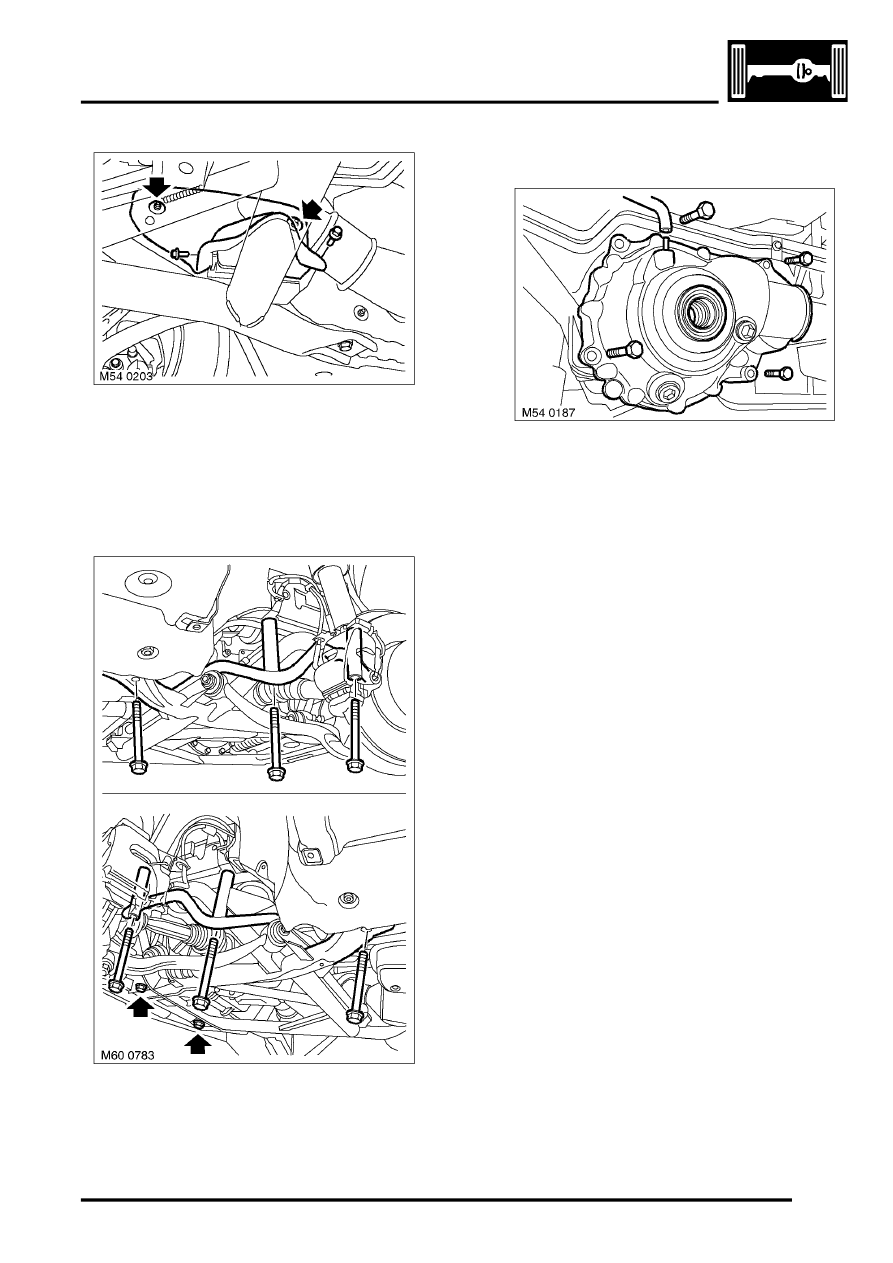
24. Remove 2 speed nuts securing each anti-roll
bar heat shield to body and 2 bolts securing
each heat shield to sub-frame. Remove heat
shields.
25. Use a transmission jack to support the sub
frame.
26. Remove 6 bolts securing sub-frame.
27. Remove 2 bolts securing sub-frame to cross
member.
28. With assistance, lower and remove sub-frame
assembly.
29. Disconnect breather hose from differential.
30. Remove 4 bolts securing differential and with
assistance, remove differential. Remove and
discard 'O' ring.
Refit
1. Clean differential and mating face.
2. Fit new 'O' ring to differential housing and
lubricate with petroleum jelly.
3. With assistance, carefully fit differential. Fit
bolts, but do not tighten at this stage.
4. Align differential to transfer box front output
flange. See Technical Bulletin, Final Drive
section, No: 0014
5. Tighten differential fixing bolts to 110 Nm (81
lbf.ft).
6. Connect breather hose to differential.
7. Clean sub-frame and body mating faces.
8. With assistance, fit sub-frame assembly.
9. Tighten 6 bolts securing sub-frame to body to
165 Nm (122 lbf.ft). Tighten 2 rear bolts a
further 90
°
.
10. Tighten 2 bolts securing sub-frame to front
cross member to 132.5 Nm (97 lbf.ft).
11. Fit anti-roll bar heat shields to body and tighten
2 bolts and speed nuts.
12. Lower engine onto mountings.
13. Tighten nuts securing engine brackets to
mountings to 100 Nm (74 lbf.ft).
14. Clean PAS hose connections.
15. Connect PAS hose to cooler.
16. Fit new 'O' ring to PAS hose union, connect
hose to pump and tighten nut to 25 Nm (18
lbf.ft).
17. Connect PAS hose to mounting and tighten nut
to 10 Nm (7 lbf.ft).
18. Connect multiplug to PAS rack pinion sensor.
19. Connect height sensor multiplugs.
20. Correctly position height sensor harness and
secure with cable ties.
