
LR3/Disco 3
Thermostatic Expansion Valve (82.26.01)
Removal
Installation
Published : Jul 1, 2004
WARNING: Eye protection must be worn.
1 .
Remove the climate control assembly. For additional information, refer to
Auxiliary Climate Control
Assembly (82.26.22)
(Section 412-03)
2 .
CAUTION: Before disconnecting or removing the components, ensure the area around the joint
faces and connections are clean. Plug open connections to prevent contamination.
NOTE :
The receiver drier need only be changed under the following circumstances: There is dirt in the
refrigerant circuit ( eg. compressor seizure ). The system is leaking and refrigerant has been lost to
atmosphere. Refrigerant circuit has been open more than 24 hours due to repair.
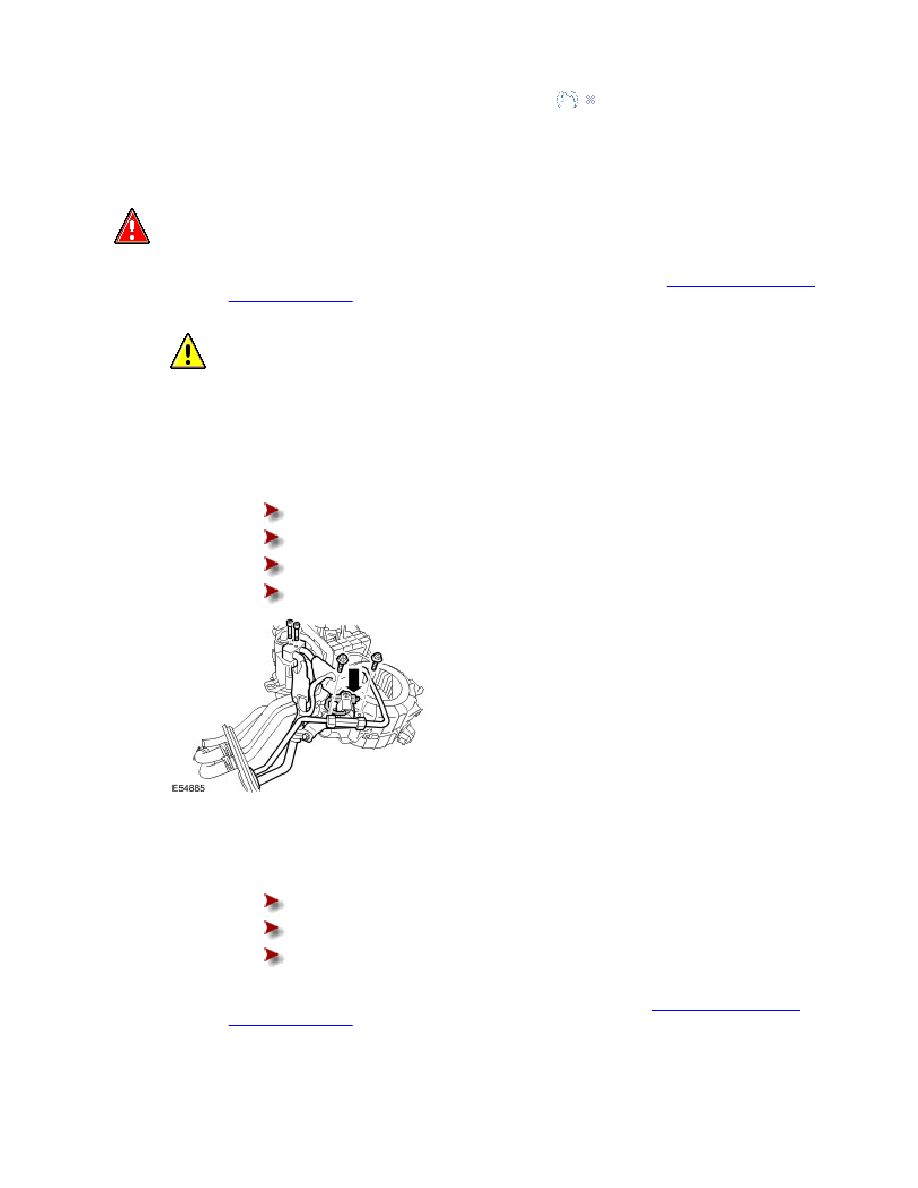
Remove the TXV assembly.
Disconnect the electrical connector.
Remove the 2 bolts.
Remove the 2 screws.
Discard the O-ring seals.
1 .
Install the TXV assembly.
Install new O-ring seals.
Install the bolts and tighten to 10 Nm (7 lb.ft).
Tighten the screws.
2 .
Install the climate control assembly. For additional information, refer to
Auxiliary Climate Control
Assembly (82.26.22)
(Section 412-03)