
Range Rover P38
BMW DIESEL
5
REPAIR
CRANKSHAFT PULLEY AND FRONT COVER OIL
SEAL
Service repair no - 12.21.01 - Crankshaft Pulley
Service repair no - 12.65.05 - Timing Gear Cover
Oil Seal
Remove
1. Disconnect battery negative lead.
2. Remove radiator.
See COOLING SYSTEM,
Repair.
3. Remove cover from air conditioning drive belt
tensioner.
4. Release drive belt tension. Remove drive belt.
5. Slacken 4 water pump pulley bolts.
6. Release auxiliary drive belt tension. Remove
belt.
7. Remove water pump pulley bolts. Remove
pulley.
8. Remove bolt from auxiliary drive belt tensioner
pulley. Remove pulley.
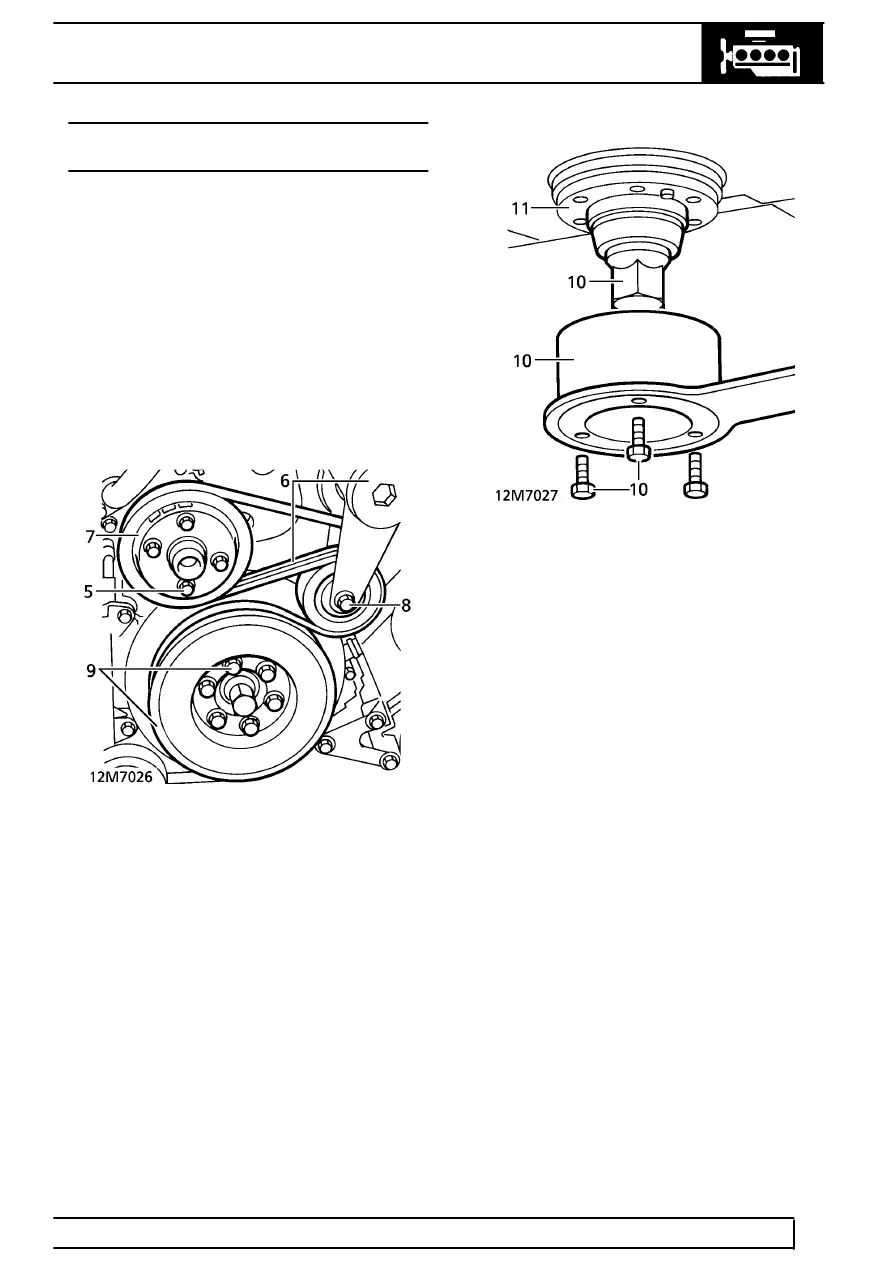
9. Remove 6 bolts securing vibration damper and
air conditioning pulley to vibration damper hub.
Remove damper and pulley.
10. Secure LRT-12-105 to hub with 3 bolts. Remove
and discard hub retaining bolt.
11. Note orientation of shouldered washer. Remove
hub and tool.
12. Remove seal from front cover.
Refit
13. Ensure mating faces are clean.
14. Lubricate outer face of seal.
15. Locate seal in timing cover.
16. Using LRT-12-111, push seal home until flush
with face of timing cover.
17. Lubricate lip of oil seal. Fit crankshaft pulley hub.
18. Hold hub using LRT-12-105. Secure with new
bolt and tighten to
100 Nm (74 lbf.ft) plus 150
°
torque angle.
19. Fit damper and pulley to hub. Secure with bolts.
Tighten to
23 Nm (17 lbf.ft)
20. Fit auxiliary belt tensioner pulley. Secure with
bolt.
21. Fit pulley to water pump. Secure with bolts.
Tighten to
10 Nm (7 lbf.ft)
22. Rotate auxiliary drive belt tensioner. Fit drive
belt.
23. Fit and tension air conditioning drive belt.
See
AIR CONDITIONING, Repair.
24. Fit radiator.
See COOLING SYSTEM, Repair.
25. Reconnect battery negative lead.