
Range Rover P38
12
ENGINE
NEW RANGE ROVER
50
REPAIR
9. Remove carbon from piston crowns, and piston
ring grooves.
CAUTION: Do not attempt to remove
carbon or deposits from piston skirts as
graphite coating will be destroyed.
Pistons - inspection
10. Check piston for signs of burning and skirt for
scoring or damage.
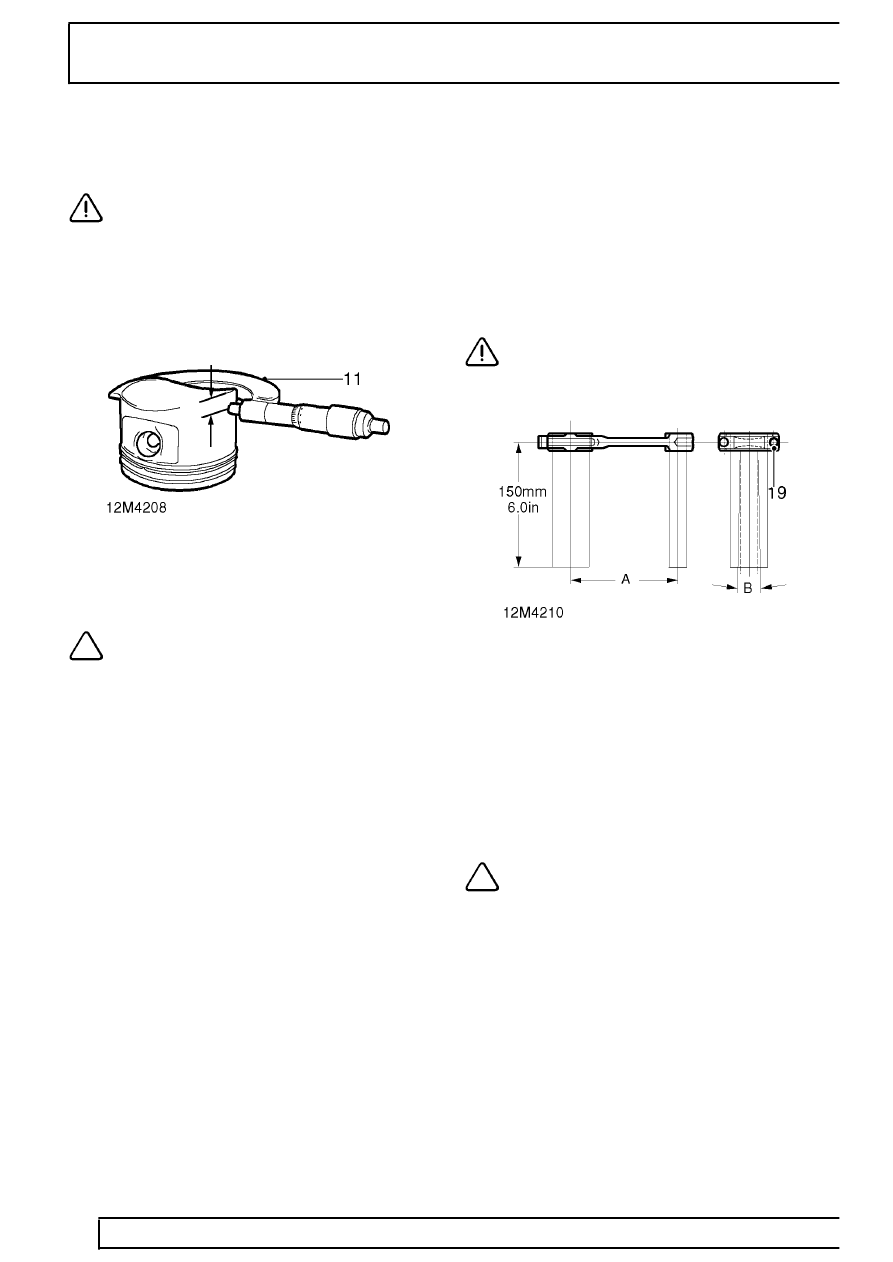
11. Measure and record piston diameter at a point
7.0 mm (0.27 in) from bottom of skirt and at right
angles to gudgeon pin holes.
NOTE: Three sizes of piston may be fitted:
Standard = 79.96
±
0.009 mm (3.14
±
0.0004 in)
Intermediate = 80.04
±
0.009 mm ( 3.15
±
0.0004
in)
1st oversize = 80.21
±
0.009 mm (3.16
±
0.0004 in)
12. Check gudgeon pin holes in piston for signs of
ovality.
13. Repeat above procedures for remaining pistons.
Connecting rods - inspection
14. Check that oil feed passages are clear.
15. Check dowels in connecting rods and big-end
bearing caps for security, replace as necessary.
16. Check gudgeon pin bush in connecting rod for
wear:
Gudgeon pin bush bore = 28.995 to 29.021 mm
(1.142 to 1.143 in)
17. Replace worn bushes as necessary.
CAUTION: When fitting new bushes,
ensure oil holes in bush and connecting
rod are aligned.
18. Check connecting rods for distortion, fit a new
BLUE colour coded ’sputter’ big-end bearing
shell to the connecting rod and a new RED
colour coded shell to the big-end bearing cap.
19. Fit original big-end bearing cap bolts and tighten
to
5 Nm (4 lbf.ft).
20. Check parallelism of connecting rods on both
sides of rod.
Maximum deviation A = 0.05 mm (0.002 in)
NOTE: Measurement must be taken
approximately 150 mm (6.0 in) from centre
line of rod:
21. Check for distortion on both sides of connecting
rod:
Maximum distortion B = 0.5 mm (0.02 in)
22. Repeat above procedures for remaining
connecting rods.