
Range Rover P38
41
TRANSFER BOX
NEW RANGE ROVER
6
REPAIR
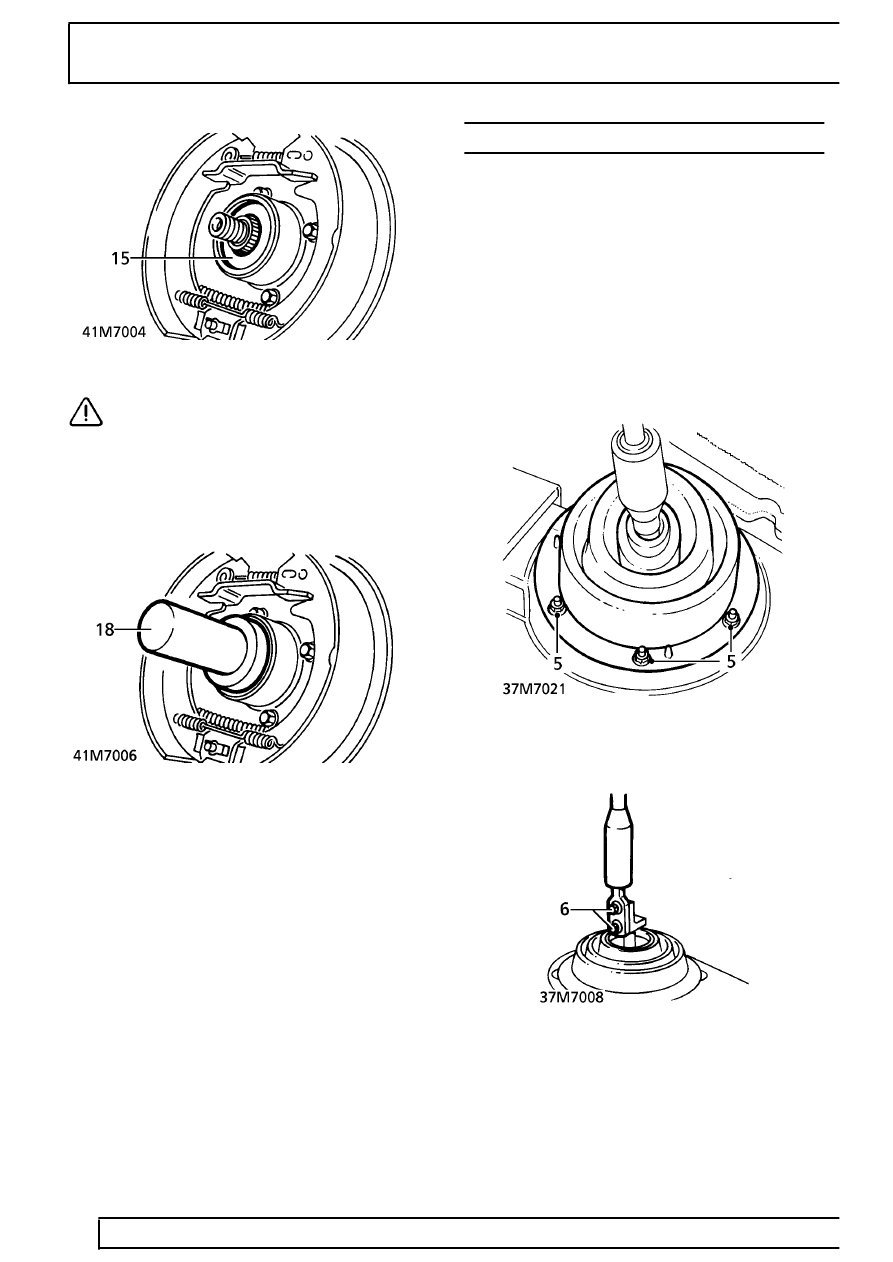
CAUTION: Ensure seal location does not
become damaged.
Refit
16. Ensure mating faces are clean.
17. Lubricate seal lip with transmission fluid.
18. Fit seal using LRT-41-011.
19. Position dust shield.
20. Position flange. Fit sealing washer.
21. Fit flat washer and new Nyloc nut, finger tight.
22. Position brake drum. Secure to flange with
screw.
23. Adjust park brake shoes.
See BRAKES,
Adjustment.
24. Apply handbrake.
25. Tighten flange nut to
148 Nm. (109 lbf.ft)
26. Position propeller shaft flange on brake drum.
Align marks.
27. Secure propeller shaft with bolts. Tighten to
48 Nm. (35 lbf.ft)
28. Fit propeller shaft guard. Secure with bolts.
29. Replenish transfer box oil.
See LUBRICANTS,
FLUIDS AND CAPACITIES, Information.
30. Lower lift.
31. Reconnect battery negative lead.
TRANSFER BOX - UP TO 99MY
Service repair no - 41.20.25
Remove
1. Position vehicle on four post lift.
2. Disconnect battery negative lead.
3. Automatic Vehicles.Remove window switch
pack.
See ELECTRICAL, Repair.
Manual Vehicles:
4. Remove centre console.
See CHASSIS AND
BODY, Repair.
5. Remove 6 nuts securing gaiter ring. Remove
ring and gaiter.
6. Remove 2 bolts securing gear lever. Remove
lever.
All Vehicles:
7. Release handbrake.
8. Remove handbrake cable clevis pin.