
Range Rover P38
44
AUTOMATIC GEARBOX
NEW RANGE ROVER
36
REPAIR
Refit
6. Clean MV2 shift control solenoid valve with lint
free cloth.
7. Position MV2 shift control solenoid valve to valve
body.
8. Position retaining fork, fit Torx screw and tighten
to
8 Nm (6lbf. ft).
9. Connect multiplugs to both shift control solenoid
valves.
10. Clean lock-up solenoid valve assembly with a
lint-free cloth.
11. Position lock-up valve assembly, assembly,fit
and tighten Torx screws to
8 Nm (6lbf. ft).
12. Fit valve body assembly.
See this section.
HARNESS - SOLENOID VALVES
Service repair no - 44.15.52
Remove
1. Remove valve body assembly.
See this
section.
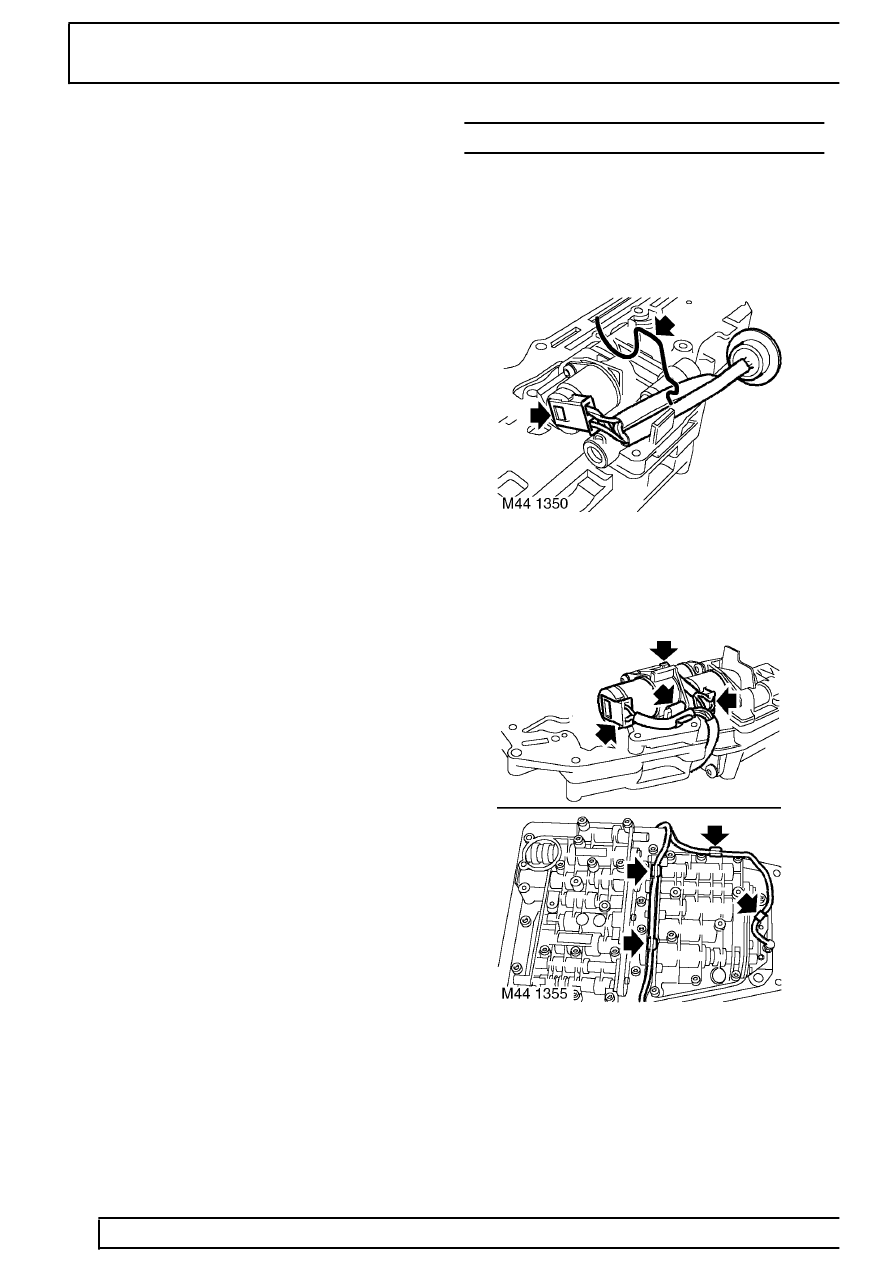
2. Release and remove clip securing pressure
regulator solenoid harness to valve body.
3. Disconnect multiplug from pressure regulator
solenoid valve.
4. Disconnect multiplugs from lock-up solenoid
valve, shift control solenoid valves MV 1 and MV
2.
5. Release harness from 5 clips on valve body and
remove harness.