Range Rover P38

ABS
5
REPAIR
4. Connect pressure gauge to pump using
LRT-70-003 through high pressure hose union.
NOTE: Use original sealing washers.
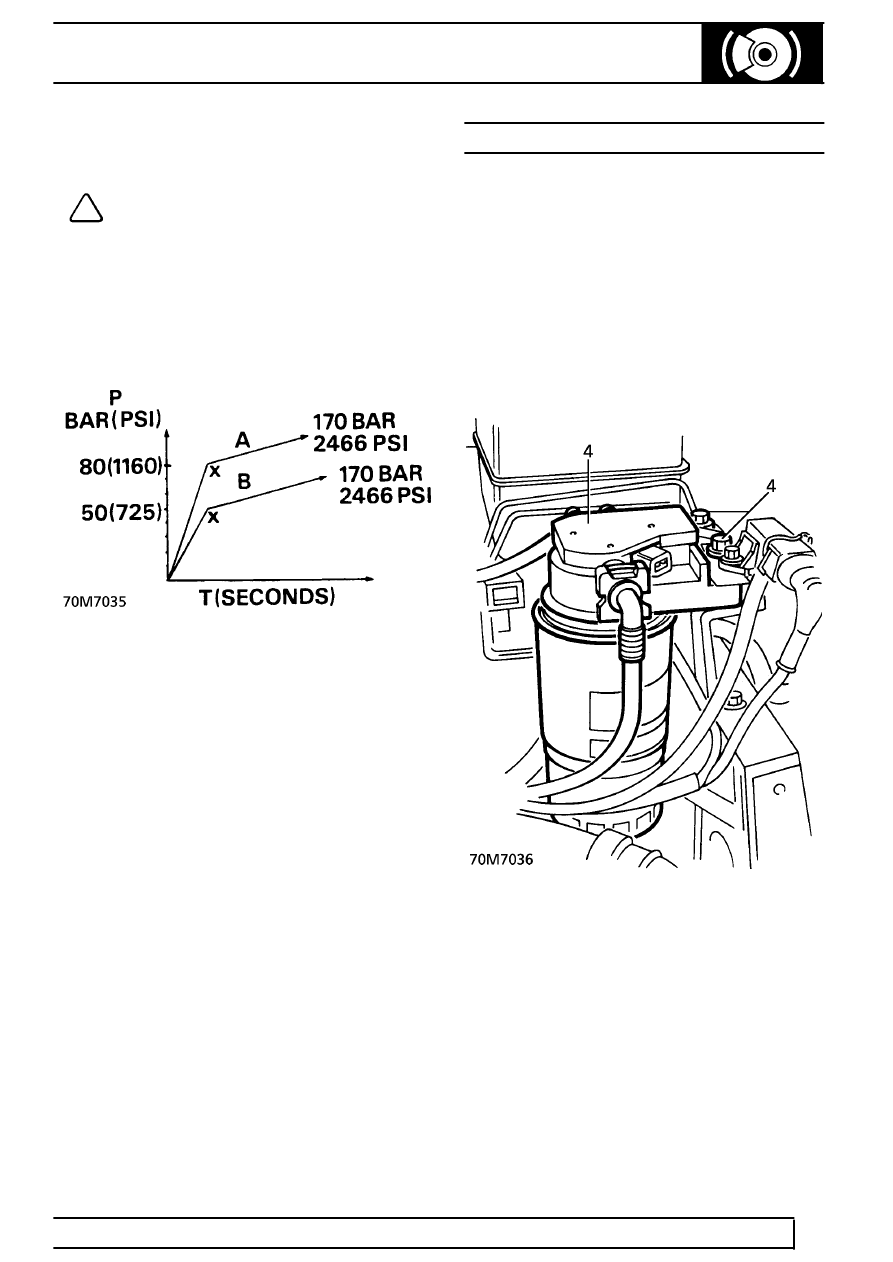
5. Switch ignition on. Observe pressure gauge.
6. Pressure will rapidly rise to the accumulator
precharge value, point X, at which point rate of
increase will reduce as pressure rises to system
pressure of approx. 170 bar - see graph ’A’.
7. With a new accumulator, point ’X’ will occur at 80
bar.
8. Renew accumulator if point ’X’ occurs below 50
bar.
9. Depressurise system. Remove test equipment.
10. Using new sealing washers, position high
pressure hose to pump. Secure with banjo bolt.
Tighten to
24 Nm. (18 lbf.ft)
11. Align pump/motor assembly to mounting. Secure
with nuts. Tighten to
8 Nm. (6 lbf.ft)
12. Bleed brake system.
See this section.
HYDRAULIC BOOSTER UNIT
Service repair no - 70.65.20
Remove
1. Disconnect battery negative lead.
2. Depressurise braking system.
See this section.
3. RHD Vehicles Only: Release coolant expansion
tank from clips and bracket. Position tank aside
for access to booster pipe connections.
4. LHD Diesel Vehicles Only: Remove 2 bolts
securing fuel filter assembly to chassis turret.
Move filter aside.
5. Position cloth under booster to collect fluid
spillage.
6. Release clip from fluid reservoir hose at pump.
Disconnect hose.
7. Allow fluid to drain into suitable container.
Discard fluid. Plug hose and pump.
8. Disconnect hose from reservoir. Plug hose and
reservoir.
