
Range Rover P38
76
CHASSIS AND BODY
NEW RANGE ROVER
26
REPAIR
74. Position harness to driver’s side carpet.
75. Connect multiplugs to BeCM.
76. Connect multiplugs at base to driver’s side ’A’
post.
77. Position earth wires to ’A’ post stud, fit and
secure captive nut.
78. Fit driver’s side carpet retainer and engage to
clips.
79. Fit seat base trim and secure with trim studs and
screw.
80. Fit seat base fuse box cover.
81. Fit driver’s side lower ’A’ post trim and secure
with screw.
82. Fit steering column.
See STEERING, Repair.
83. Fit radio.
See ELECTRICAL, Repair.
84. Fit centre console.
See this section.
85. Remove tape from heater intake ducts.
86. Engage heater intake seals to scuttle apertures.
87. Fit heater intake housings and secure with
screws.
88. Fit pollen filters to intake housings.
89. Fit wiper motor and linkage.
See WIPERS AND
WASHERS, Repair.
90. Fit scuttle side panel to scuttle and secure with
bolts.
91. Connect heated screen multiplug and engage
multiplug to scuttle side panel bracket.
92. Remove caps from heater matrix pipes.
93. Engage heater matrix grommet to bulkhead
aperture.
94. Connect heater hoses to heater matrix and
secure with clips.
95. Remove caps from air conditioning pipes and
TXV.
96. Lubricate NEW ’O’ ring seals with clean
compressor oil and fit to air conditioning pipes.
97. Connect air conditioning pipes to TXV, position
clamp and fit bolt.
98. Tighten clamp bolt to
6 Nm. (4 lbf.ft)
99. Charge air conditioning system.
See AIR
CONDITIONING, Adjustment.
100. Fill coolant system.
See COOLING SYSTEM,
Repair.
101. Connect both battery terminals, earth lead last.
PANELS - VENEERED - FASCIA
Service repair no - 76.46.24
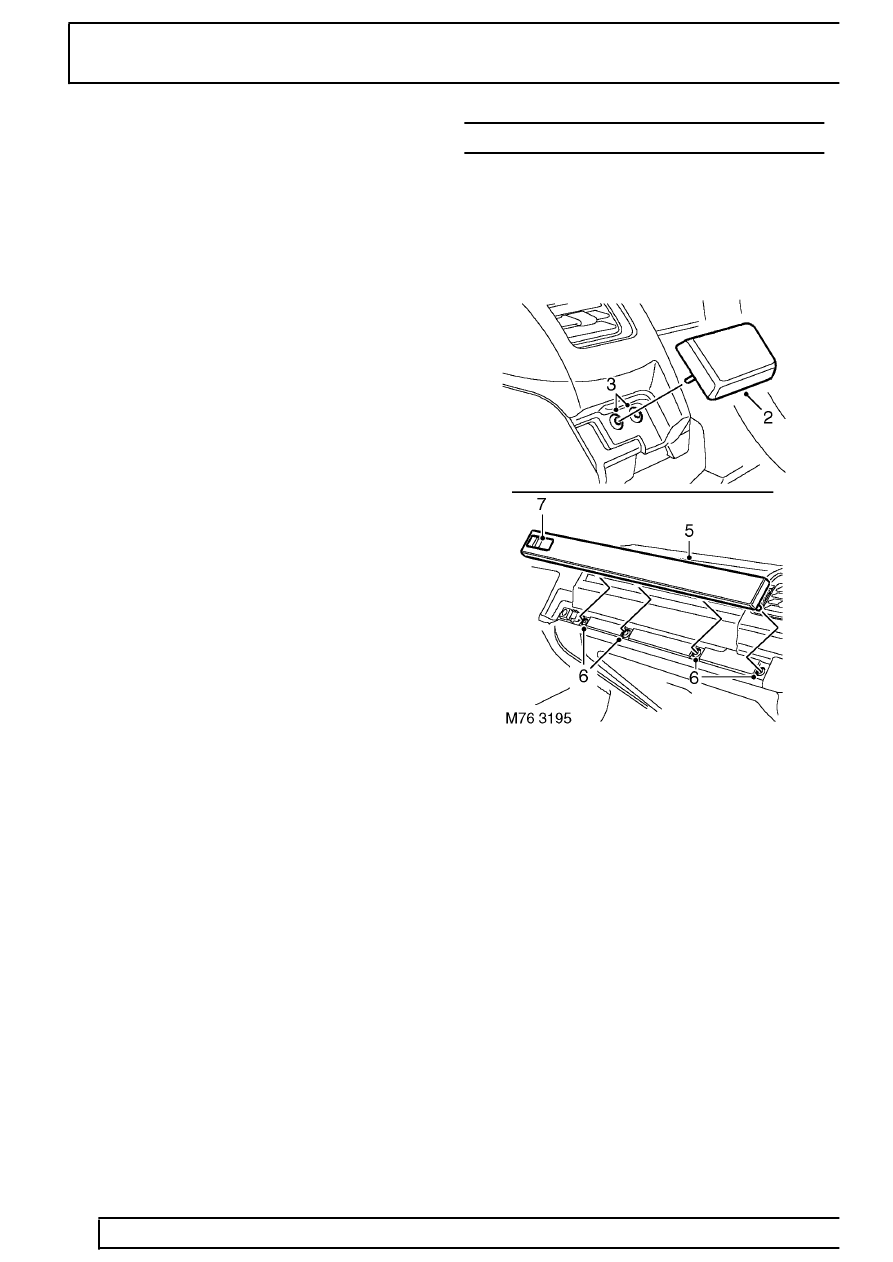
Remove
1. Drivers side: Remove fascia closing panel.
See
this section.
2. With suitable protection against fascia, carefully
lever veneered panel away from fascia to
release 2 fixing studs.
3. Remove fixing stud inserts.
4. Passenger side: Open glove box.
5. With suitable protection against fascia, carefully
lever veneered panel away from fascia to
release 4 fixings studs.
6. Remove fixing stud inserts.
7. Remove glove box lock bezel from veneered
panel.