Range Rover P38

HEATING AND VENTILATION
3
REPAIR
8. Disconnect solar sensor and alarm LED
multiplugs. Push fly-leads into fascia ducting.
9. Release clip securing harness to fascia ducting.
Position solar sensor/LED harness aside.
10. Release clip securing water temperature sensor
to heater matrix inlet pipe. Position sensor aside.
11. Disconnect evaporator sensor multiplug.
12. Release 2 clips securing fascia harness to base
of heater unit.
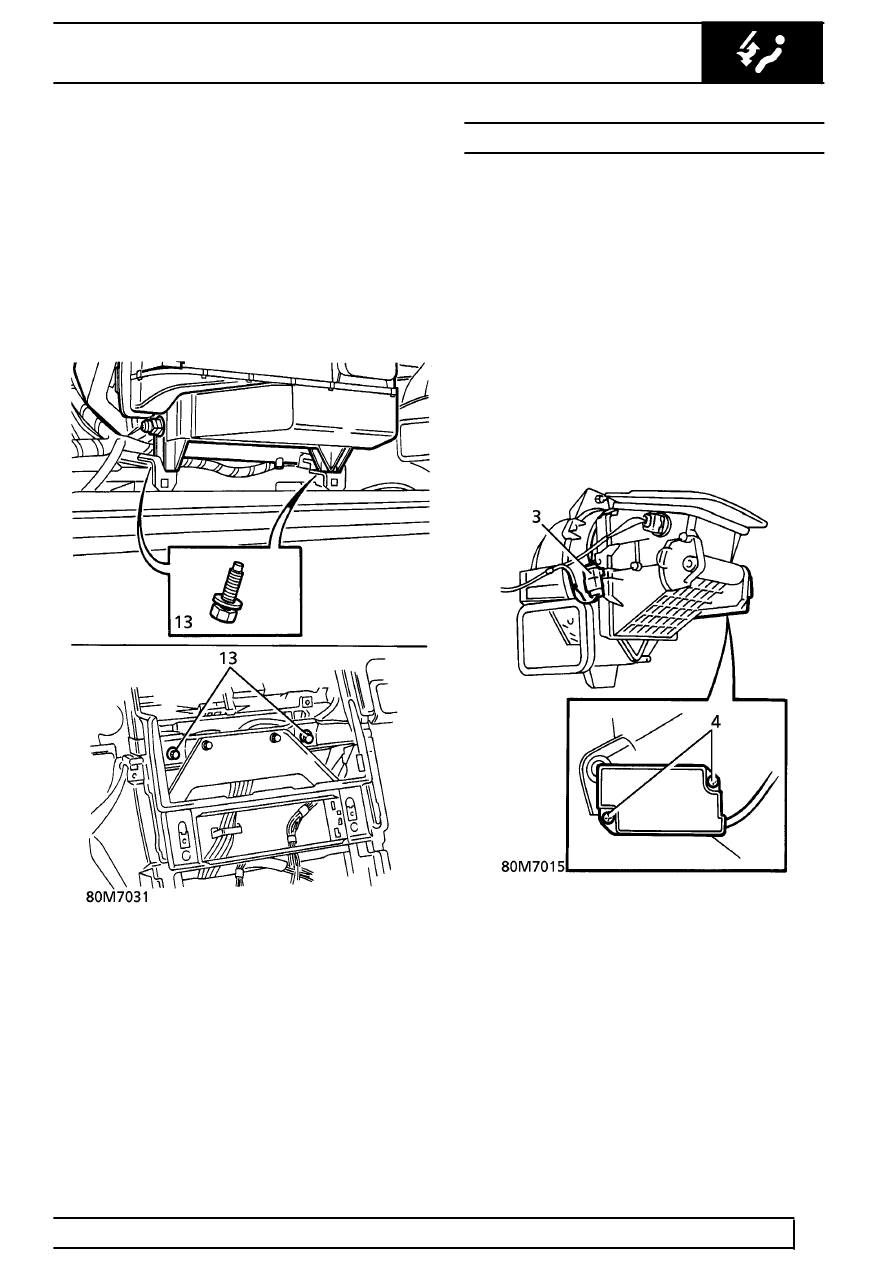
13. Remove 4 bolts securing heater unit to fascia
frame.
14. With assistance to hold harness away from
heater, remove heater unit from fascia.
Refit
15. Reverse removal procedure.
HEATING AND AIR CONDITIONING SERVOS
Service repair no - 80.20.03 - Distribution
Service repair no - 80.20.04/20 - Blend - air
conditioned vehicles
Service repair no - 80.20.10 - Recirculation
Remove
1. Vehicles with heater only. Blend servos can be
replaced with fascia in position.
See this
section.
2. Remove fascia assembly.
See CHASSIS AND
BODY, Repair.
Recirculation Flap Servos.
3. Disconnect multiplug. Release from recirculation
flap housing.
4. Remove 2 screws securing servo to recirculation
flap housing. Remove servo.
Blend and Distribution Servos.
5. Remove heater unit.
See this section.
6. Remove 2 screws securing rear vent ducting.
Remove ducting from relevant side of heater.
