
Body interior squeaks and rattles
- Make
- Land Rover
- Model
- Range Rover P38 Technical Bulletins
- Section
- Body interior squeaks and rattles › Body interior squeaks and rattles
BODY INTERIOR SQUEAKS AND RATTLES
- Model
- Range Rover
- Affected vehicles
- All Derivatives - the ACTION text refers to specific change points where applicable
- Date
- 1998-05-27
- Reference
- Bulletin 0019, CDS ref L8412bu
Bulletin text
Range Rover
AFFECTED RANGE:
All Derivatives - the ACTION text refers to specific change points where applicable
PROBLEM:
BODY INTERIOR SQUEAKS AND RATTLES
ACTION:
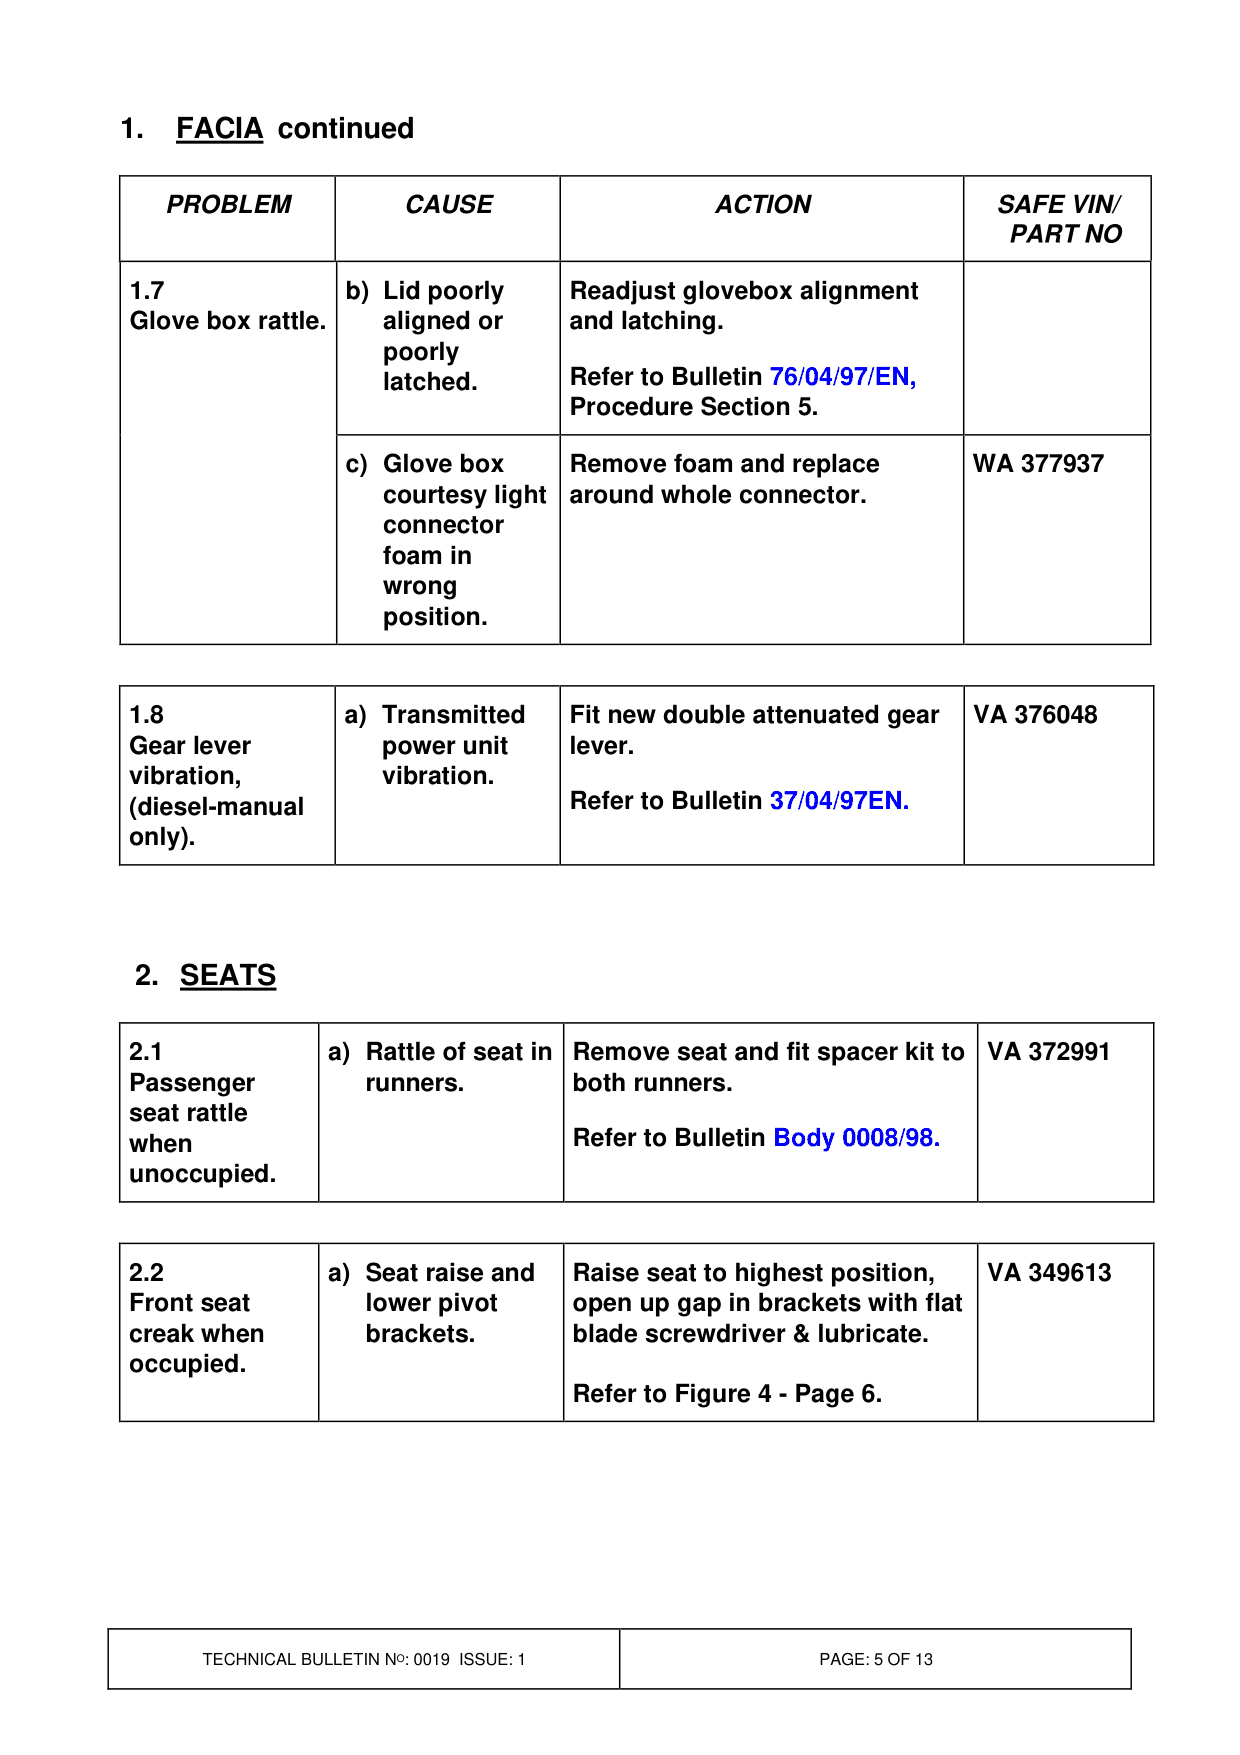
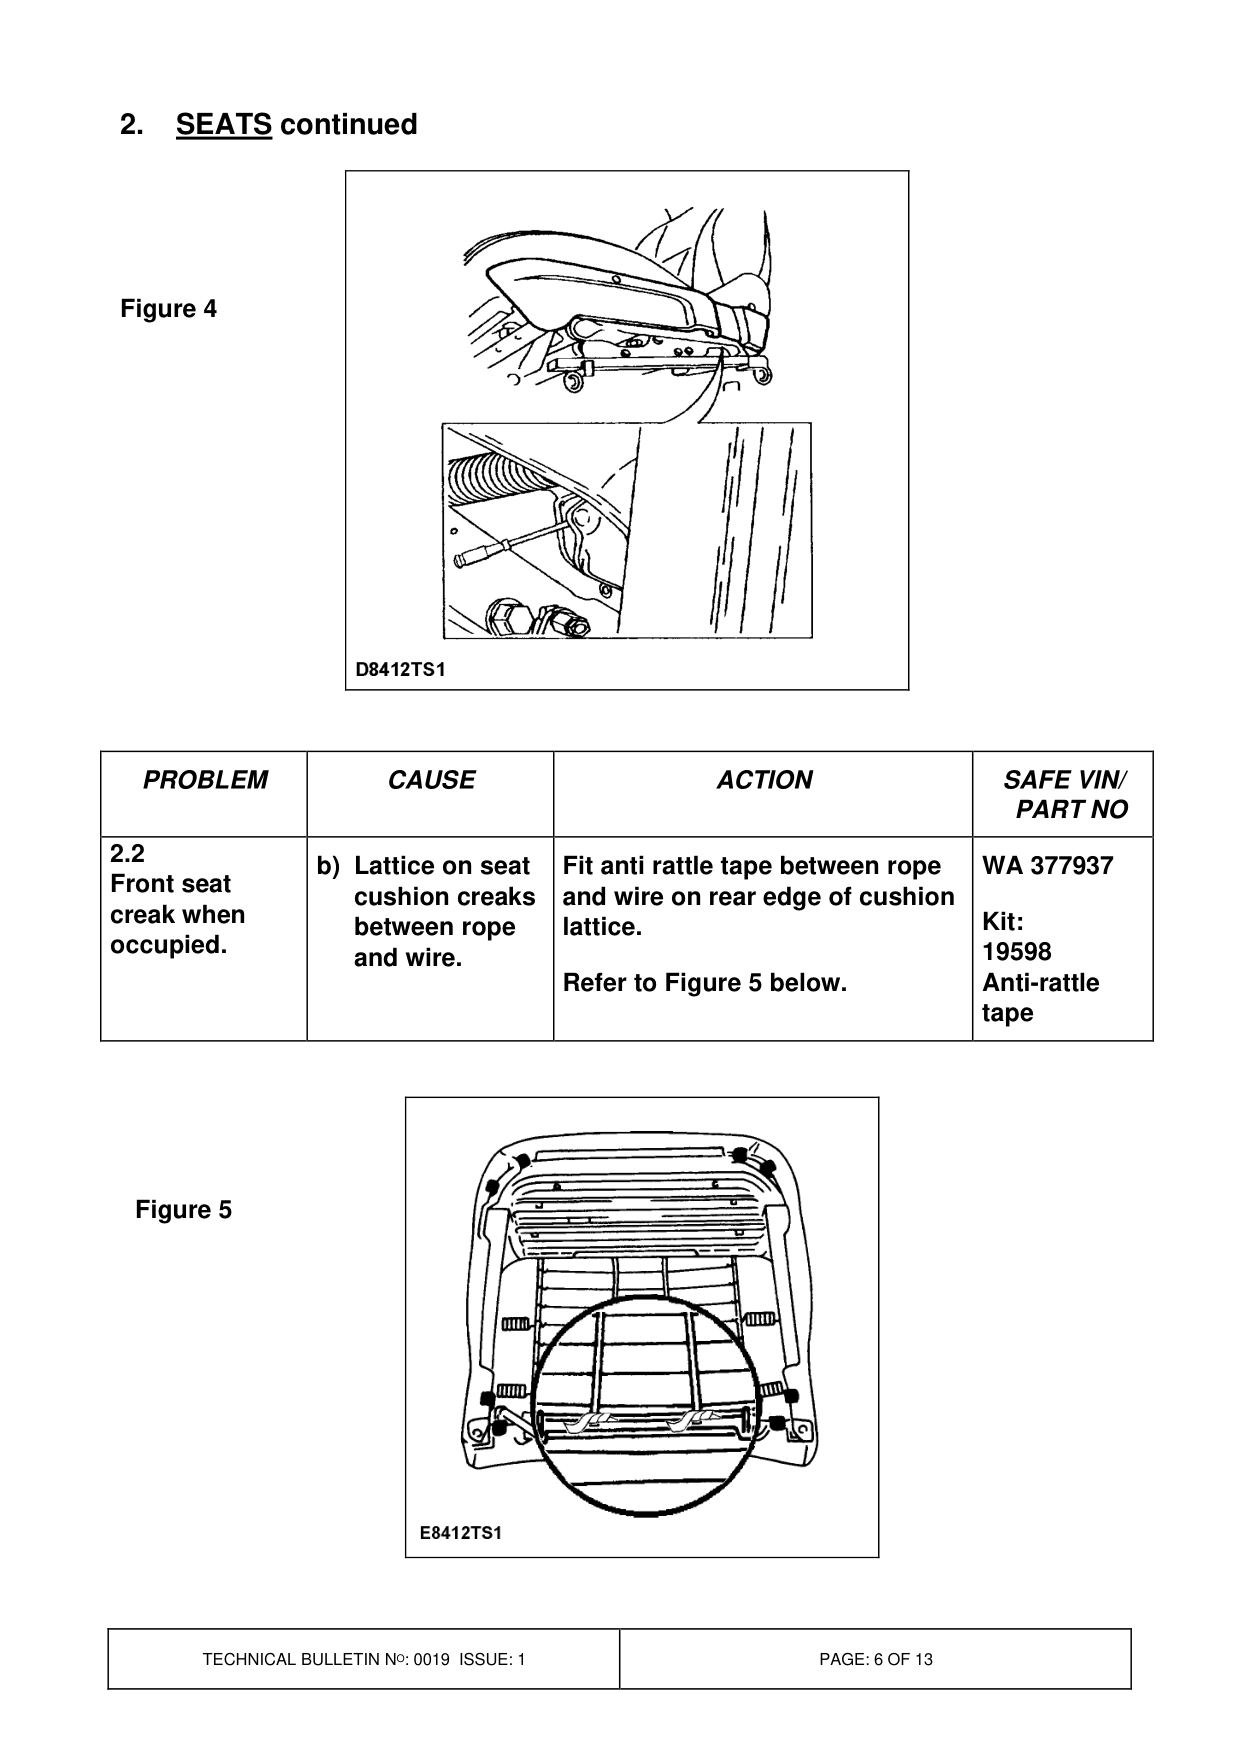
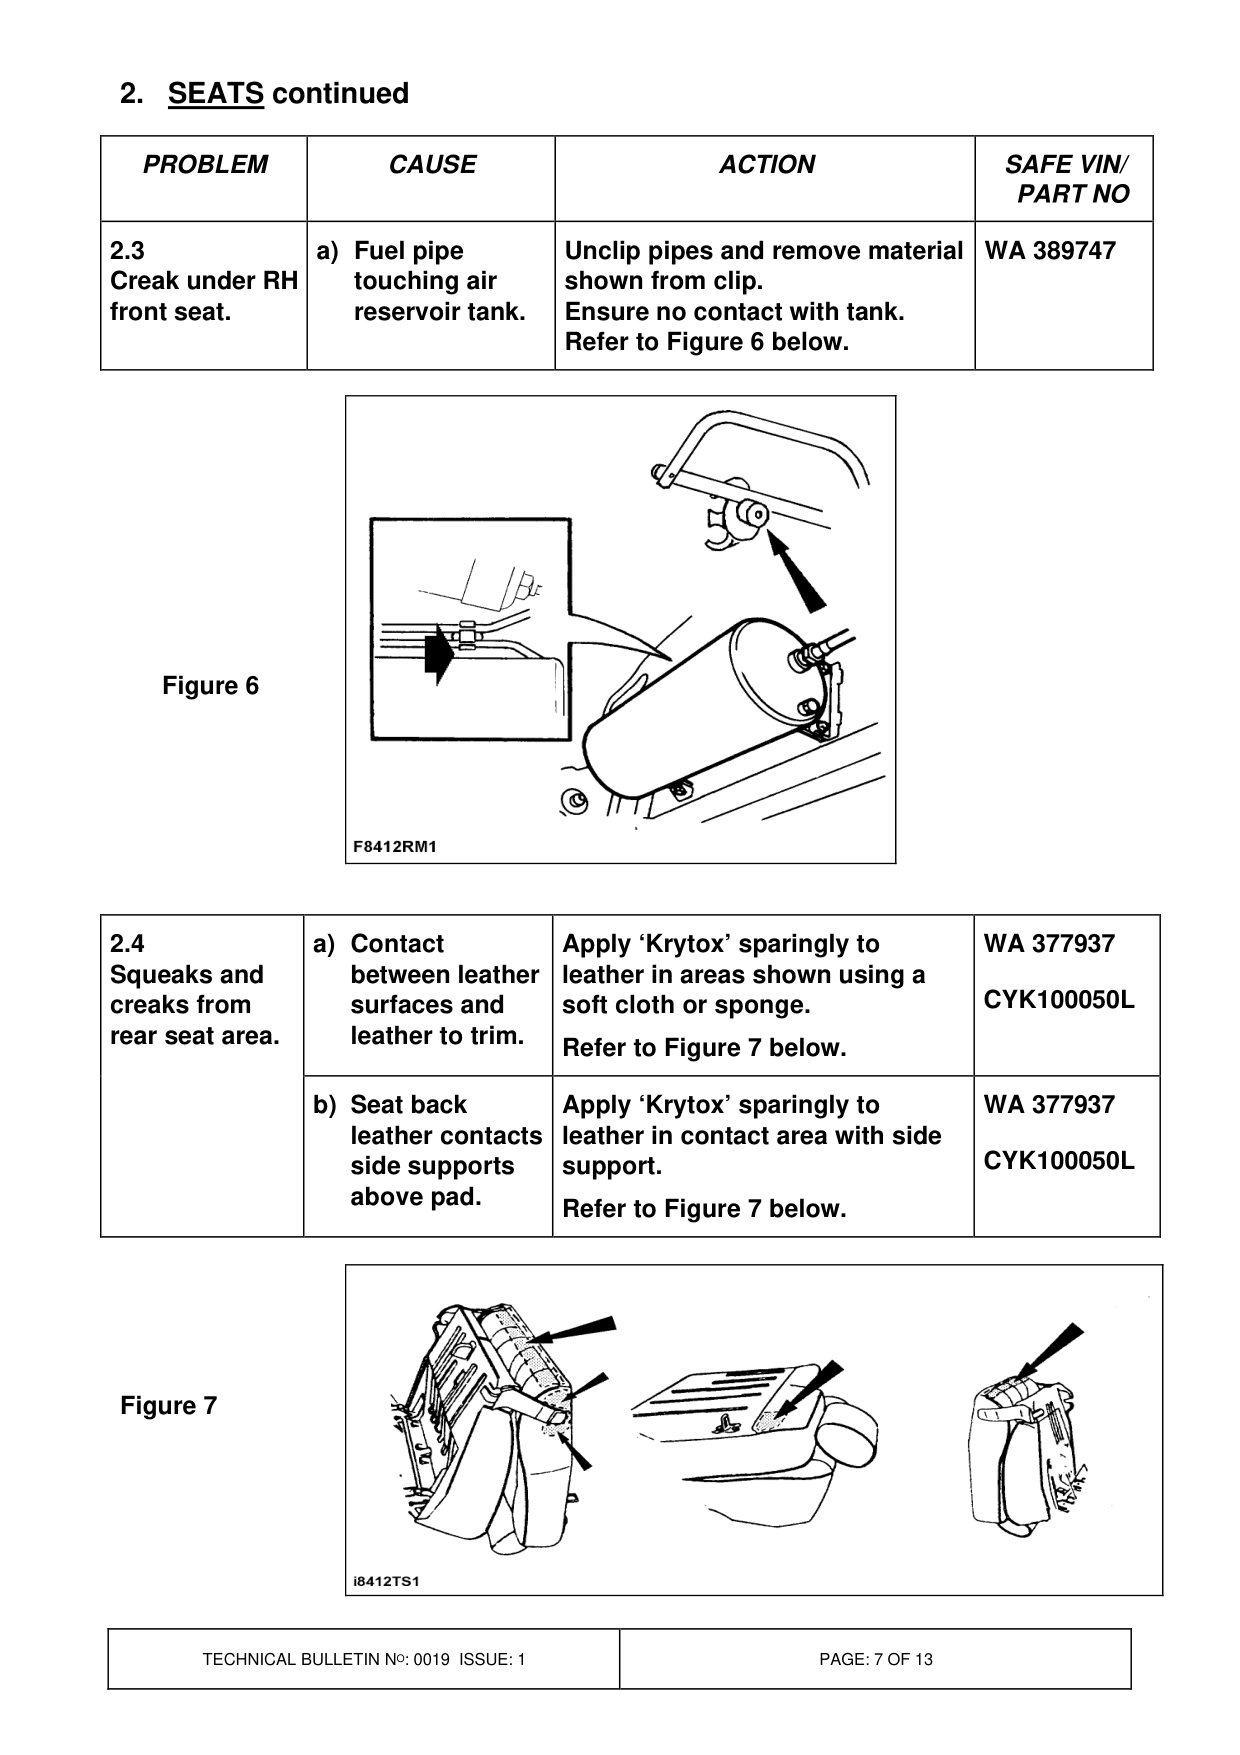
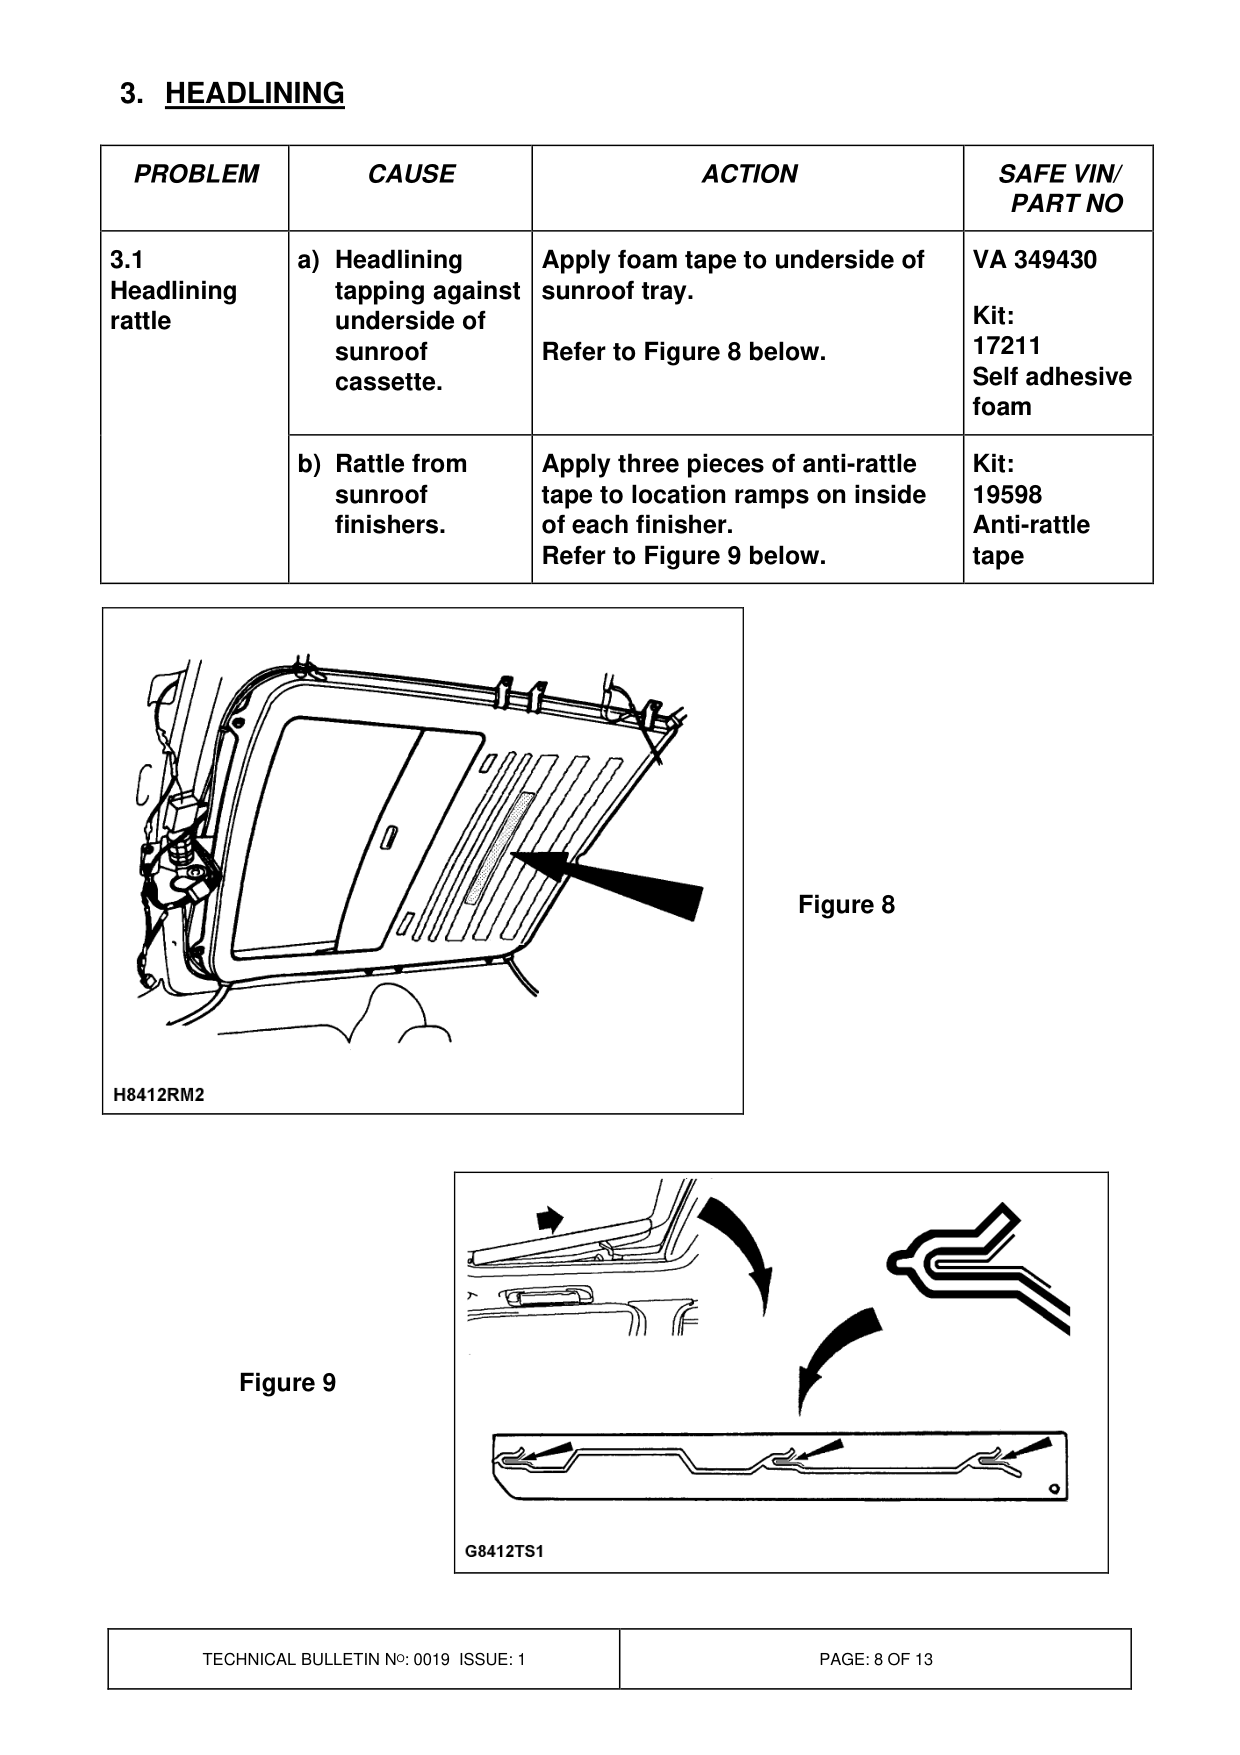
Where a customer complaint is confirmed and the problem area defined, refer to the following information for repair method.
Kit content part numbers in the right hand column are to aid identification only and are NOT available individually from Land Rover Parts. Use items as required from the Anti-Rattle Kit detailed in PARTS INFORMATION together with any additional parts.
1. FACIA
PROBLEM CAUSE
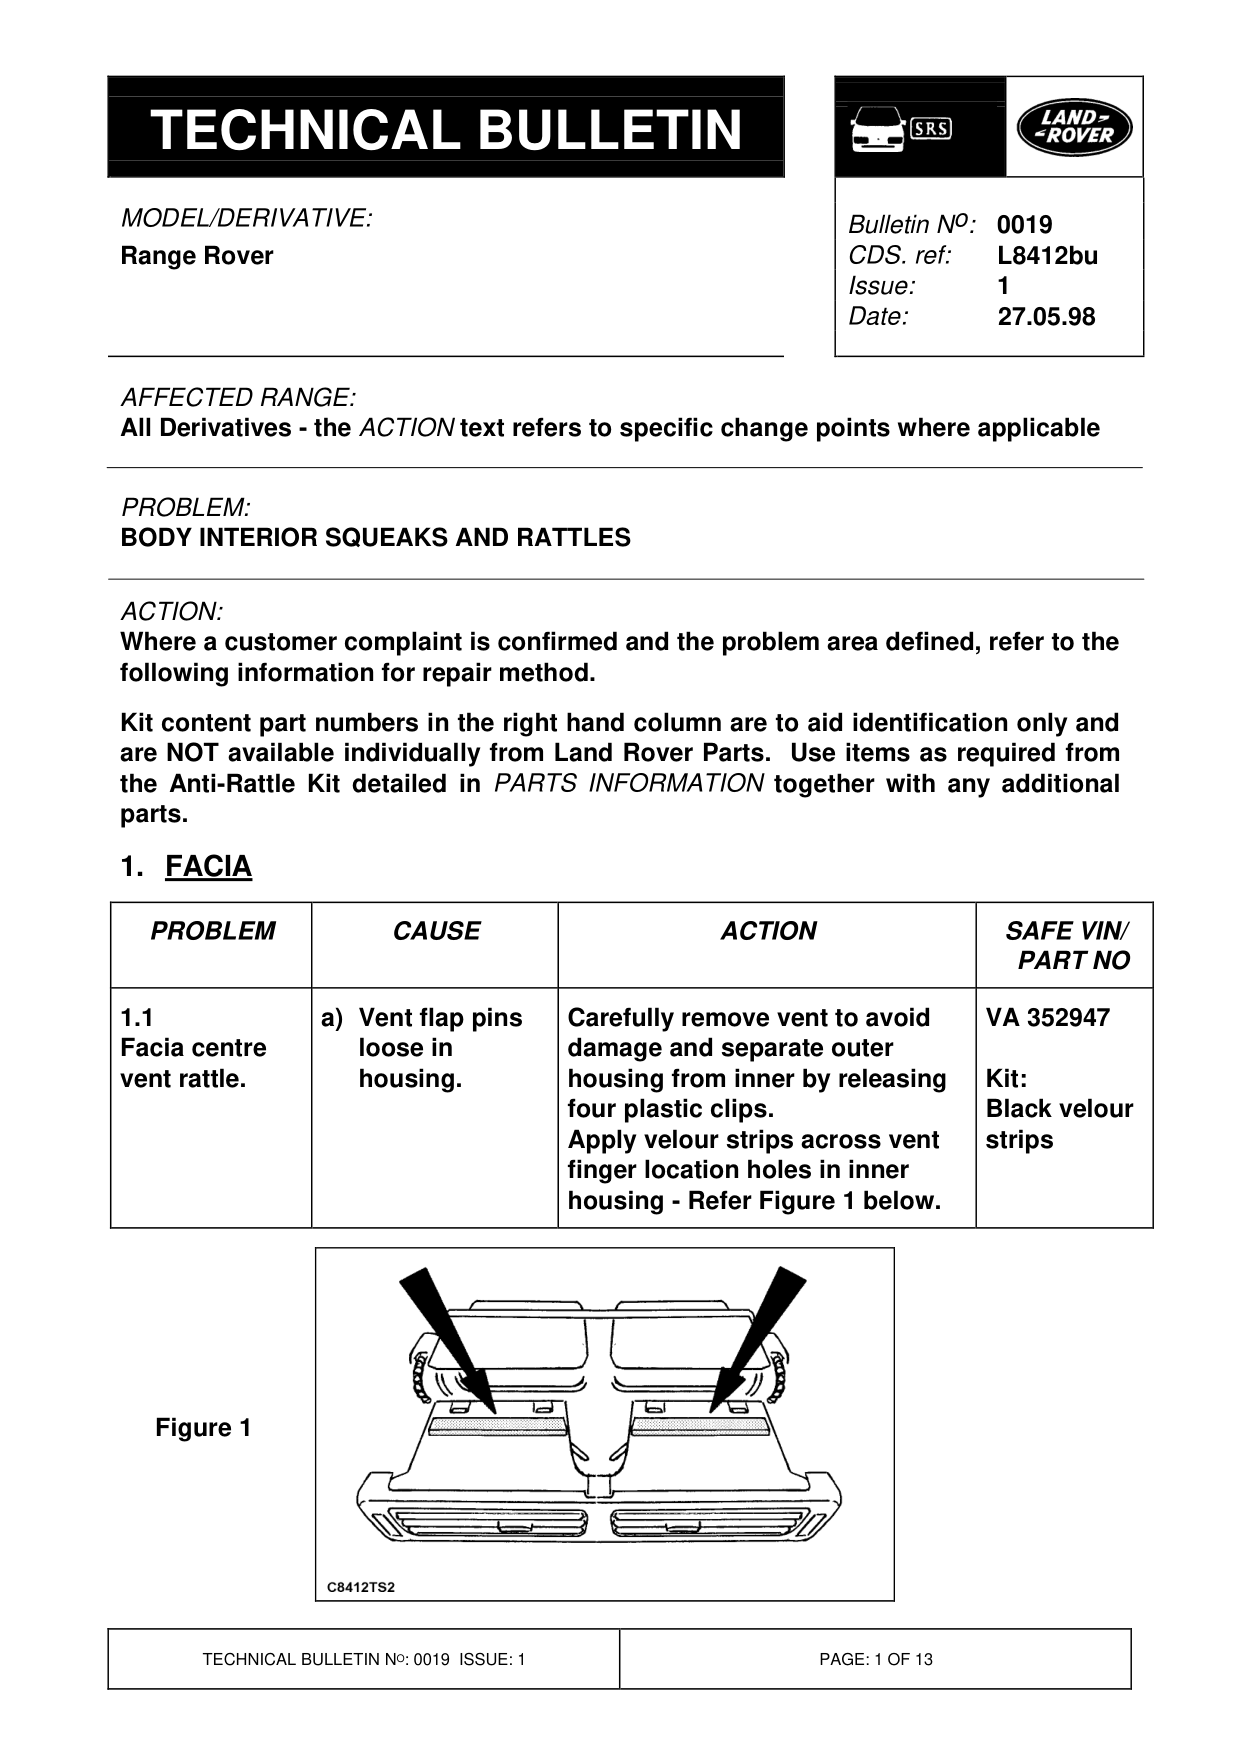
1.1 a) Vent flap pins Facia centre loose in vent rattle. housing.
Figure 1
Bulletin N o : 0019 L8412bu 1
ACTION
SAFE VIN/ PART NO
Carefully remove vent to avoid VA 352947 damage and separate outer housing from inner by releasing Kit: four plastic clips. Black velour Apply velour strips across vent strips finger location holes in inner housing - Refer Figure 1 below.
1. FACIA continued...
PROBLEM CAUSE
1.2 a) Air Temperature Centre console Control unit squeak/rattle. (ATC) squeaks due to loose screws on rear of ATC panel.
b) Clock lens squeaks in console housing.
c) Plastic assembly of steering column cowl rattles.
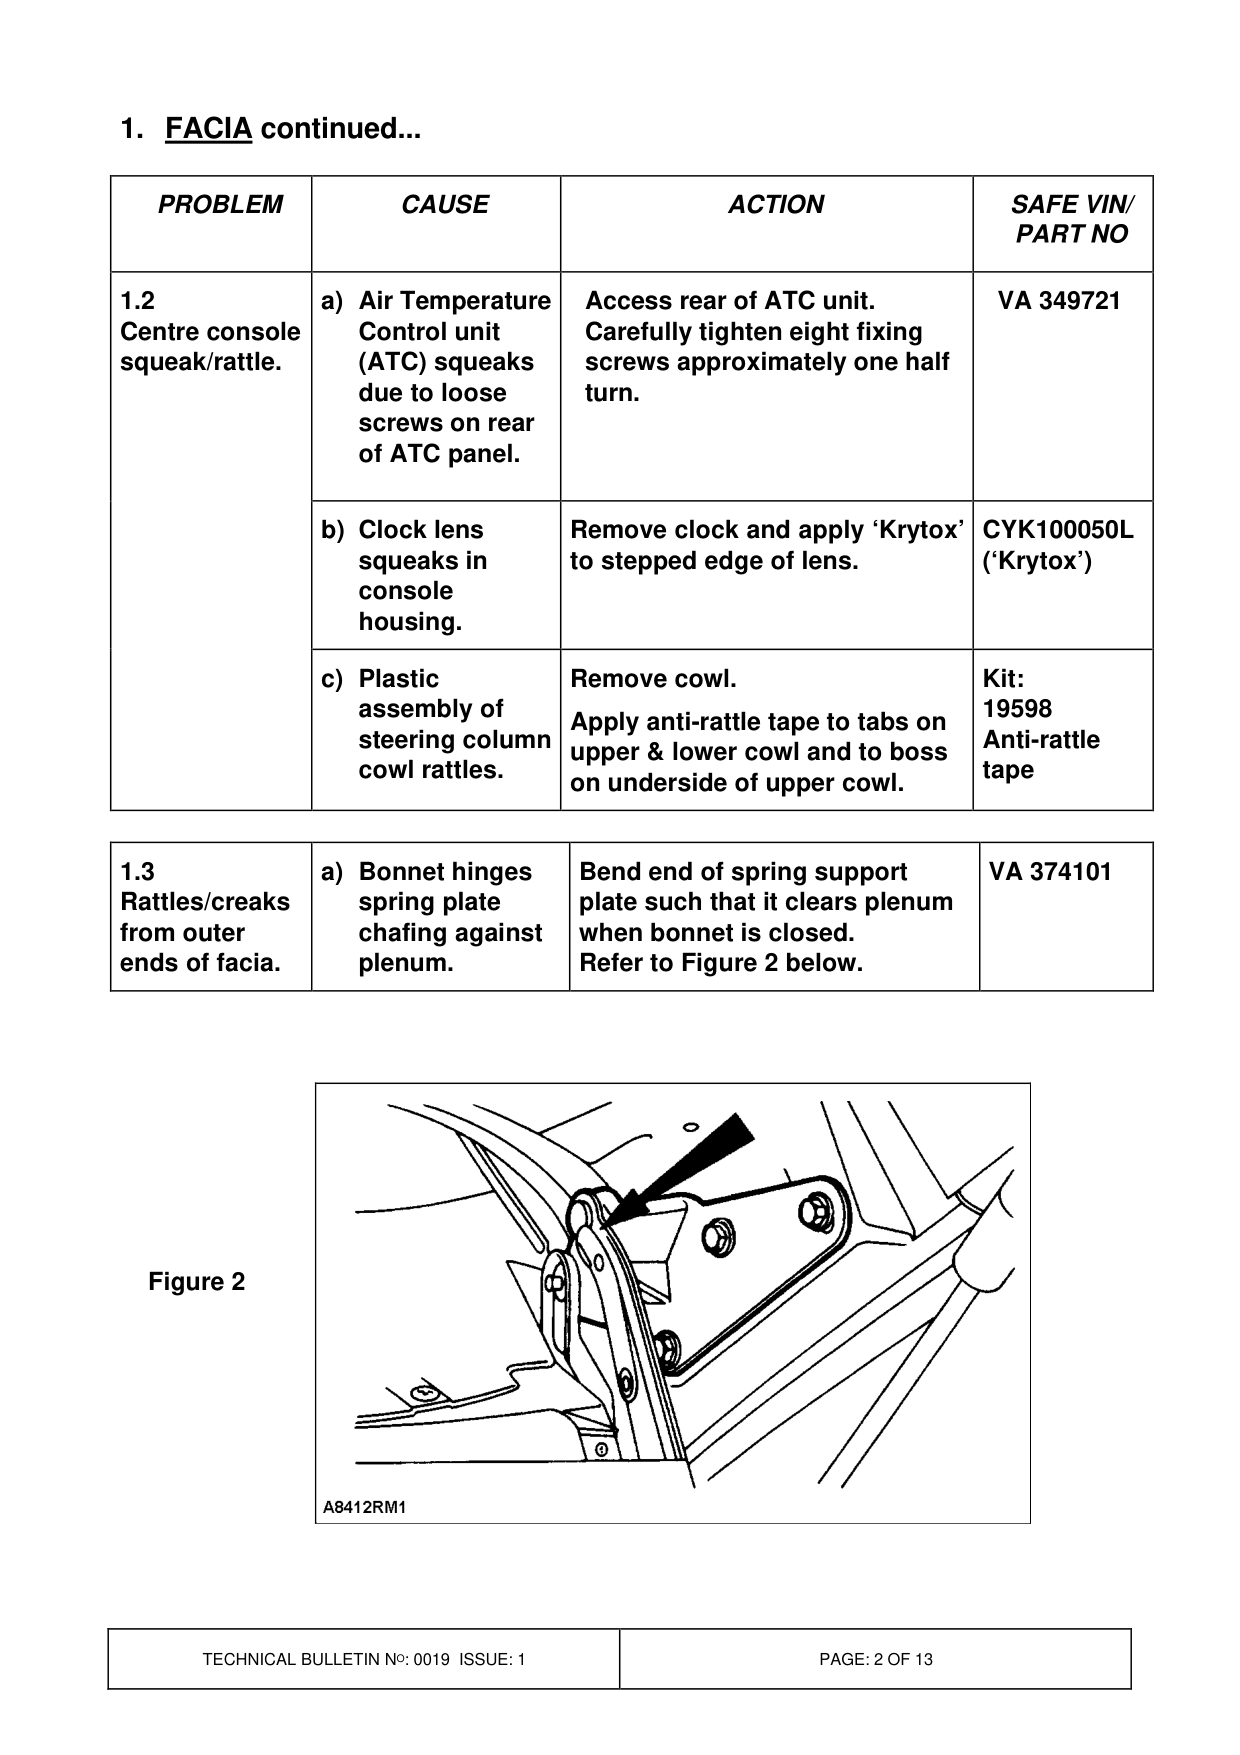
1.3 a) Bonnet hinges Rattles/creaks spring plate from outer chafing against ends of facia. plenum.
Figure 2
ACTION
SAFE VIN/ PART NO
Access rear of ATC unit. VA 349721 Carefully tighten eight fixing screws approximately one half turn.
Remove clock and apply ‘Krytox’ CYK100050L to stepped edge of lens. (‘Krytox’)
Remove cowl. Kit: 19598 Apply anti-rattle tape to tabs on Anti-rattle upper & lower cowl and to boss tape on underside of upper cowl.
Bend end of spring support VA 374101 plate such that it clears plenum when bonnet is closed. Refer to Figure 2 below.
1. FACIA continued
PROBLEM CAUSE
1.4 a) Plenum finisher Rattles/creaks creaks against from outer screen at ‘A’ ends of facia, post. or between facia and screen.
b) Heated screen Note: Diagnose in wiring taps order given. against plenum when vehicle is cold.
c) Excess sealant creaks against plenum finisher and/or bottom screen finisher.
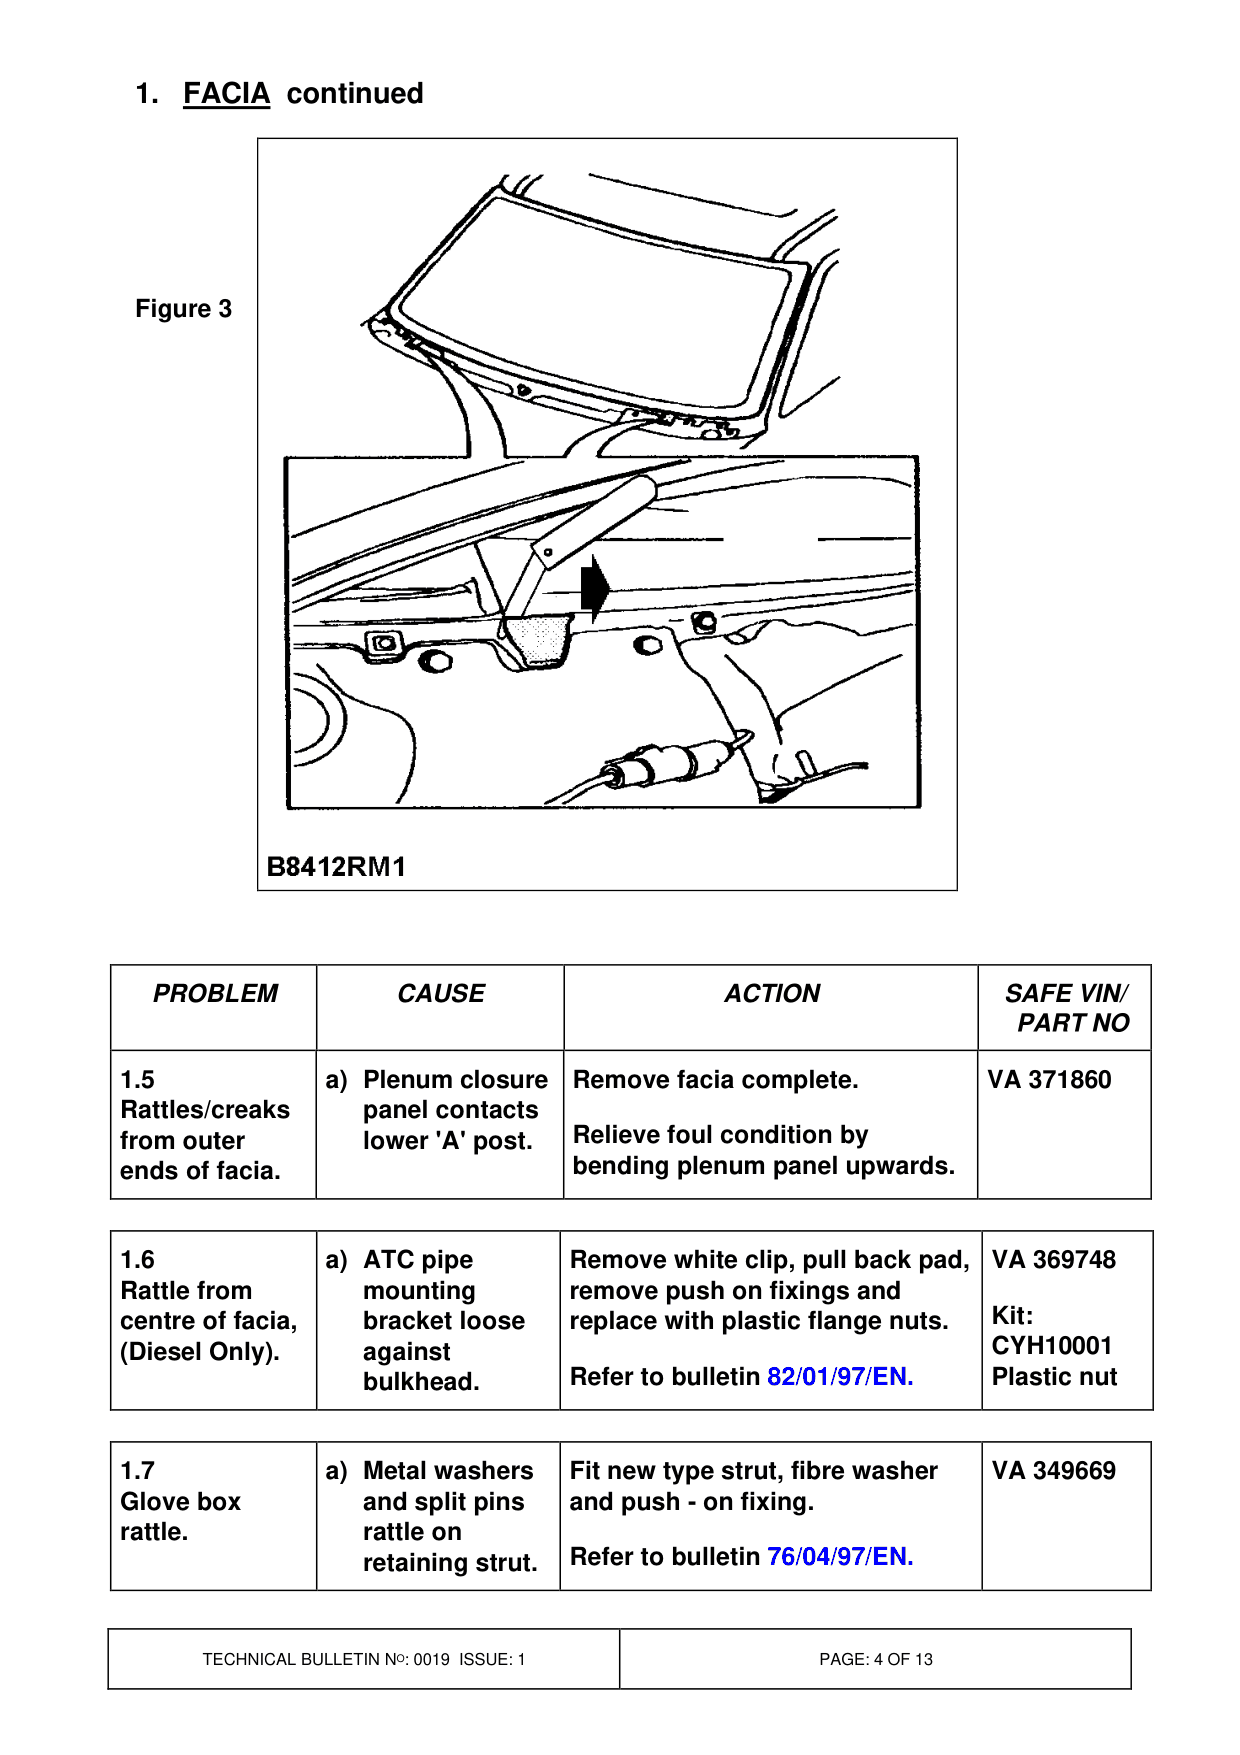
d) Screen creaks against support blocks
e) Bottom of 'A' post trim taps against corner of front wing.
ACTION
SAFE VIN/ PART NO
Remove lower screen finisher. VA 372605 Slacken plenum finisher screws. Pull finisher away from screen.
Tighten screws ensuring that gap to screen is maintained.
Remove plenum outer finishers. VA 349691
Secure screen wiring to plenum Kit: plate using half of foam block AWR2015 each side. Foam block
Remove lower screen finisher & VA 372465 plenum finishers.
Cut away excess polyurethane sealant. Touch up paint.
VA 374912 Remove lower screen finisher.
Apply ‘Krytox’ to both sides of CYK100050L feeler gauge, and pull through between screen & blocks to lubricate join.
Ensure blade penetrates to full depth of glass.
DO NOT use a craft knife or similar due to risk of cracking screen.
Refer to Figure 3 - Page 4.
Tighten 'A' post finisher screws to create gap to front wing.
1. FACIA continued
Figure 3
PROBLEM CAUSE
1.5 a) Plenum closure Rattles/creaks panel contacts from outer lower 'A' post. ends of facia.
1.6 a) ATC pipe Rattle from mounting centre of facia, bracket loose (Diesel Only). against bulkhead.
1.7 a) Metal washers Glove box and split pins rattle. rattle on retaining strut.
ACTION
SAFE VIN/ PART NO
Remove facia complete. VA 371860
Relieve foul condition by bending plenum panel upwards.
Remove white clip, pull back pad, VA 369748 remove push on fixings and Kit: replace with plastic flange nuts. CYH10001 Refer to bulletin 82/01/97/EN. Plastic nut
Fit new type strut, fibre washer VA 349669 and push - on fixing.
Refer to bulletin 76/04/97/EN.
1. FACIA continued
PROBLEM CAUSE
1.7 b) Lid poorly Glove box rattle. aligned or poorly latched.
c) Glove box courtesy light connector foam in wrong position.
1.8 a) Transmitted Gear lever power unit vibration, vibration. (diesel-manual only).
2. SEATS
2.1 a) Rattle of seat in Passenger runners. seat rattle when unoccupied.
2.2 a) Seat raise and Front seat lower pivot creak when brackets. occupied.
ACTION
SAFE VIN/ PART NO
Readjust glovebox alignment and latching.
Refer to Bulletin 76/04/97/EN, Procedure Section 5.
Remove foam and replace WA 377937 around whole connector.
Fit new double attenuated gear VA 376048 lever.
Refer to Bulletin 37/04/97EN.
Remove seat and fit spacer kit to VA 372991 both runners.
Refer to Bulletin Body 0008/98.
Raise seat to highest position, VA 349613 open up gap in brackets with flat blade screwdriver & lubricate.
Refer to Figure 4 - Page 6.
2. SEATS continued
Figure 4
PROBLEM CAUSE
2.2 b) Lattice on seat Fit anti rattle tape between rope Front seat cushion creaks and wire on rear edge of cushion creak when between rope lattice. occupied. and wire. Refer to Figure 5 below.
Figure 5
ACTION
SAFE VIN/ PART NO
WA 377937
Kit: 19598 Anti-rattle tape
2. SEATS continued
PROBLEM CAUSE
2.3 a) Fuel pipe Unclip pipes and remove material Creak under RH touching air shown from clip. front seat. reservoir tank. Ensure no contact with tank. Refer to Figure 6 below.
Figure 6
2.4 a) Contact Apply ‘Krytox’ sparingly to Squeaks and between leather leather in areas shown using a creaks from surfaces and soft cloth or sponge. rear seat area. leather to trim. Refer to Figure 7 below.
b) Seat back Apply ‘Krytox’ sparingly to leather contacts leather in contact area with side side supports support. above pad. Refer to Figure 7 below.
Figure 7
ACTION
SAFE VIN/ PART NO
WA 389747
WA 377937
CYK100050L
WA 377937
CYK100050L
3. HEADLINING
PROBLEM CAUSE
3.1 a) Headlining Apply foam tape to underside of Headlining tapping against sunroof tray. rattle underside of sunroof Refer to Figure 8 below. cassette.
b) Rattle from Apply three pieces of anti-rattle sunroof tape to location ramps on inside finishers. of each finisher. Refer to Figure 9 below.
Figure 9
ACTION
SAFE VIN/ PART NO
VA 349430
Kit: 17211 Self adhesive foam
Kit: 19598 Anti-rattle tape
Figure 8
4. SIDE DOORS
PROBLEM CAUSE
4.1 a) Inconsistent Sill button form of clips on rattles sill button.
b) Rear door sill button falls inboard to escutcheon.
c) Front door sill button link rod bent.
4.2 a) Regulator Rear side door mounting plate rattle. rattling on door.
5. VEHICLE REAR
5.1 a) Sub-woofer Parcel shelf nuts worked area loose. rattle/creak.
b) Parcel shelf boom/rattle in side supports.
ACTION
SAFE VIN/ PART NO
VA 357475 Refer to bulletin: 76/03/97 EN - Issue 2.
Straighten link rod to push sill WA 377937 button back into escutcheon. Refer to bulletin: 76/03/97EN - Issue 2.
Remove door casing. Remove latch. Detach sill button link rod & straighten upper section to ensure sill button is vertical in escutcheon. Care point: Take care not to rebend link rod when refitting door casing.
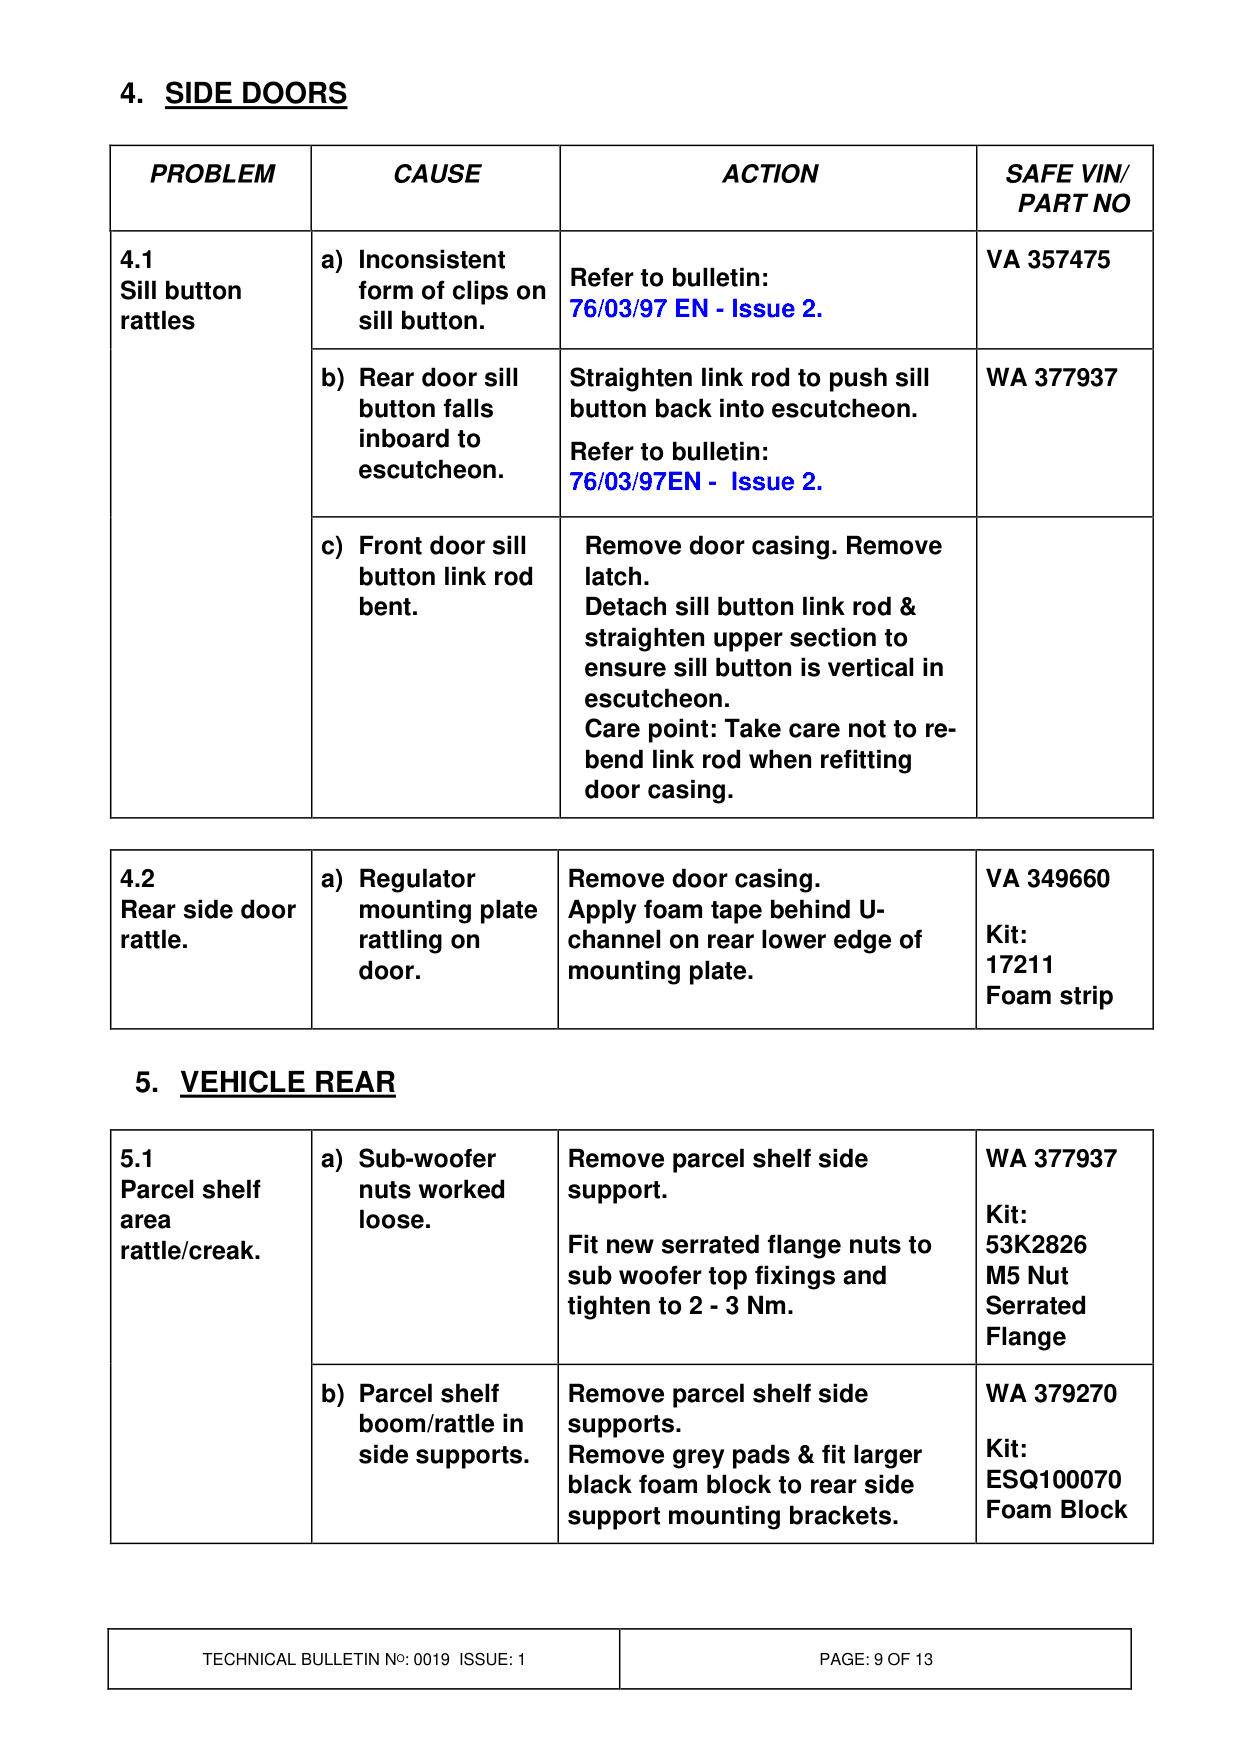
Remove door casing. VA 349660 Apply foam tape behind UKit: channel on rear lower edge of 17211 mounting plate. Foam strip
Remove parcel shelf side WA 377937 support. Kit: Fit new serrated flange nuts to 53K2826 sub woofer top fixings and M5 Nut tighten to 2 - 3 Nm. Serrated Flange
Remove parcel shelf side WA 379270 supports. Kit: Remove grey pads & fit larger ESQ100070 black foam block to rear side Foam Block support mounting brackets.
5. VEHICLE REAR continued
PROBLEM CAUSE
5.1 c) Antenna Remove parcel shelf side support. Parcel shelf amplifier plug Take care not to mark ‘C’ post area tapping on flock coat. rattle/creak. underside of Tuck amplifier connector behind side support. sound-deadening felt.
d) Edges of Locate outer ends of side parcel shelf supports fully into spring clips. squeak against side supports.
e) Bumper Locate foul condition. armature Relieve foul condition by touching body bending armature away from flange behind flange. bumper applique.
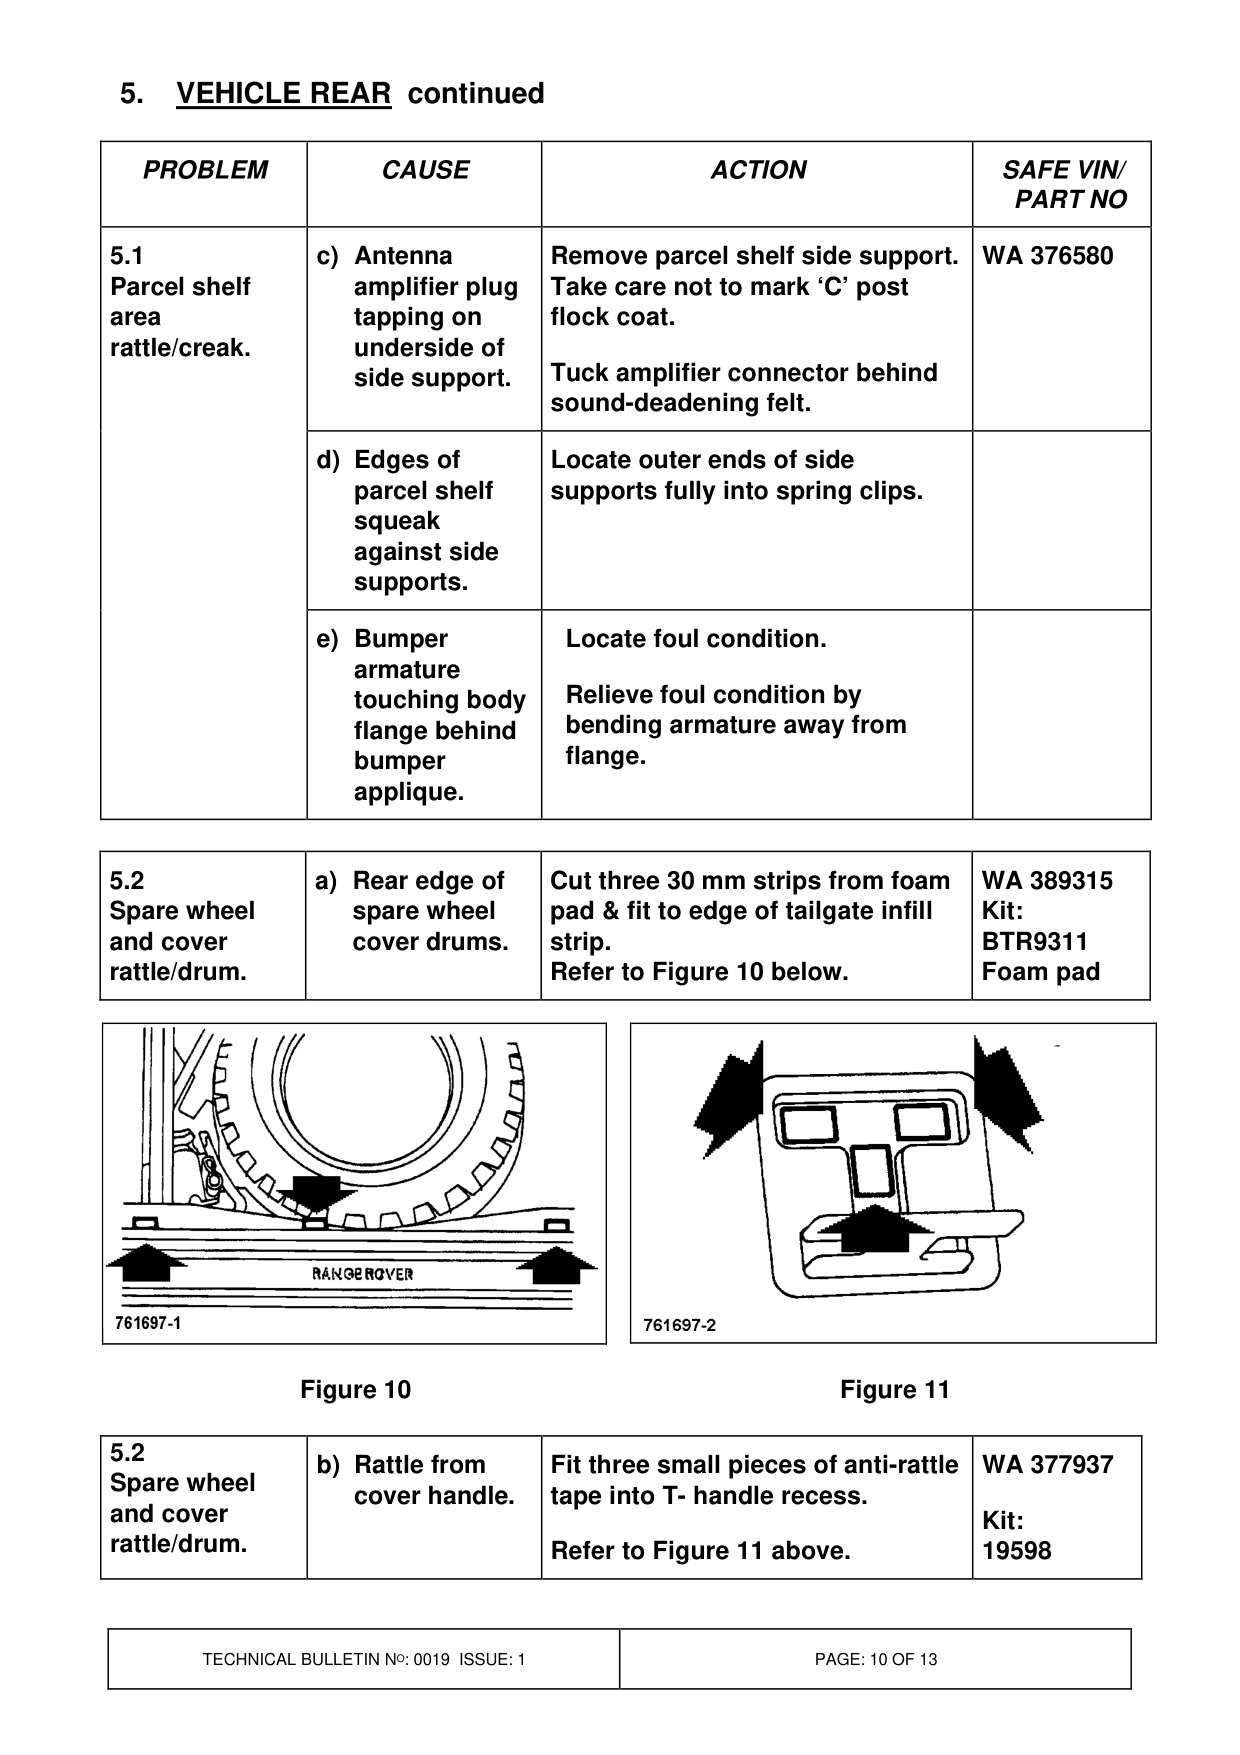
5.2 a) Rear edge of Cut three 30 mm strips from foam Spare wheel spare wheel pad & fit to edge of tailgate infill and cover cover drums. strip. rattle/drum. Refer to Figure 10 below.
Figure 10
5.2 b) Rattle from Fit three small pieces of anti-rattle Spare wheel cover handle. tape into T- handle recess. and cover rattle/drum. Refer to Figure 11 above.
ACTION
SAFE VIN/ PART NO
WA 376580
WA 389315 Kit: BTR9311 Foam pad
Figure 11
WA 377937
Kit: 19598
5. VEHICLE REAR continued
PROBLEM CAUSE
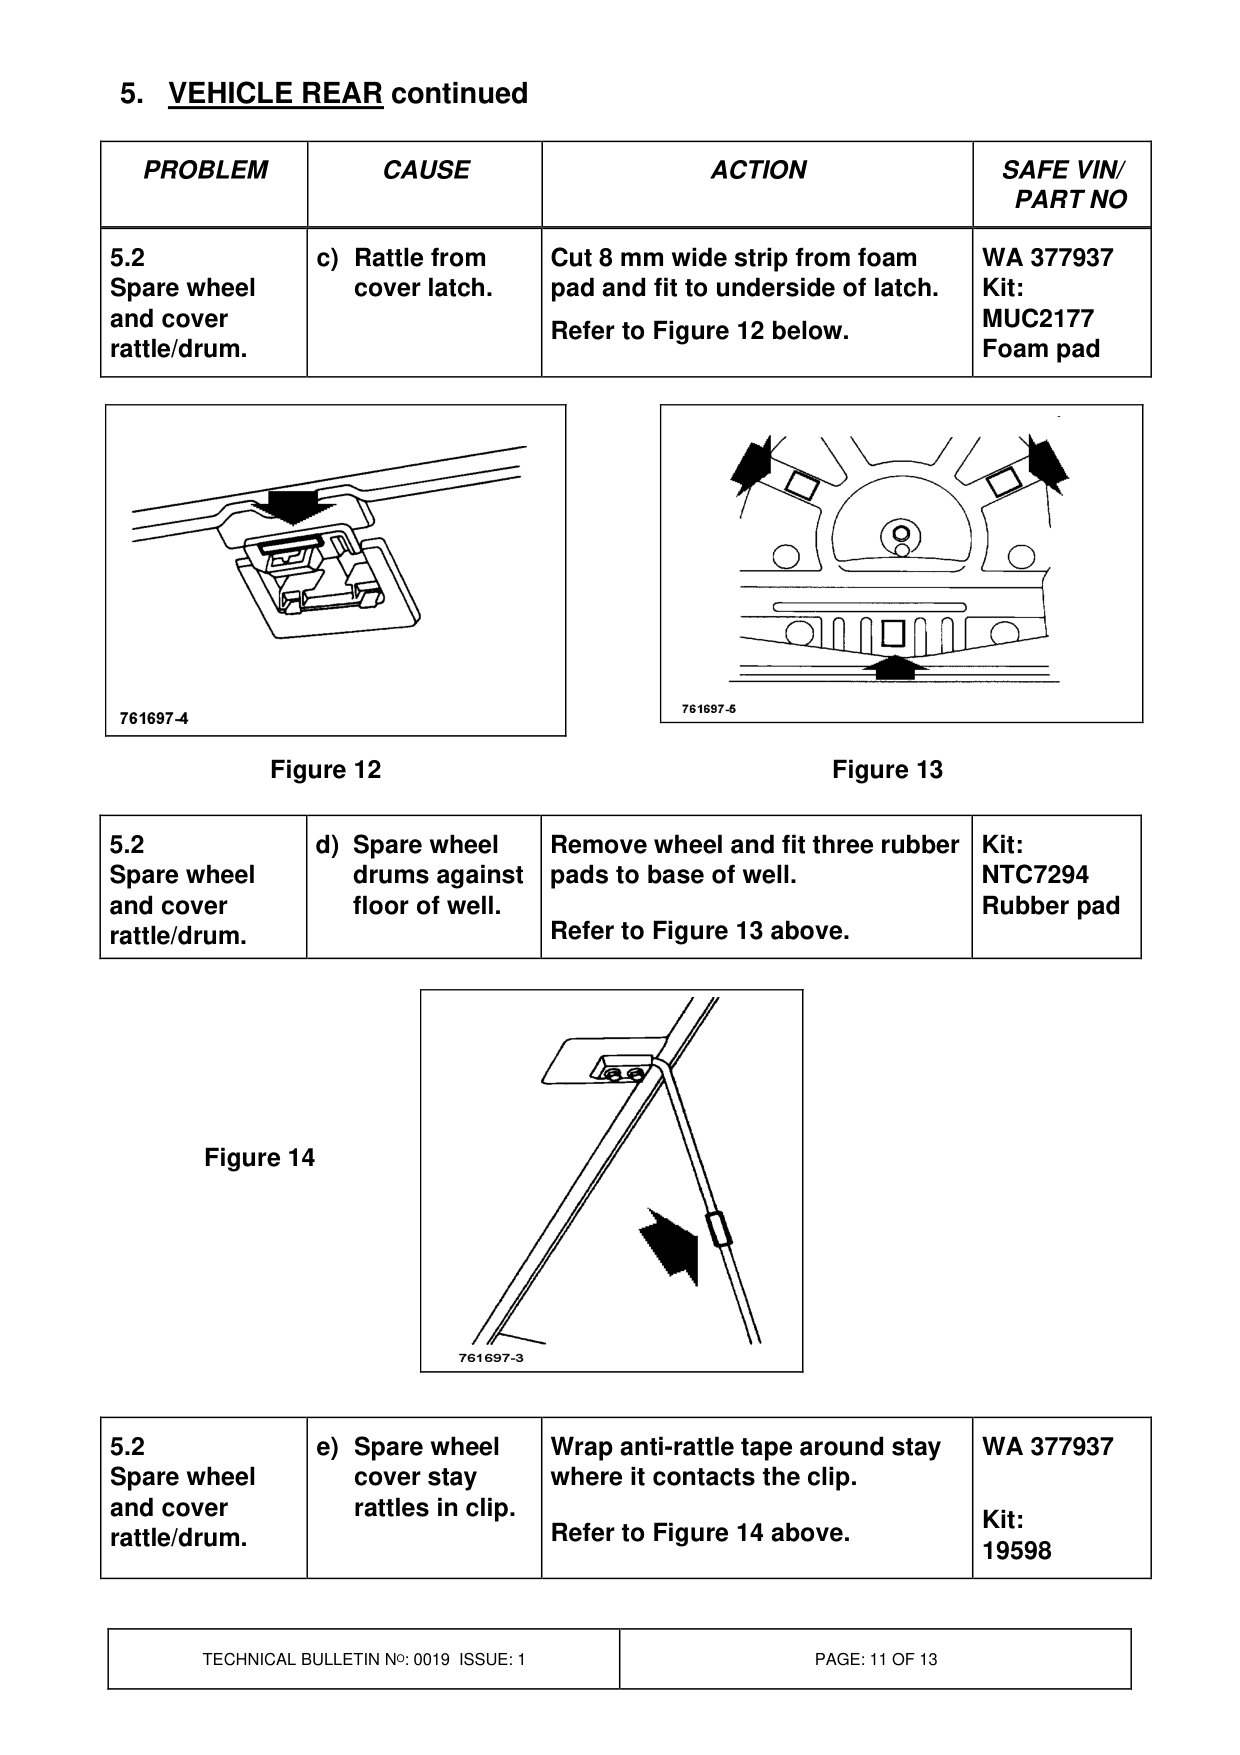
5.2 c) Rattle from Cut 8 mm wide strip from foam Spare wheel cover latch. pad and fit to underside of latch. and cover Refer to Figure 12 below. rattle/drum.
Figure 12
5.2 d) Spare wheel Remove wheel and fit three rubber Spare wheel drums against pads to base of well. and cover floor of well. Refer to Figure 13 above. rattle/drum.
Figure 14
5.2 e) Spare wheel Wrap anti-rattle tape around stay Spare wheel cover stay where it contacts the clip. and cover rattles in clip. Refer to Figure 14 above. rattle/drum.
ACTION
SAFE VIN/ PART NO
WA 377937 Kit: MUC2177 Foam pad
Figure 13
Kit: NTC7294 Rubber pad
WA 377937
Kit: 19598
5. VEHICLE REAR continued
PROBLEM CAUSE
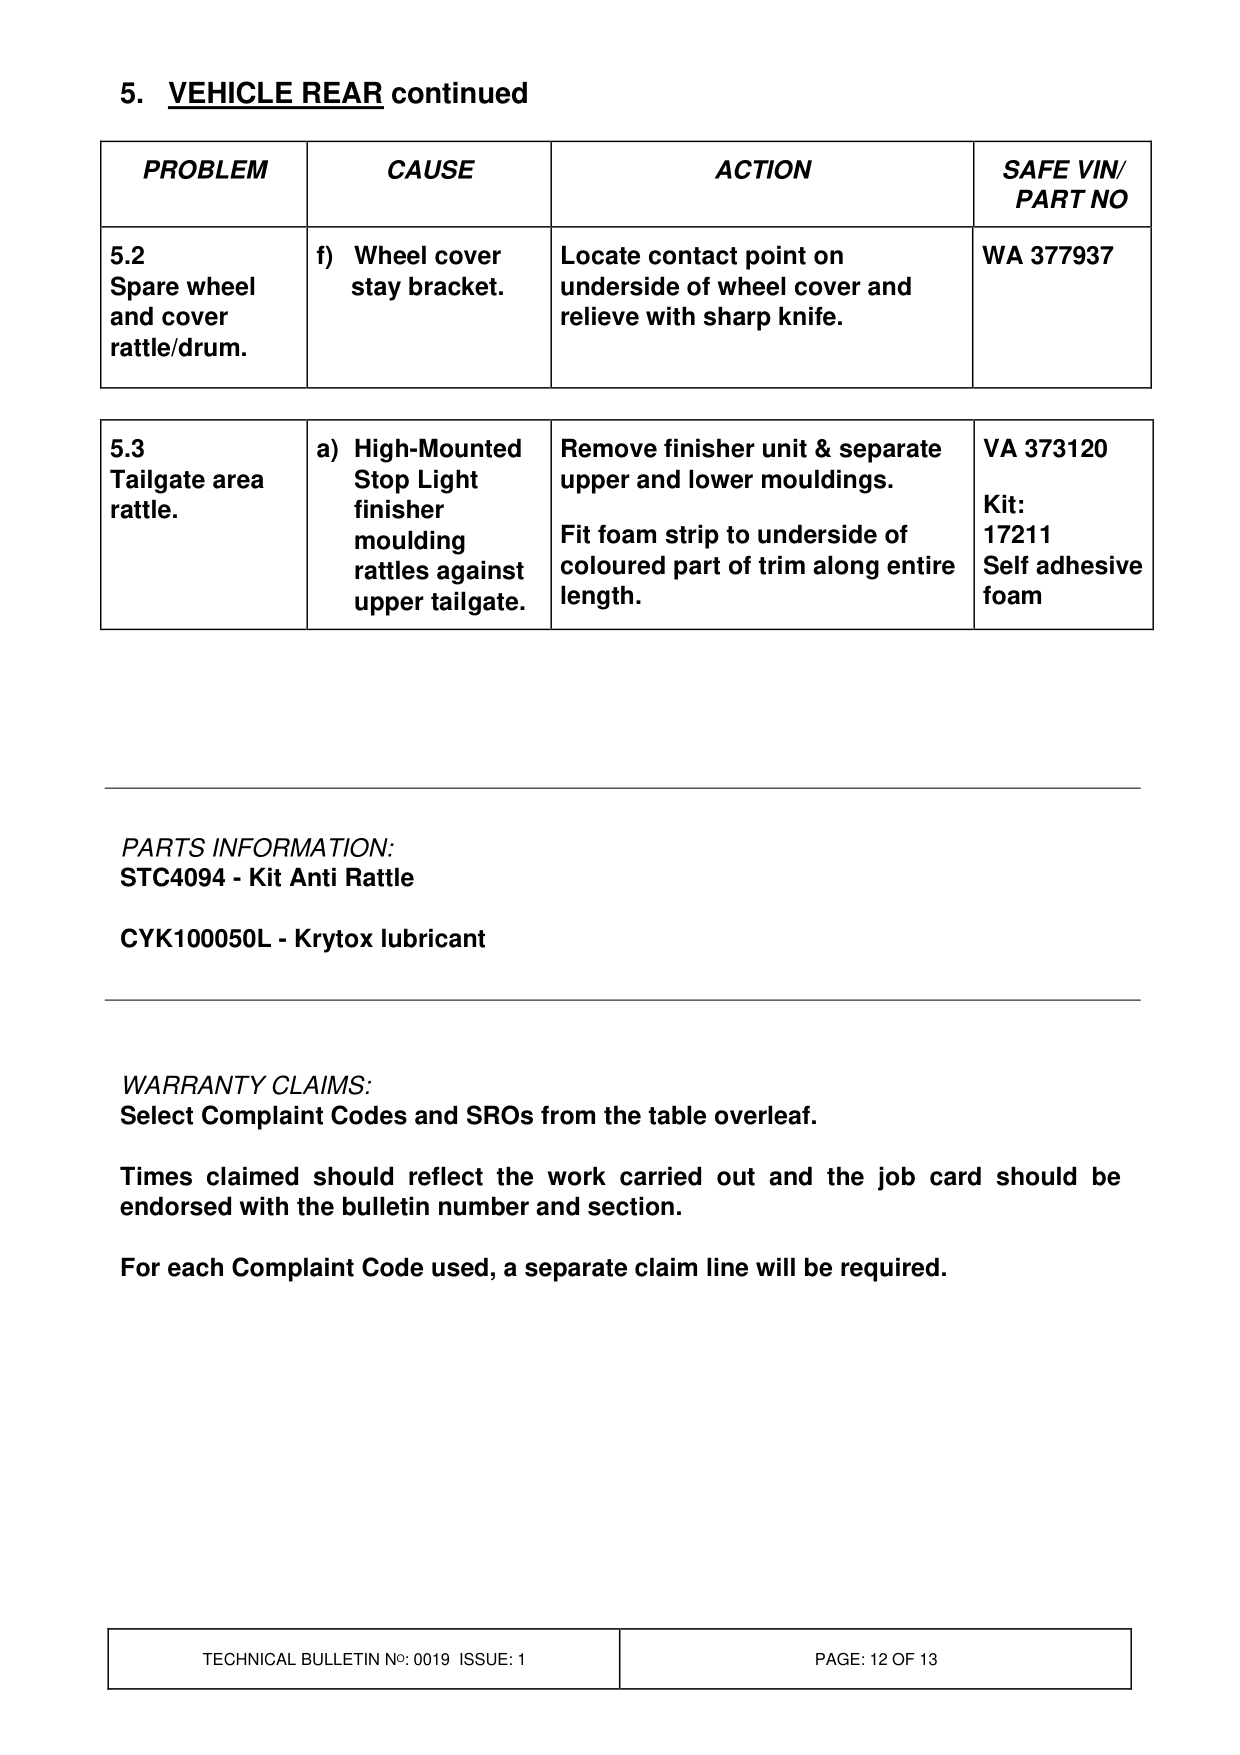
5.2 f) Wheel cover Locate contact point on Spare wheel stay bracket. underside of wheel cover and and cover relieve with sharp knife. rattle/drum.
5.3 a) High-Mounted Remove finisher unit & separate Tailgate area Stop Light upper and lower mouldings. rattle. finisher Fit foam strip to underside of moulding coloured part of trim along entire rattles against length. upper tailgate.
PARTS INFORMATION:
STC4094 - Kit Anti Rattle
CYK100050L - Krytox lubricant
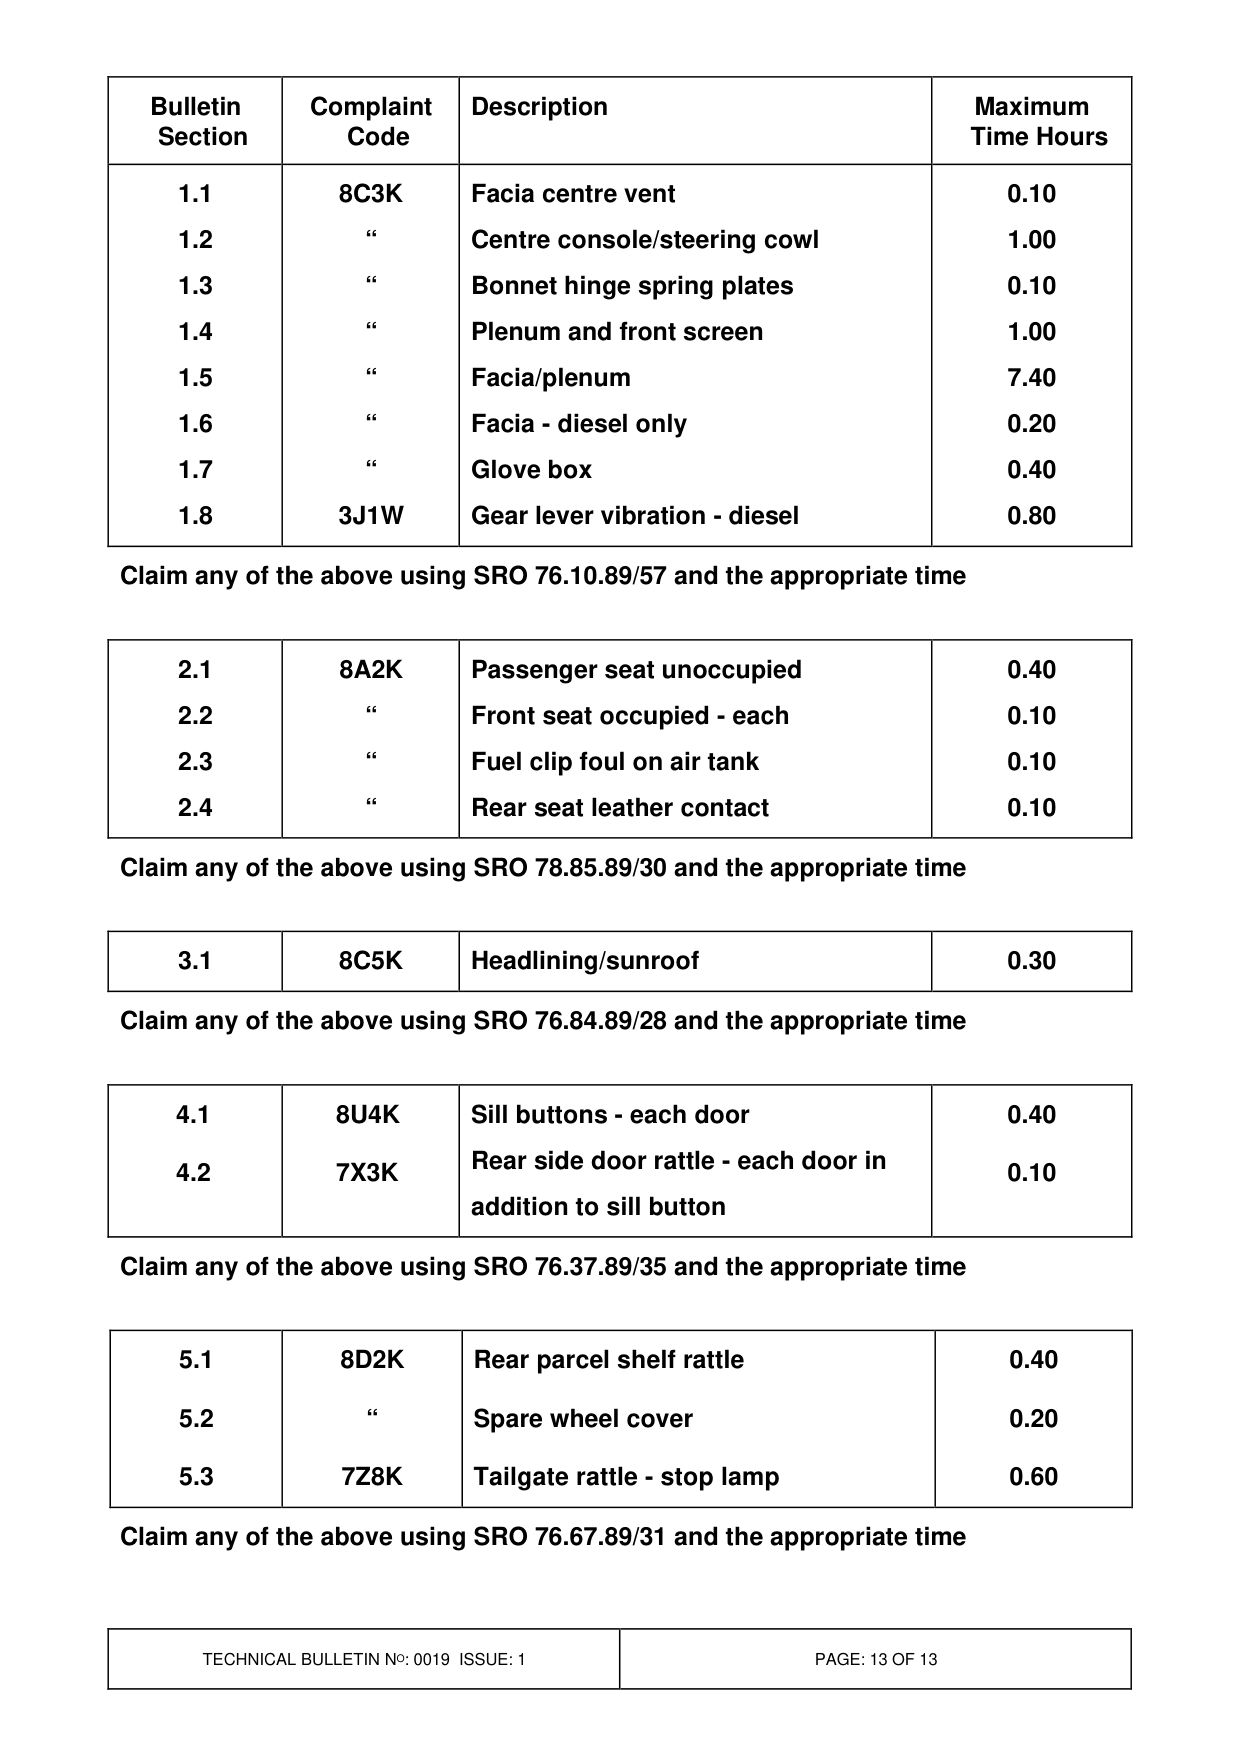
WARRANTY CLAIMS: Select Complaint Codes and SROs from the table overleaf.
Times claimed should reflect the work carried out and the job card should be endorsed with the bulletin number and section.
For each Complaint Code used, a separate claim line will be required.
ACTION
SAFE VIN/ PART NO
WA 377937
VA 373120
Kit: 17211 Self adhesive foam
Bulletin Complaint Description Section Code
1.1 8C3K Facia centre vent 1.2 “ Centre console/steering cowl 1.3 “ Bonnet hinge spring plates 1.4 “ Plenum and front screen 1.5 “ Facia/plenum 1.6 “ Facia - diesel only 1.7 “ Glove box 1.8 3J1W Gear lever vibration - diesel
Claim any of the above using SRO 76.10.89/57 and the appropriate time
Passenger seat unoccupied 8A2K 2.1 Front seat occupied - each “ 2.2 Fuel clip foul on air tank “ 2.3 Rear seat leather contact “ 2.4
Claim any of the above using SRO 78.85.89/30 and the appropriate time
3.1 8C5K Headlining/sunroof
Claim any of the above using SRO 76.84.89/28 and the appropriate time
4.1 8U4K Sill buttons - each door Rear side door rattle - each door in 4.2 7X3K addition to sill button
Claim any of the above using SRO 76.37.89/35 and the appropriate time
5.1 8D2K Rear parcel shelf rattle
5.2 “ Spare wheel cover
5.3 7Z8K Tailgate rattle - stop lamp
Claim any of the above using SRO 76.67.89/31 and the appropriate time
Maximum Time Hours
0.10 1.00 0.10 1.00 7.40 0.20 0.40 0.80
0.40 0.10 0.10 0.10
0.30
0.40
0.10
0.40
0.20
0.60
Parts & tools for this job For Land Rover Range Rover
- TOOLTrim removal tool kitSearch: trim removal tool kit
- PARTTouch-up paintSearch: Land Rover touch up paint
- PARTPanel clip assortmentSearch: Land Rover panel clips assortment
Links open Amazon search results in a new tab. As an Amazon Associate I earn from qualifying purchases.