
Front seat creak - mounting bracket
- Make
- Land Rover
- Model
- Range Rover P38 Technical Bulletins
- Section
- Front seat creak - mounting bracket › Front seat creak - mounting bracket
FRONT SEAT CREAK - MOUNTING BRACKET
- Model
- Range Rover
- Affected vehicles
- All vehicles
- Reference
- Bulletin 0038, CDS ref L8454bu
Bulletin text
Range Rover
AFFECTED RANGE:
All vehicles
PROBLEM:
FRONT SEAT CREAK - MOUNTING BRACKET Creaking noise from either of the front seats when occupied.
CAUSE:
Front inboard seat to body mounting bracket flexing.
ACTION:
The repair procedure describes the removal of single or both seat mounting brackets depending on result of investigation. The bracket(s) will require removal to allow a weld repair to the floor tunnel, when tunnel repair is complete, a new bracket will require to be welded into position.
Preparation and gaining access: 1. Ensure radio code is available and disconnect vehicle battery. 2. Remove both front seats, centre console and front carpet. For Workshop Manual repair information on seat and centre console removal refer to: • = Seat removal and refit - 78.10.44/99 (up to 99 MY) or 78.10.43/99 • = Centre console removal and refit - 76.25.01 3. Remove the 4 screws securing rear air ducts to the BeCM and ABS ECU and remove ducts. 4. Disconnect multiplugs from the electronic suspension ECM, EAT ECU, transfer gearbox ECU and BeCM.
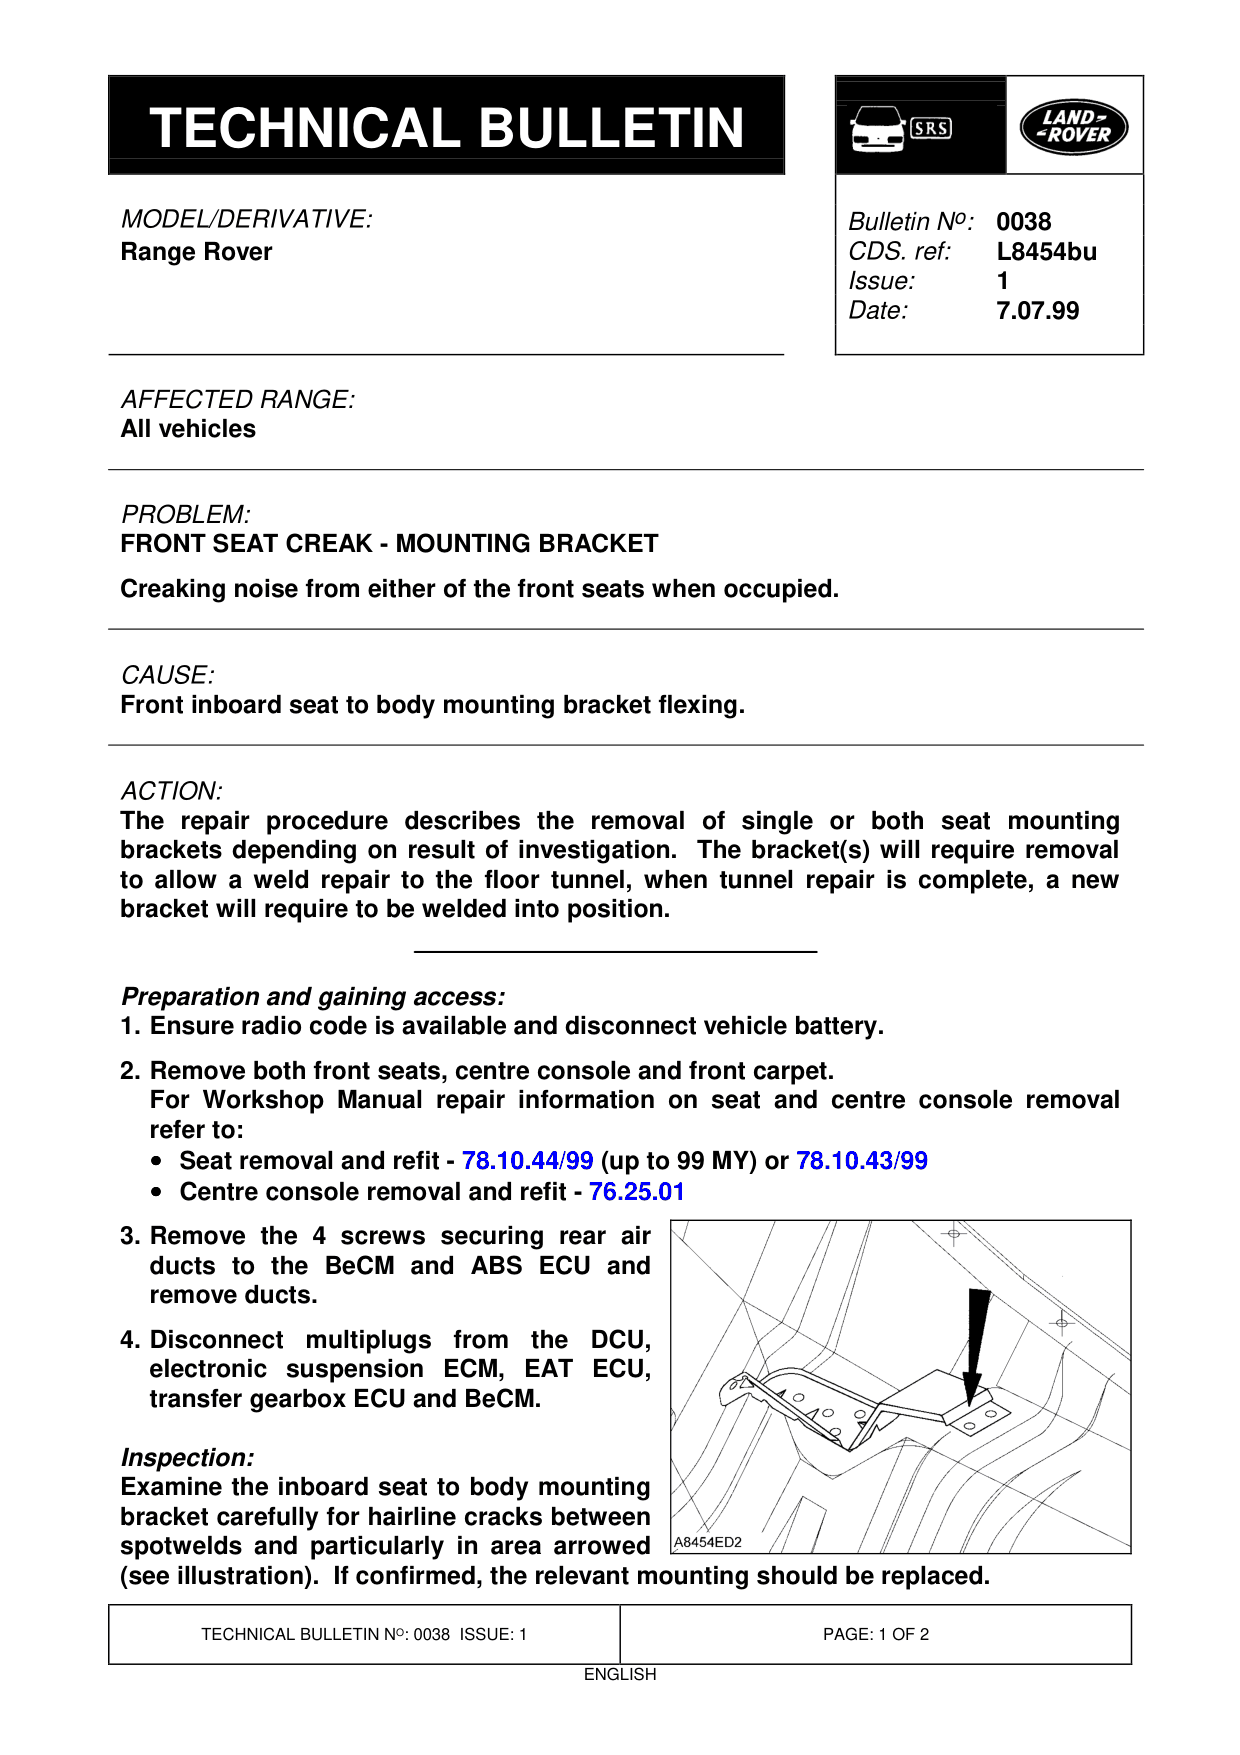
Inspection: Examine the inboard seat to body mounting bracket carefully for hairline cracks between spotwelds and particularly in area arrowed (see illustration). If confirmed, the relevant mounting should be replaced.
Bulletin N o : 0038 L8454bu 1 7.07.99
DCU,
NOTE: There is no need to replace the opposite mounting if confirmed satisfactory.
Repair procedure: Replace mounting bracket for new, see PARTS INFORMATION for details. 1. Make a mark around the mounting bracket to assist alignment of new bracket on re-fitment. 2. Using a cobalt spot weld removing tool, drill through all the mounting bracket to floor spot welds until bracket can be removed. 3. With bracket removed, drill a 3mm hole at each end of hairline crack on tunnel/floor. Using a MIG welder, weld up hairline cracks and previously drilled holes. Dress all welds when complete. 4. Position new bracket to floor while aligning into previously marked position. The new bracket will have pre-drilled welding holes. technique, weld new bracket to floor. 5. Touch-in any exposed bare metal with an etch phosphate process then re-paint repaired areas. NOTE: For additional information on body repair procedure, refer to Body Repair manual - Panel repairs - Panel replacement procedure. 6. Refit all previously removed components in reverse order. 7. Raise vehicle on ramp and apply under body sealant/wax to any disturbed area adjacent to weld repairs. 8. Re-connect battery and insert radio code.
PARTS INFORMATION:
ADV720060 - Bracket - inner RH front seat ADV720070 - Bracket - inner LH front seat
WARRANTY CLAIMS: Use Complaint Code: 9B2E
Seat mounting bracket - single side replace Use S.R.O.: 78.85.89/38 Time allowance: 2.70 Hrs
Seat mounting bracket - both sides replace Use S.R.O.: 78.85.89/39 Time allowance: 3.70 Hrs
Using the puddle weld
Parts & tools for this job For Land Rover Range Rover
- TOOLOBD2 scanner with SRSSearch: OBD2 scanner ABS SRS
- TOOLTrim removal tool kitSearch: trim removal tool kit
Links open Amazon search results in a new tab. As an Amazon Associate I earn from qualifying purchases.