
Remote handsets - new part introduction
- Make
- Land Rover
- Model
- Range Rover P38 Technical Bulletins
- Section
- Remote handsets - new part introduction › Remote handsets - new part introduction
REMOTE HANDSETS - NEW PART INTRODUCTION
- Model
- Range Rover UK/Rest of World/Europe
- Affected vehicles
- See below
- Date
- 1997-03-18
- Reference
- 18/03/97
Bulletin text
Remote Handsets - New Part Introduction
MODEL
Range Rover UK/Rest of World/Europe
DETAIL
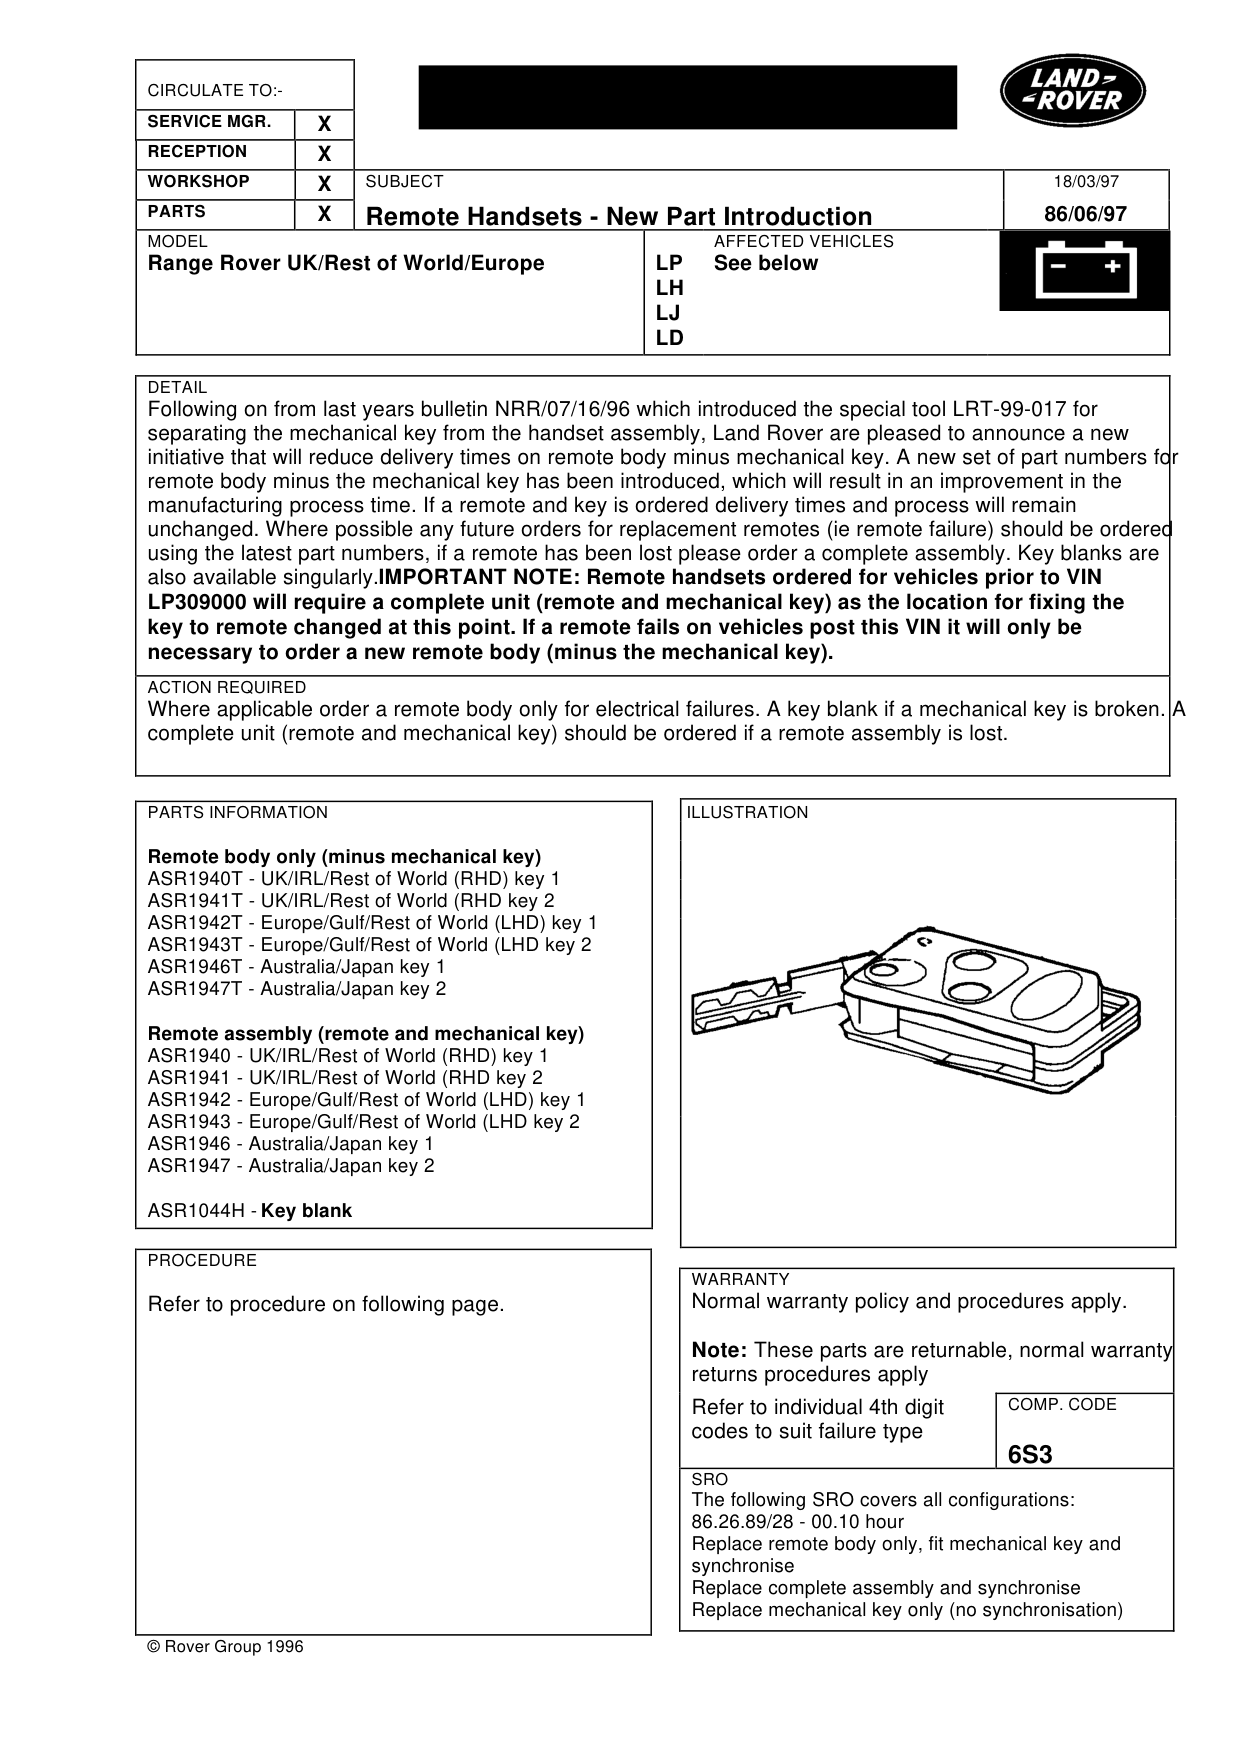
Following on from last years bulletin NRR/07/16/96 which introduced the special tool LRT-99-017 for separating the mechanical key from the handset assembly, Land Rover are pleased to announce a new initiative that will reduce delivery times on remote body minus mechanical key. A new set of part numbers for remote body minus the mechanical key has been introduced, which will result in an improvement in the manufacturing process time. If a remote and key is ordered delivery times and process will remain unchanged. Where possible any future orders for replacement remotes (ie remote failure) should be ordered using the latest part numbers, if a remote has been lost please order a complete assembly. Key blanks are also available singularly. IMPORTANT NOTE: Remote handsets ordered for vehicles prior to VIN LP309000 will require a complete unit (remote and mechanical key) as the location for fixing the key to remote changed at this point. If a remote fails on vehicles post this VIN it will only be necessary to order a new remote body (minus the mechanical key).
ACTION REQUIRED
Where applicable order a remote body only for electrical failures. A key blank if a mechanical key is broken. A complete unit (remote and mechanical key) should be ordered if a remote assembly is lost.
PARTS INFORMATION
Remote body only (minus mechanical key) ASR1940T - UK/IRL/Rest of World (RHD) key 1 ASR1941T - UK/IRL/Rest of World (RHD key 2 ASR1942T - Europe/Gulf/Rest of World (LHD) key 1 ASR1943T - Europe/Gulf/Rest of World (LHD key 2 ASR1946T - Australia/Japan key 1 ASR1947T - Australia/Japan key 2
Remote assembly (remote and mechanical key) ASR1940 - UK/IRL/Rest of World (RHD) key 1 ASR1941 - UK/IRL/Rest of World (RHD key 2 ASR1942 - Europe/Gulf/Rest of World (LHD) key 1 ASR1943 - Europe/Gulf/Rest of World (LHD key 2 ASR1946 - Australia/Japan key 1 ASR1947 - Australia/Japan key 2
ASR1044H - Key blank
PROCEDURE
Refer to procedure on following page.
© Rover Group 1996
18/03/97
86/06/97
AFFECTED VEHICLES
LP See below LH LJ LD
WARRANTY
Normal warranty policy and procedures apply.
Note: These parts are returnable, normal warranty returns procedures apply Refer to individual 4th digit
COMP. CODE
codes to suit failure type 6S3
SRO
The following SRO covers all configurations: 86.26.89/28 - 00.10 hour Replace remote body only, fit mechanical key and synchronise Replace complete assembly and synchronise Replace mechanical key only (no synchronisation)
Remote Handsets - New Part Introduction
MODEL
Range Rover UK/Rest of World/Europe
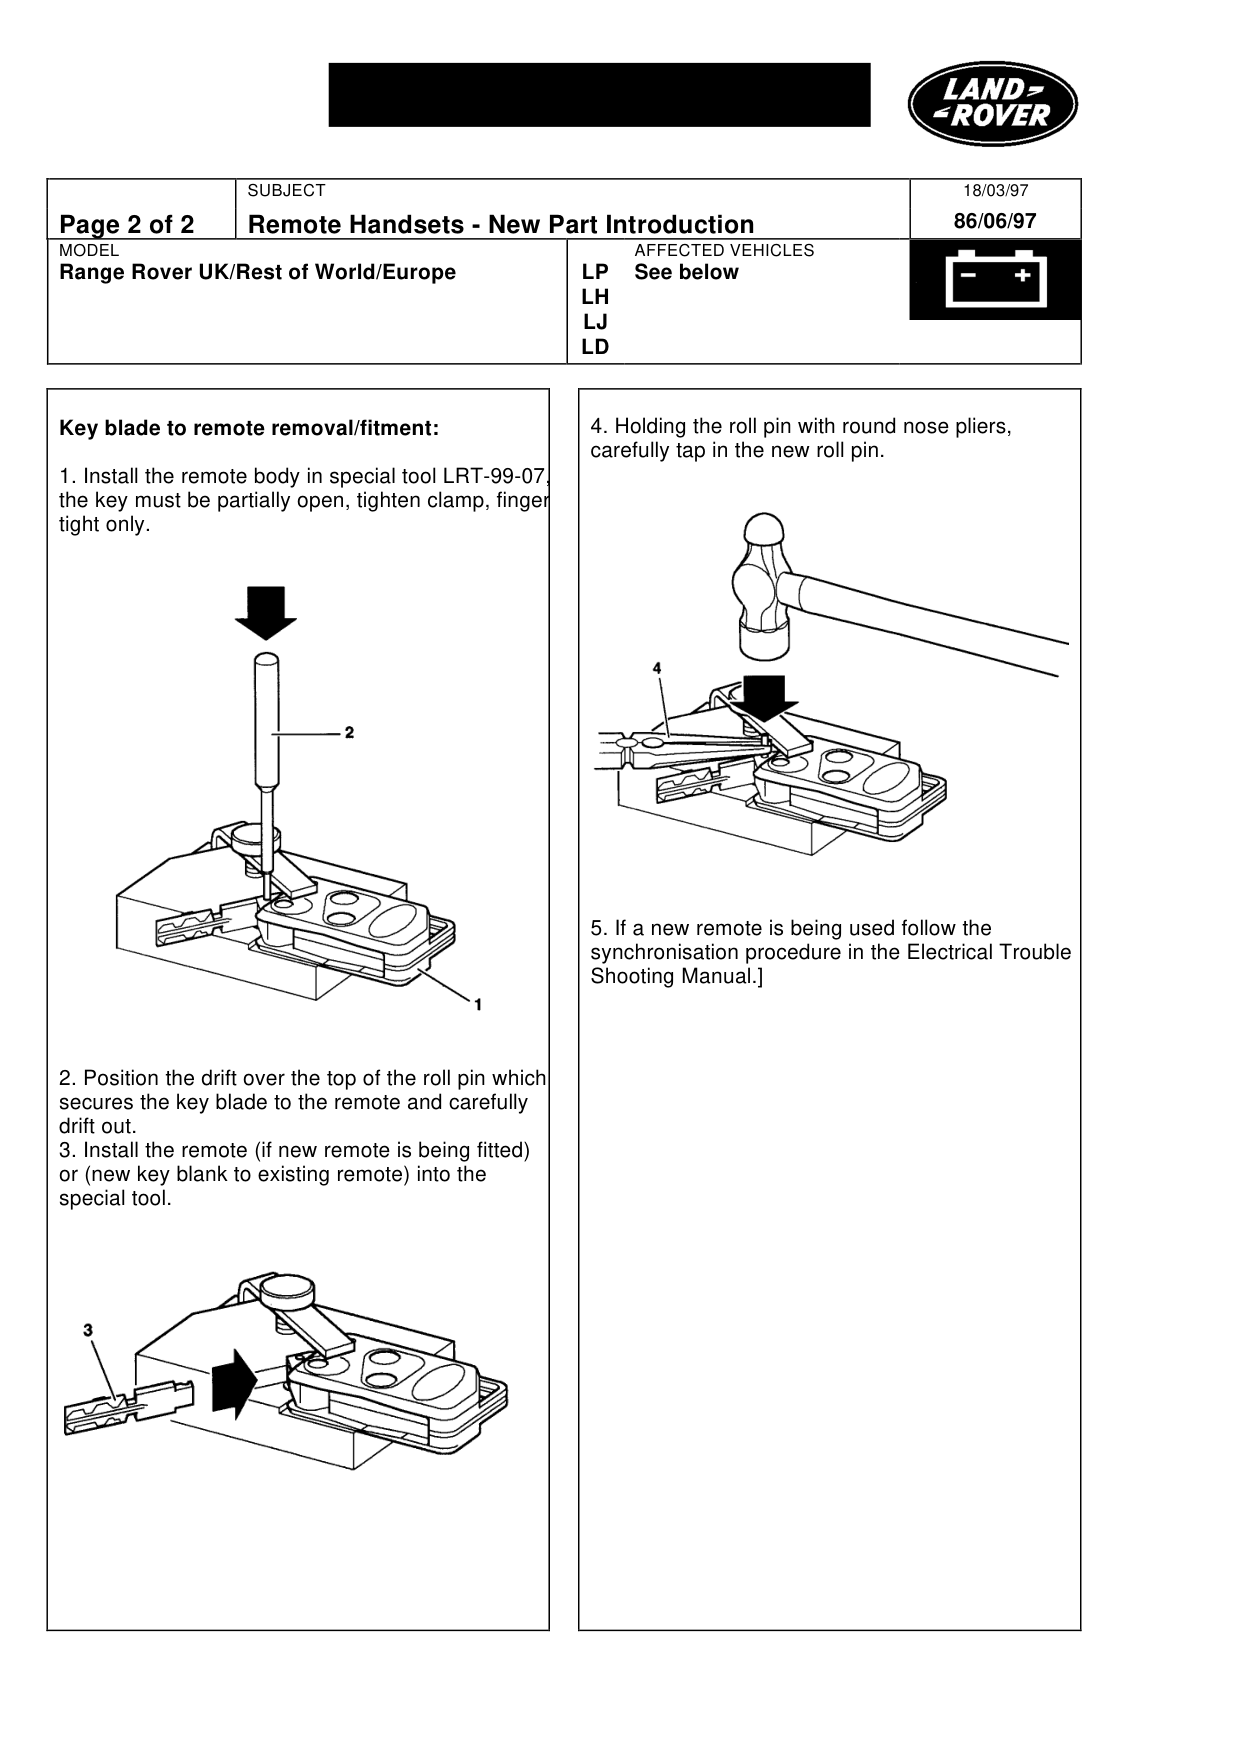
Key blade to remote removal/fitment:
1. Install the remote body in special tool LRT-99-07, the key must be partially open, tighten clamp, finger tight only.
2. Position the drift over the top of the roll pin which secures the key blade to the remote and carefully drift out. 3. Install the remote (if new remote is being fitted) or (new key blank to existing remote) into the special tool.
18/03/97 86/06/97
AFFECTED VEHICLES
LP See below LH LJ LD
4. Holding the roll pin with round nose pliers, carefully tap in the new roll pin.
5. If a new remote is being used follow the synchronisation procedure in the Electrical Trouble Shooting Manual.]
Parts & tools for this job For Land Rover Range Rover
- TOOLDigital multimeterSearch: automotive digital multimeter
- PARTAssorted fuse kitSearch: car fuse assortment kit
- TOOLWire crimper and connector kitSearch: wire crimper connector kit
Links open Amazon search results in a new tab. As an Amazon Associate I earn from qualifying purchases.