
OVERHAUL (page 9 of 14)
- Make
- Land Rover
- Model
- Range Rover Classic
BORG WARNER
15
OVERHAUL
3. Remove the rear upper bevel gear and thrust
washer.
4. Remove the pinion gears and dished washers
along with the cross shaft.
5. Remove the front lower bevel gear and thrust
washer from the front half of the differential unit.
6. Remove the front half of the differential unit from
the vice and clean all components. Examine for
wear or damage, renew if necessary.
Differential pinions - rolling resistance
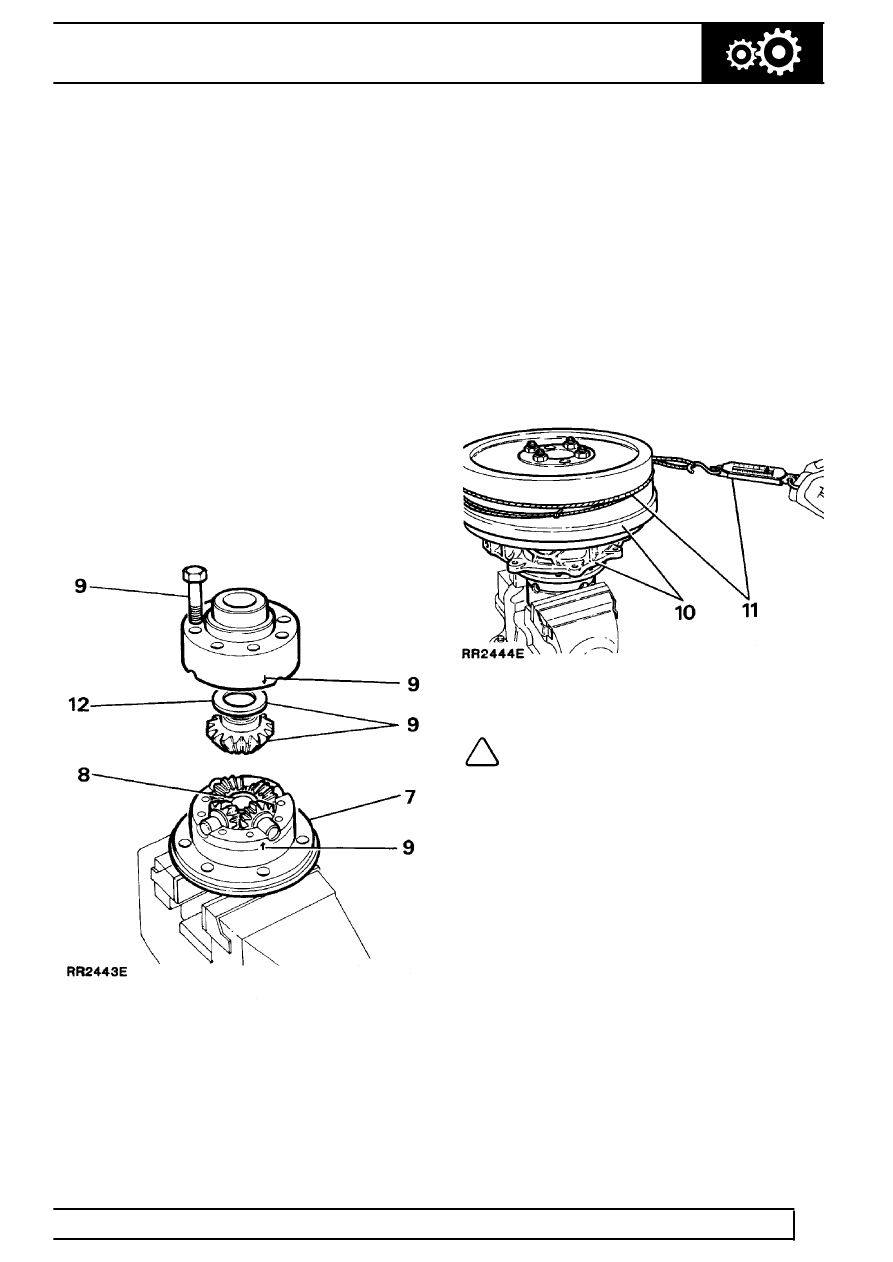
7. Using soft jaws secure the front half of the
differential unit in the vice.
8. Fit the front bevel gear without the thrust washer.
Lightly lubricate and fit the cross shaft, pinion
gears and new dished washers.
9. Fit the rear bevel gear together with the thinnest
thrust washer to the rear half of the differential.
Assemble both halves of the differential noting
the identification marks. Fit the bolts and tighten
to the specified torque.
10. Invert the differential unit in the vice, fit the front
output housing to the differential, locating the
viscous unit splines on the front bevel gear. Fit
the drive flange to the viscous unit and place the
brake drum on top of the drive flange, secure
with the nut. Check that the gears are free to
rotate.
11. Tie a length of string around the brake drum,
attach a spring balance to the free end and
carefully tension the string until a load to turn is
achieved. Alternatively use a torque wrench
applied to the drive flange nut. Rotate the brake
drum slowly by hand to overcome the initial load
when using either method.
NOTE: Gears that have been run will rotate
smoothly and will require a torque of 0.56
Nm (5 in lb), equivalent force using a
spring balance 0.45 kg (1 lb). New gears will rotate
with a notchy feel and will require a torque of not
more than 2.26 Nm (20 in lb), equivalent force
using a spring balance 7.72 Kg (3.8 lb). Keep all
components lubricated when carrying out these
adjustments.
12. Change the thrust washer for a thicker one if the
torque reading is too low and re - check the
torque. Five thrust washers are available in
0.10mm steps ranging from 1.05 to 1.45mm.
13. Dismantle the unit when the rear bevel gear
thrust washer has been selected.
14. Remove and retain the rear bevel gear and
thrust washer combination.
Parts & tools for this job For Land Rover Range Rover
- TOOLTorque wrenchSearch: 3/8 inch torque wrench
- TOOLSocket setSearch: socket set metric
- BOOKHaynes manualSearch: Haynes manual Land Rover Range Rover
Links open Amazon search results in a new tab. As an Amazon Associate I earn from qualifying purchases.