Range Rover Classic

41
TRANSFER GEARBOX
16
OVERHAUL
15. Repeat the procedure to obtain the correct thrust
washer for the front bevel gear, it is not
necessary to fit the rear bevel gear when
checking the front bevel gear rolling resistance.
16. When the thrust washer has been selected for
the front bevel gear, again dismantle the
differential unit and retain the thrust washer and
front bevel gear combination.
Centre differential - Assemble
17. Fit the thrust washer and front bevel gear into
the front half of the differential unit.
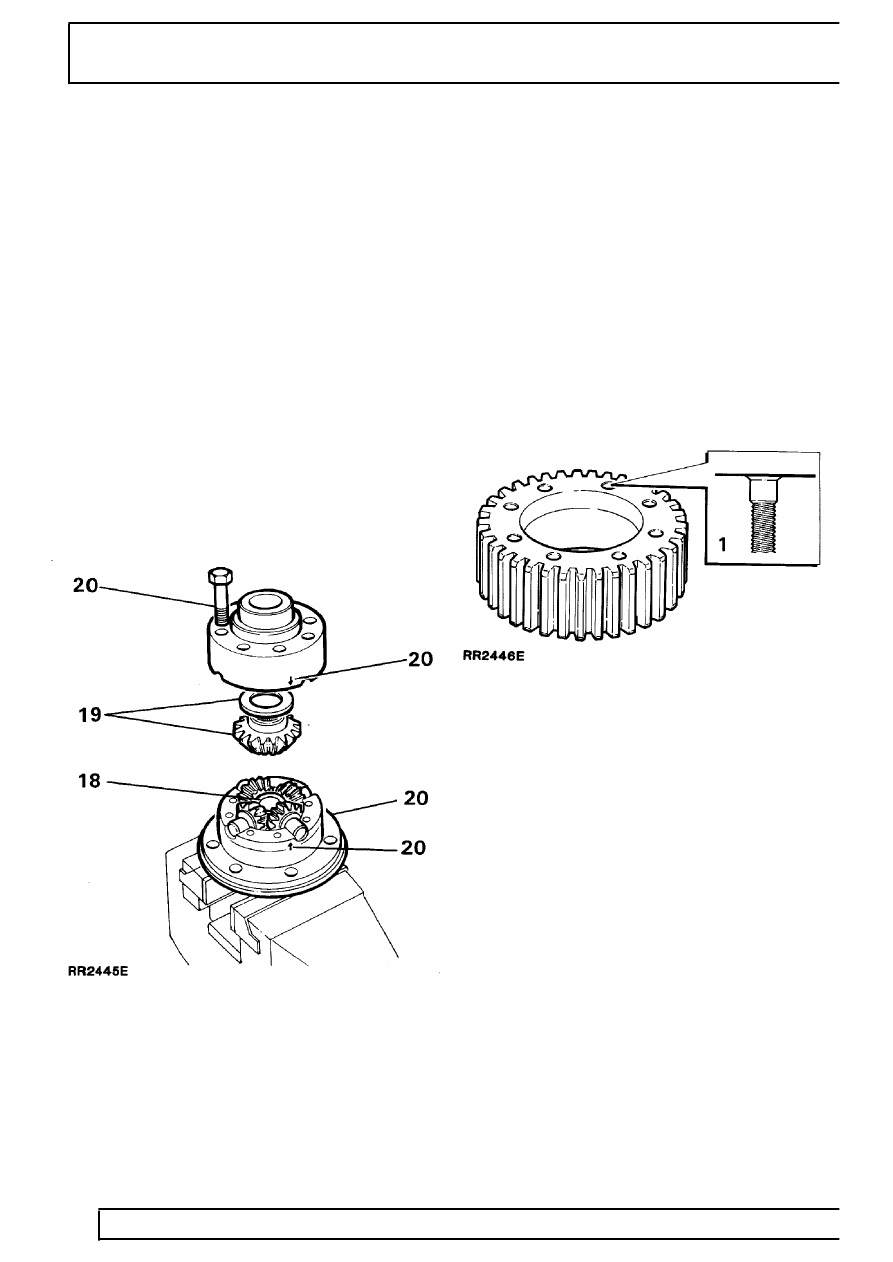
18. Fit the pinion gears with dished washers to the
cross shaft and fit the assembly to the differential
unit.
19. Fit the thrust washer and rear bevel gear to the
rear half of the differential unit.
20. Align both halves of the differential noting the
identification marks. Secure both halves together
with the eight bolts. Tighten the bolts to the
specified torque.
21. Check the overall torque required to turn the
differential, this should be approximately equal to
both bevel gears added together.
22. Drive or press new bearings onto the differential,
noting that the smaller of the two bearings is
fitted to the rear half of the differential.
Centre differential sprocket - Assemble
1. Fit the sprocket to the differential noting that the
face of the sprocket with the relieved threads
must contact the flange of the differential
housing. Observe the previously marked
identification lines if the original components are
being refitted.
2. Fit new bolts and tighten evenly to the specified
torque.
Transfer sprocket, centre differential assembly
and chain - Assemble
1. Place the differential assembly and transfer
sprocket inside the chain. If the original
components are being refitted observe the
identification marks previously applied to the
chain and transfer sprocket. Fit the complete
assembly simultaneously.
2. Carefully tap the differential bearing into its bore
while easing the transfer sprocket onto the
transfer shaft.
