Range Rover Classic

BORG WARNER
17
OVERHAUL
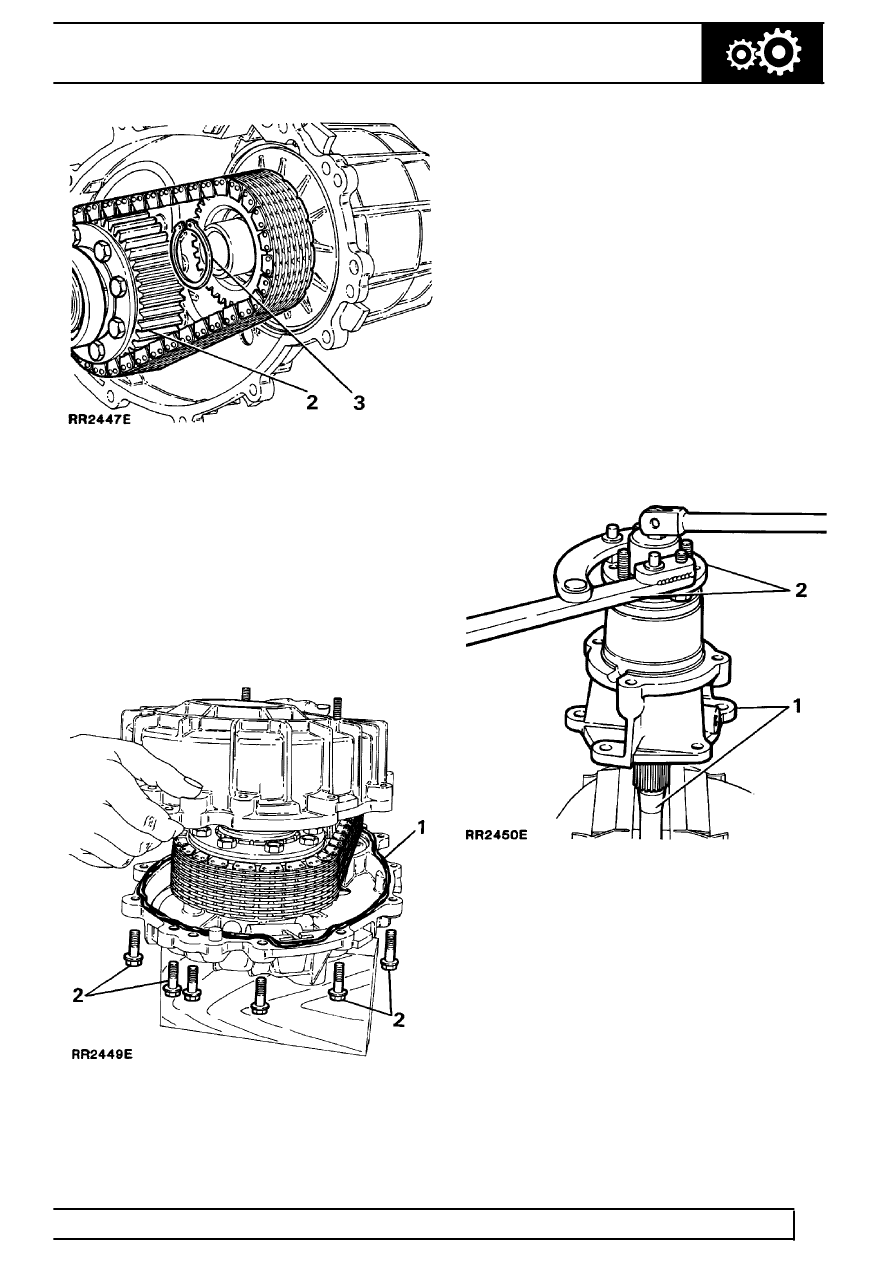
3. Ensuring that the transfer sprocket is fully down,
secure the sprocket to the transfer shaft with the
circlip.
Front and rear cover - main casing - Assemble
1. Ensuring that the joint faces of the front and rear
covers are clean, apply a bead of Dow Corning
732 or a suitable equivalent silicone sealant to
the joint face of the rear cover and evenly spread
the sealant over the face. Do not over apply the
sealant.
2. Fit the front cover, secure with the eleven bolts,
tightening evenly to the specified torque. Do not
wipe away the surplus sealant which is forced
out of the joint.
Rear output housing
- Dismantle and inspection
Service tools:
18G1422 - Oil seal replacer
18G1205 - Adjustable flange holding wrench
1. Support the rear output housing by the output
shaft in a vice fitted with soft jaws.
2. Using service tool 18G1205 to restrain the drive
flange, release and remove the nyloc nut and
plain washer securing the drive flange to the
output shaft, withdraw the rubber seal. Discard
the nut and seal.
3. Remove the drive flange from the output shaft.
Examine the flange for damage or wear
particularly the seal running surface, if the
surface is corroded or a groove has been worn
by the previous seal discard the flange.
4. Prise the speedometer sleeve and driven gear
from the housing. Examine the gear teeth for
wear, if worn discard the gear.
5. Prise the oil seal from the sleeve and remove the
’O’ ring, discard both the seal and ’O’ ring.
