Range Rover Classic Borg Warner Transfer Gearbox Overhaul Instructions 5-Speed Model

41
TRANSFER GEARBOX
20
OVERHAUL
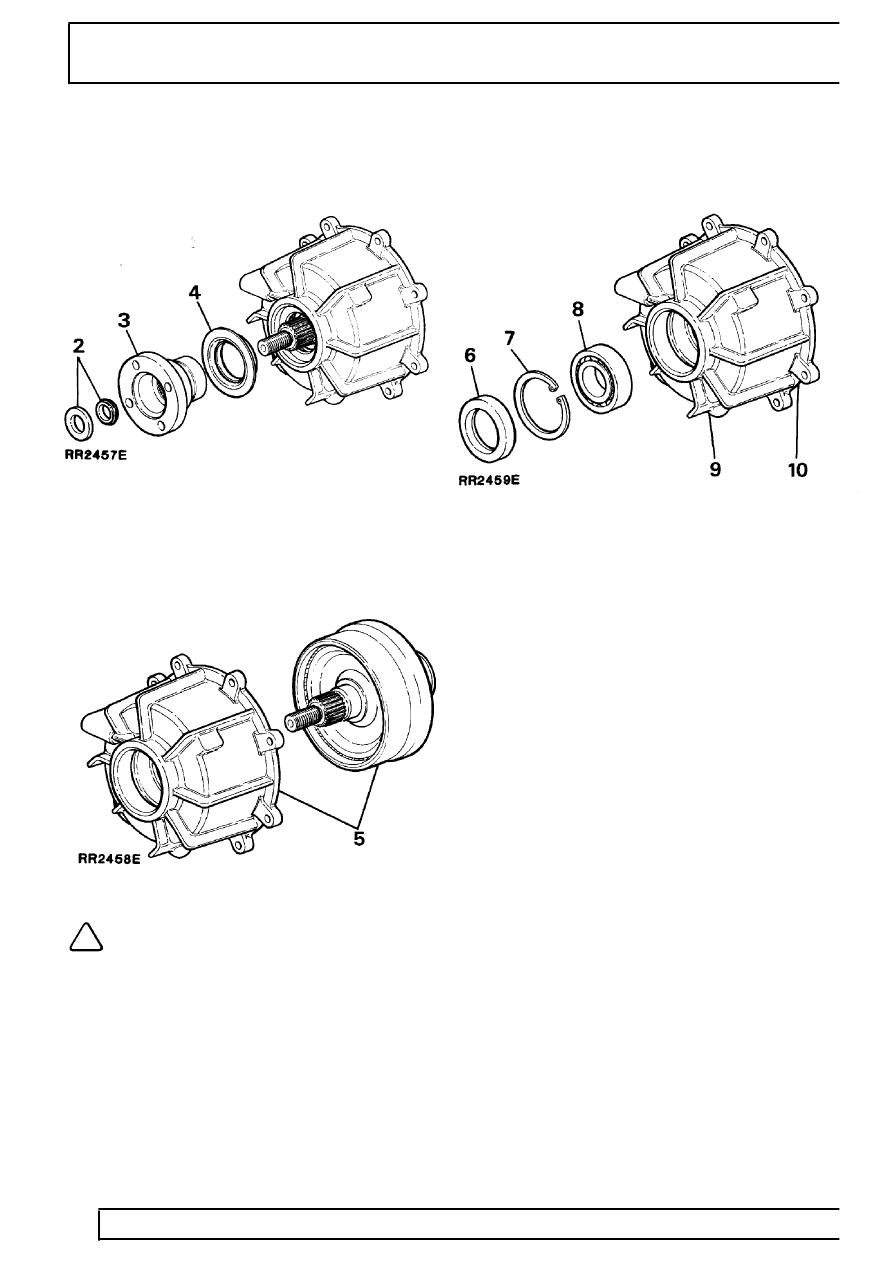
4. If necessary the oil catcher can be carefully
pressed from the drive flange, if either a new oil
catcher or bolts are being fitted.
5. Carefully tap the viscous unit out of the housing.
If the original unit is being refitted wipe clean
with a clean cloth.
NOTE: The viscous unit is a sealed
assembly and cannot be further
dismantled, a new unit should be fitted if
the unit is damaged or if the torque to turn is out
of limits.
6. Prise the oil seal out from the front output
housing and discard.
7. Remove the circlip retaining the bearing.
8. Drive or press the bearing from the housing and
discard.
9. Clean the housing with a suitable solvent.
10. Remove any previous sealant from the joint face
of the housing.
11. Examine the housing for damage and wear,
renew the housing if necessary.
Front output housing - Assemble
12. Drive or press a new bearing into the housing
13. Fit the circlip to retain the bearing.
14. Lubricate a new oil seal. Using oil seal replacing
tool 18G1422 fit the seal, lip side of the seal
leading until it contacts the circlip.
15. Carefully tap the original or new viscous unit into
the housing until contact is made with the face of
the bearing.
16. Lubricate the lips of the seal and fit the flange
followed by a new rubber seal; fit the steel
washer and secure the flange with a new nut.
Tighten to the specified torque.
17. Apply Dow Corning 732 or a suitable equivalent
silicone sealant to the output housing joint face
of the main casing. Evenly spread the sealant on
the face to ensure a good seal.
18. Fit the housing to the main casing and secure in
position with the eight bolts tightened evenly to
the specified torque.
19. Refit the gearbox to the vehicle.
