
Range Rover Classic
FRONT AXLE AND FINAL DRIVE
1
REPAIR
FRONT AXLE ASSEMBLY
Service repair no - 54.15.01
Remove
WARNING: Remove and refit of axle
requires a further two persons to steady
axle when lowering or repositioning axle.
1. Support chassis front.
2. Remove road wheels.
3. Support axle weight with hydraulic jack.
4. Remove radius arms to chassis frame nuts.
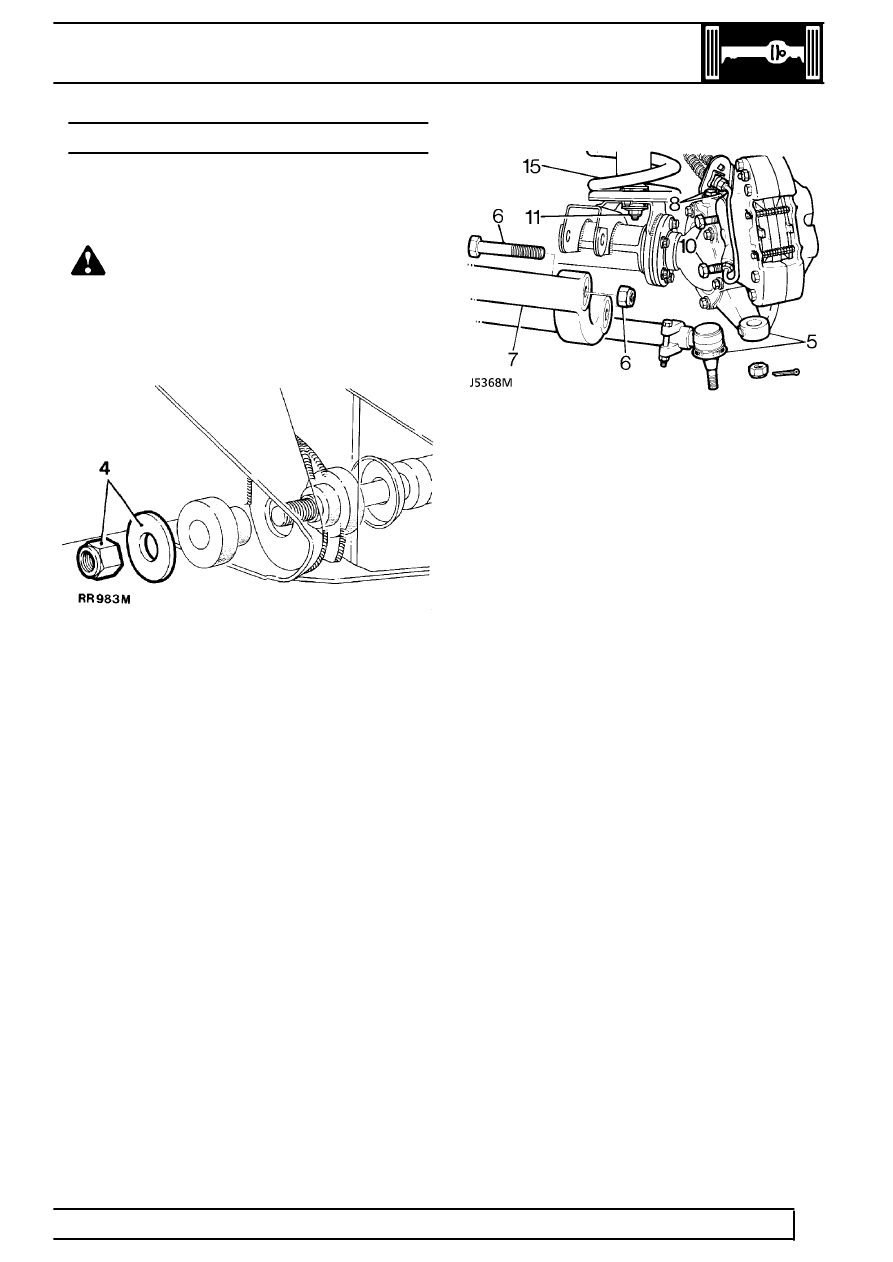
5. Disconnect steering damper from track rod.
Using a extractor remove track rod links from
swivel pin arms.
6. Remove four nuts and bolts securing radius
arms to axle bracket.
7. Remove radius arms.
8. Remove bolts securing brake hose brackets.
Refit bolts to prevent oil leakage.
9. Remove ABS sensor, if applicable.
10. Remove bolts from brake calipers and tie to one
side.
11. Remove nuts and washers securing shock
absorbers to axle.
12. Disconnect drag link from swivel pin housing
arm.
13. Remove two nuts and bolts securing panhard
rod to axle bracket. Lift rod clear of axle.
14. Mark for reassembly drive shaft flanges.
Remove four nuts and bolts, tie propeller shaft to
one side.
15. Lower axle assembly and remove road springs.
16. Disconnect anti-roll[sway] bar link.
See FRONT
SUSPENSION, Repair, Anti-Roll[Sway] Bar
Ball Joint Links
17. Remove axle assembly.
Refit
18. Position axle under vehicle, supporting left side
of axle.
19. Reverse removal procedure.
20. Tighten propeller shaft bolts to
47 Nm.
21. Tighten panhard rod to axle bracket to
88 Nm.
22. Tighten drag link to hub arm to
40 Nm.
23. Tighten upper swivel pin bolts.
See
Specifications, torque, Torque Values
24. Tighten radius arms to axle bolts to
197 Nm.
25. Tighten radius arms to chassis side member
nuts to
197 Nm.
26. Tighten track rod end to
40 Nm.
Fit new split [cotter] pin.