
Cylinder Head
- Make
- Lincoln
- Model
- Town Car Factory Service Manual
- Year
- 2007
- Section
- 303-01 Engine › Removal › Cylinder Head
Cylinder Head
 |
Remover, Crankshaft Vibration Damper
303-009 (T58P-6316-D) |
 |
Remover, Crankshaft Front Oil Seal
303-107 (T74P-6700-A) |
 |
Engine Lifting Bracket Set
303-DS086 (D93P-6001-A) |
 |
Compressor, Valve Spring
303-567 (T97P-6565-AH) |
 |
Spacer, Valve Spring Compressor
303-382 (T91P-6565-AH) |
 |
Remover/Installer, Cylinder Head
303-572 (T97T-6000-A) |
| Item | Specification |
|---|---|
| Silicone Gasket Remover ZC-30 | — |
| Motorcraft Metal Surface Prep ZC-31 | — |
Removal
Cylinder heads
- With the vehicle in NEUTRAL, position it on a hoist. For additional information, refer to Section 100-02.
- Remove the engine. For additional information, refer to Engine in the Removal portion of this section.
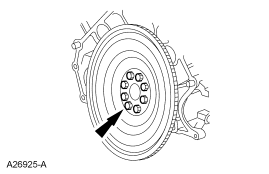
- Remove the bolts and the flexplate.
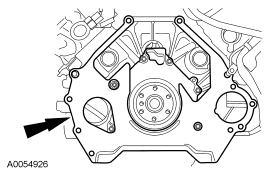
- Remove the engine/transmission spacer plate.
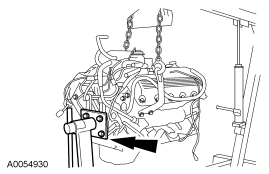
- Mount the engine on a suitable engine stand.
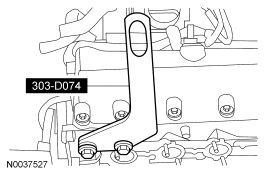
- Remove the LH and the RH lifting brackets.
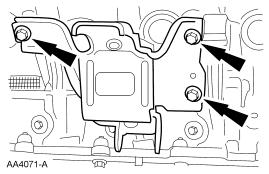
- Remove the bolts and the RH engine mount.
-
NOTE: LH shown, RH similar.
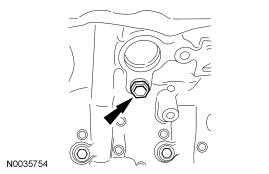
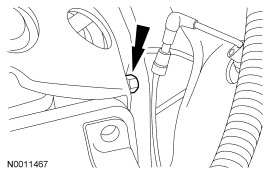
Remove the drain plugs from the engine block. Allow the coolant to completely drain.- Install the drain plugs when finished.
- To install, tighten to 20 Nm (15 lb-ft).
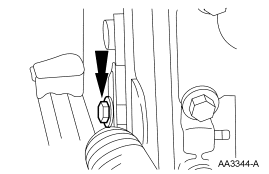
- Remove the bolt and the battery cables from the engine.
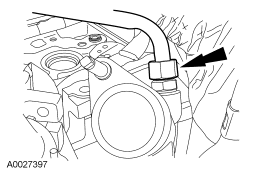
- Disconnect the exhaust gas recirculation (EGR) tube from the exhaust manifold.
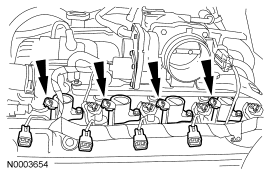
- Disconnect the 8 ignition coil electrical connectors.
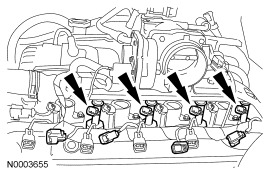
- Disconnect the 8 fuel injector electrical connectors.
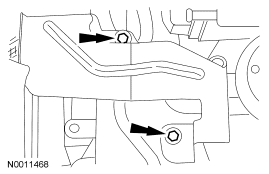
- Remove the bolts and the intake manifold shield.
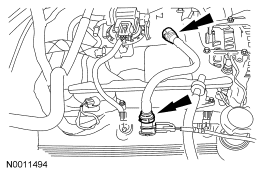
- Remove the crankcase ventilation tube.
- Remove the generator mounting bracket.
- Remove the bolts.
- Remove the bracket.
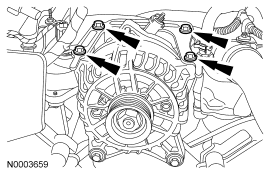
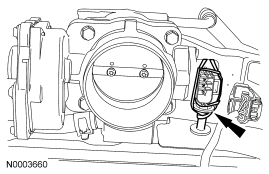
- Disconnect the throttle control and the throttle position (TP) sensor electrical connectors.
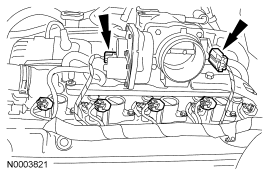
- Disconnect the generator electrical connector.
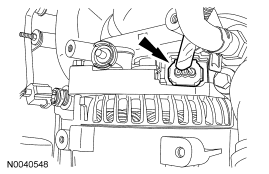
- Disconnect the cylinder head temperature (CHT) sensor electrical connector.
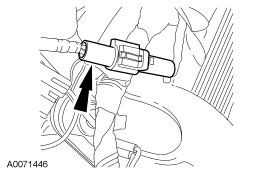
- Remove the generator wiring harness anchor from the LH front stud.
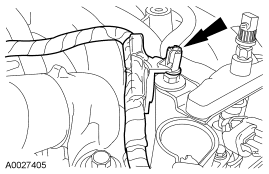
- Disconnect the ground wire from the RH rear stud.
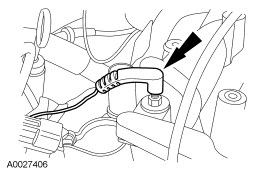
- Disconnect the camshaft position (CMP) sensor electrical connector.
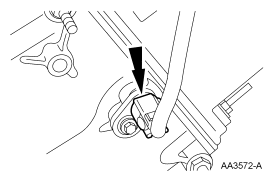
- Disconnect the radio ignition interference capacitor and remove the engine control sensor wiring.
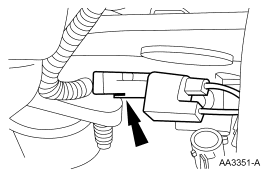
- Disconnect the fuel charging wiring from the crash bracket and the wiring support bracket and remove the harness from the engine.
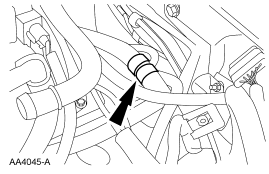
- Disconnect the EGR tube nut from the EGR system module.
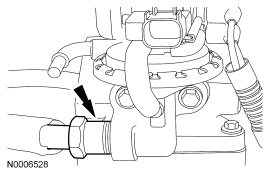
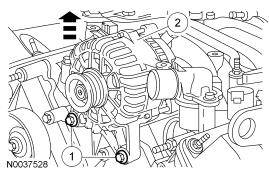
- Remove the generator.
- Remove the bolts.
- Remove the generator.
- Remove the intake manifold crash bracket bolt and prevent the bolt from contacting the cylinder head with a rubber band or tie strap.
- Remove the intake manifold crash bracket stud bolt.
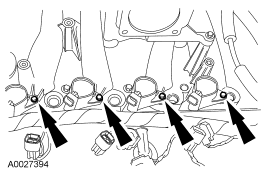
- Remove the 8 bolts and the 8 ignition coils.
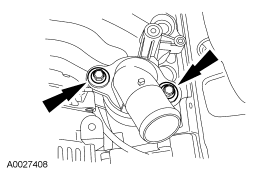
- Remove the 2 bolts and the coolant outlet adapter.
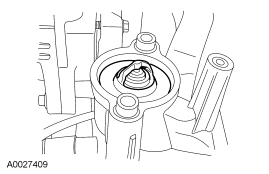
- Remove the thermostat.
- Remove the bolts and the intake manifold.
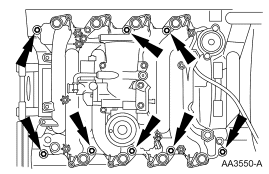
- Remove the intake manifold gaskets and discard.
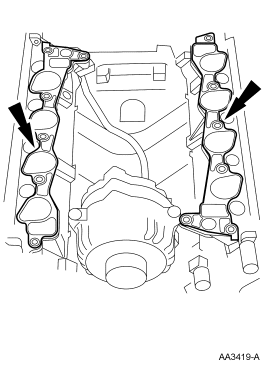
-
CAUTION: Do not use metal scrapers, wire brushes, power abrasive discs or other abrasive means to clean the sealing surfaces. These tools cause scratches and gouges which make leak paths.
Clean the sealing surfaces.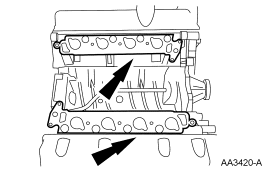
- Remove the coolant bypass tube.
- Remove the retaining nut.
- Remove the ground strap.
- Remove the coolant bypass tube.
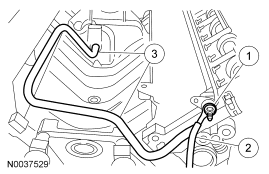
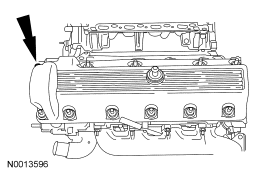
- Loosen the studs and bolts and remove the valve cover.
- Clean the mating surface and discard gasket.
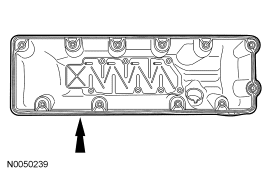
- Loosen the studs and bolts and remove the right valve cover.
- Clean the mating surface and discard the gasket.
-
NOTE: Use compressed air to remove any foreign material from the spark plug well before removing the spark plugs.
Remove the spark plugs.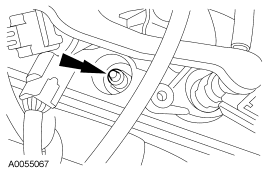
- Position the lobe of the camshaft up.
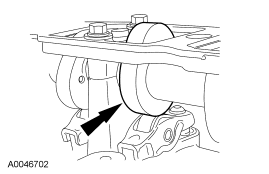
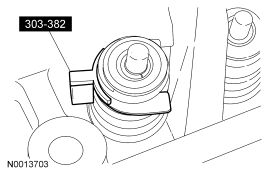
- Install the special tool between the valve spring coils to prevent valve stem seal damage.
-
NOTE: The roller followers are positional. Mark the followers for installation in their original locations.
Use the special tool to compress the valve springs and remove the camshaft roller followers.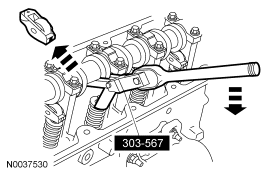
- Remove the bolt and the belt idler pulley.
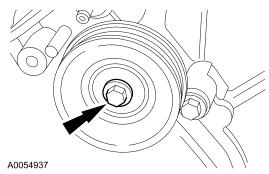
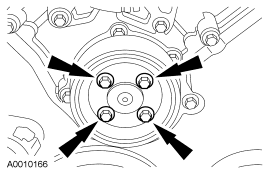
- Remove the coolant pump pulley.
- Remove the crankshaft pulley bolt.
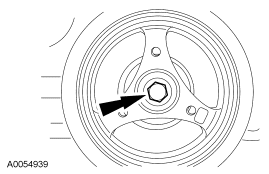
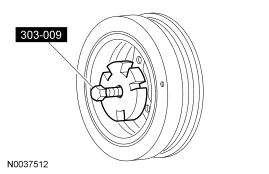
- Using the special tool, remove the crankshaft pulley.
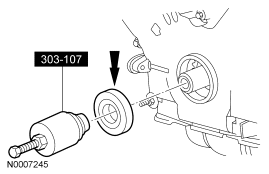
- Using the special tool, remove the crankshaft front oil seal.
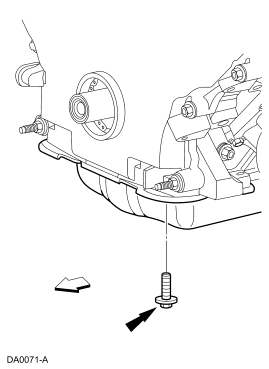
- Remove the front 4 oil pan bolts.
- Remove the fasteners.
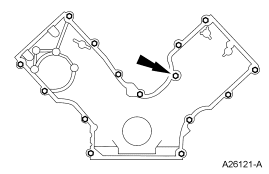
- Remove the engine front cover from the cylinder block.
- Clean the sealing surfaces and discard the gaskets.
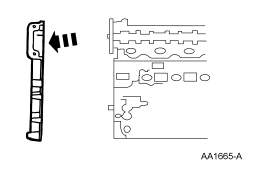
- Remove the crankshaft sensor ring.
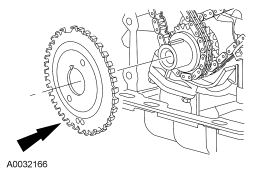
- Position the crankshaft with the keyway at the 12 o'clock position.
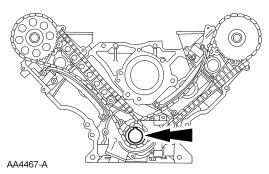
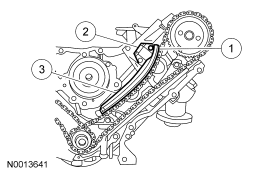
- Remove the timing chain tensioning system from both timing chains.
- Remove the bolts.
- Remove the timing chain tensioners.
- Remove the timing chain tensioner arms.
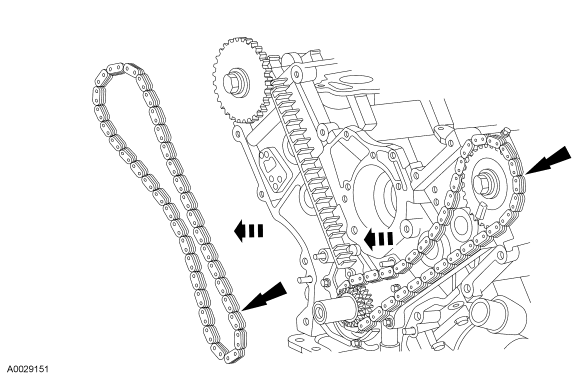
- Remove the LH and RH timing chains and the crankshaft sprocket.
- Remove the RH timing chain from the camshaft sprocket.
- Remove the RH timing chain from the crankshaft sprocket.
- Repeat for the LH timing chain and crankshaft sprocket.
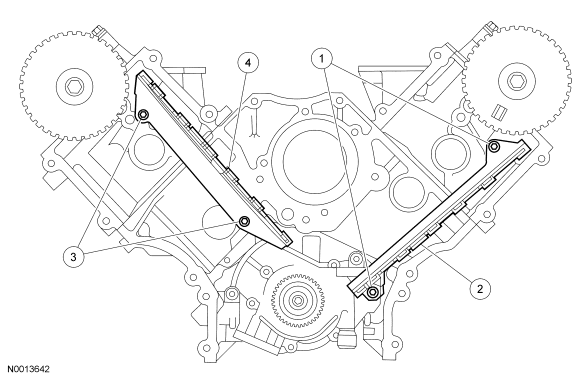
- Remove both timing chain guides.
- Remove the bolts.
- Remove the LH timing chain guide.
- Remove the bolts.
- Remove the RH timing chain guide.
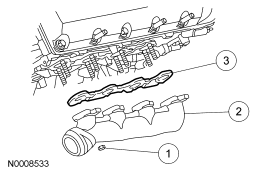
RH cylinder head
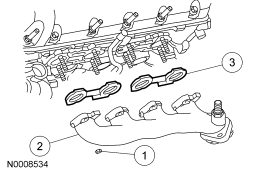
- Remove the RH exhaust manifold.
- Remove the nuts and discard.
- Remove the RH exhaust manifold.
- Remove and discard the RH exhaust manifold gasket.
LH cylinder head
- Remove the LH exhaust manifold.
- Remove the nuts and discard.
- Remove the LH exhaust manifold.
- Remove and discard the LH exhaust manifold gaskets.
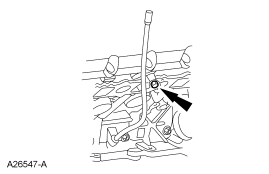
- Remove the bolt and the oil level indicator tube.
Both cylinder heads
- Clean and inspect the exhaust manifolds. For additional information, refer to Section 303-00.
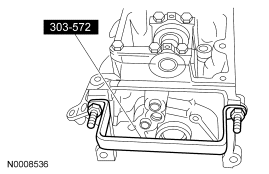
- Install the special tool on both ends of the cylinder head.
-
NOTE: The hydraulic lash adjusters must be reinstalled in their original locations. Record the hydraulic lash adjuster locations.
Remove the hydraulic lash adjusters.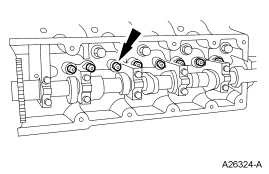
RH cylinder head
-
CAUTION: The cylinder head must be cool before removing it from the engine. Cylinder head warpage can result if a warm or hot cylinder head is removed.
CAUTION: Place clean shop towels over exposed engine cavities. Carefully remove the towels so foreign material is not dropped into the engine.
CAUTION: The cylinder head bolts must be discarded and new bolts installed. They are tighten-to-yield designed and cannot be reused.
CAUTION: Do not use metal scrapers, wire brushes, power abrasive discs or other abrasive means to clean the sealing surfaces. These tools cause scratches and gouges that make leak paths. Use a plastic scraping tool to remove all traces of the head gasket.
CAUTION: Aluminum surfaces are soft and can be scratched easily. Never place the cylinder head gasket surface, unprotected, on a bench surface.
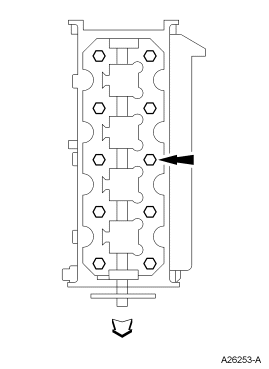
Remove the bolts and the RH cylinder head.- Discard the cylinder head gasket.
- Discard the cylinder head bolts.
LH cylinder head
-
CAUTION: The cylinder head must be cool before removing it from the engine. Cylinder head warpage can result if a warm or hot cylinder head is removed.
CAUTION: Place clean shop towels over exposed engine cavities. Carefully remove the towels so foreign material is not dropped into the engine.
CAUTION: The cylinder head bolts must be discarded and new bolts installed. They are tighten-to-yield designed and cannot be reused.
CAUTION: Do not use metal scrapers, wire brushes, power abrasive discs or other abrasive means to clean the sealing surfaces. These tools cause scratches and gouges that make leak paths. Use a plastic scraping tool to remove all traces of the head gasket.
CAUTION: Aluminum surfaces are soft and can be scratched easily. Never place the cylinder head gasket surface, unprotected, on a bench surface.
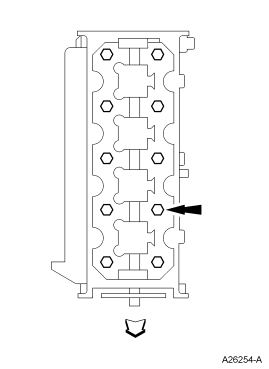
Remove the bolts and the LH cylinder head.- Discard the cylinder head gasket.
- Discard the cylinder head bolts.
Both cylinder heads
-
CAUTION: Do not use metal scrapers, wire brushes, power abrasive discs or other abrasive means to clean the sealing surfaces. These tools cause scratches and gouges that make leak paths. Use a plastic scraping tool to remove all traces of the head gasket.
CAUTION: Observe all warnings or cautions and follow all application directions contained on the packaging of the silicone gasket remover and the metal surface prep.
NOTE: If there is no residual gasket material present, metal surface prep can be used to clean and prepare the surfaces.
Clean the cylinder head-to-cylinder block mating surfaces of both the cylinder head and the cylinder block.- Remove any large deposits of silicone or gasket material with a plastic scraper.
- Apply silicone gasket remover, following package directions, and allow to set for several minutes.
- Remove the silicone gasket remover with a plastic scraper. A second application of silicone gasket remover may be required if residual traces of silicone or gasket material remain.
- Apply metal surface prep, following package directions, to remove any remaining traces of oil or coolant, and to prepare the surfaces to bond with the new gasket. Do not attempt to make the metal shiny. Some staining of the metal surfaces is normal.
-
NOTE: The straightedge used must be flat within 0.0051 mm (0.0002 in) per foot of tool length.
Support the cylinder head on a bench with the head gasket side up. Inspect all areas of the deck face with a straightedge, paying particular attention to the oil pressure feed area. The cylinder head must not have depressions deeper than 0.0254 mm (0.001 in) across a 38.1 mm (1.5 in) square area, or scratches more than 0.0254 mm (0.001 in).
Parts & tools for this job For 2007 Lincoln Town Car
- PARTEngine gasket setSearch: Lincoln Town Car 2007 engine gasket set
- TOOLTorque wrenchSearch: 3/8 inch torque wrench
- TOOLFeeler gauge setSearch: feeler gauge set
Links open Amazon search results in a new tab. As an Amazon Associate I earn from qualifying purchases.