
3 L4-2.0L (2007)
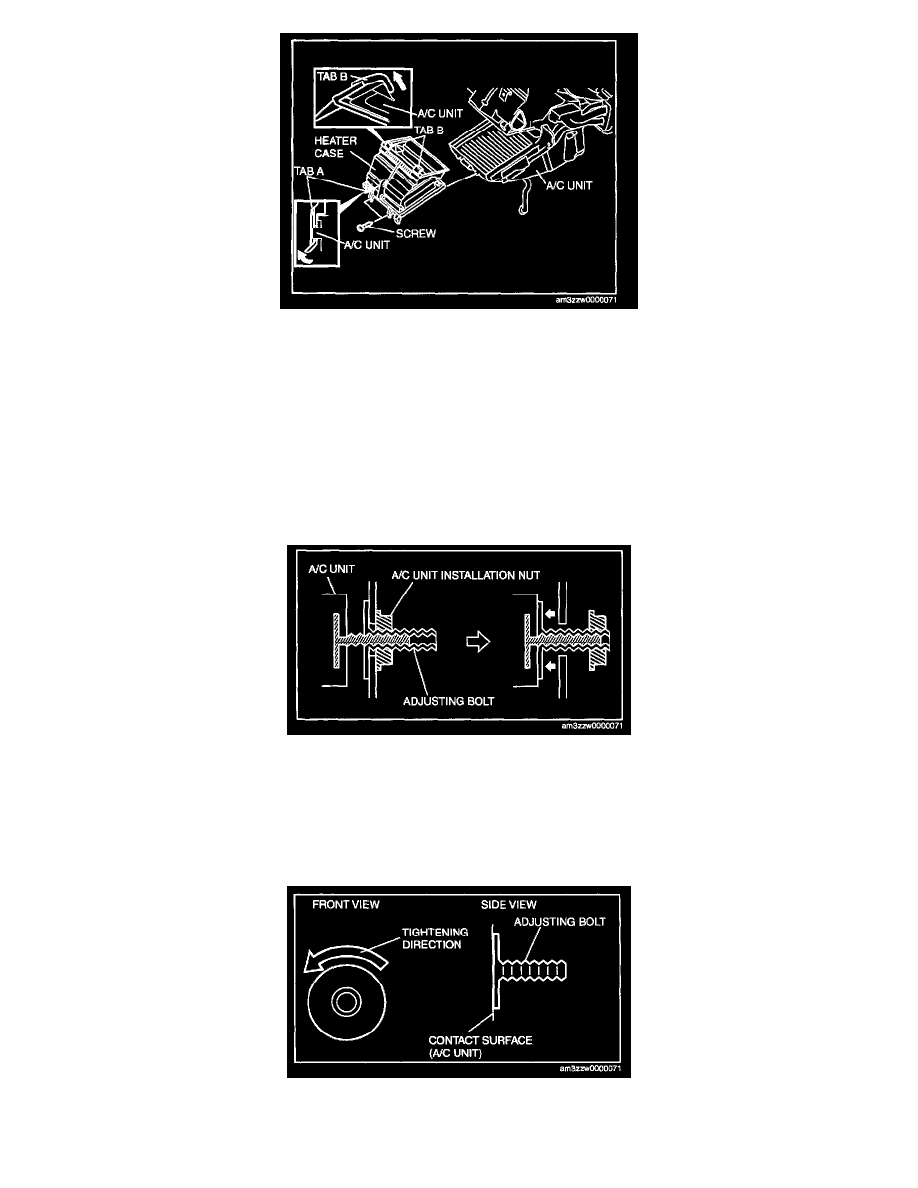
14. Remove the heater case.
1. Remove the screws.
2. Pull up tab A in the direction shown by the arrow in the figure and remove it from the A/C unit.
3. Pull up tabs B in the direction shown by the arrow in the figure and remove it from the A/C unit.
15. Remove the nuts and bolts for installing the A/C unit to the dashboard.
16. Install in the reverse order of removal.
17. Inspect for engine coolant leakage.
18. Perform the refrigerant system performance test. See: Testing and Inspection/Component Tests and General Diagnostics/Refrigerant System
Performance Test (See REFRIGERANT SYSTEM PERFORMANCE TEST.)
A/C Unit Installation Nut Removal Note
NOTE: If the adjusting bolt rotates when removing the A/C unit nut, keep rotating the nut. The adjusting bolt stops rotating when it contacts the
A/C unit and the nut can be removed.
A/C Unit Installation Note
1. When replacing the A/C unit or evaporator, add compressor oil to the refrigerant cycle.
Supplemental oil amount (approx. quantity) : 25 ml (25 cc, 0.8 ft. oz)
2. Tighten the A/C unit adjusting bolt until it lightly touches the A/C unit.
Drain Hose Installation Note