
3 L4-2.5L (2010)
Engine Oil Control Valve: Testing and Inspection
OIL CONTROL VALVE (OCV) INSPECTION [LF, L5]
Coil Resistance Inspection
1. Remove the battery cover. See: Starting and Charging/Battery/Service and Repair/Removal and Replacement
2. Disconnect the negative battery cable.
3. Remove the plug hole plate. See: Service and Repair/Removal and Replacement/Plug Hole Plate Removal/Installation
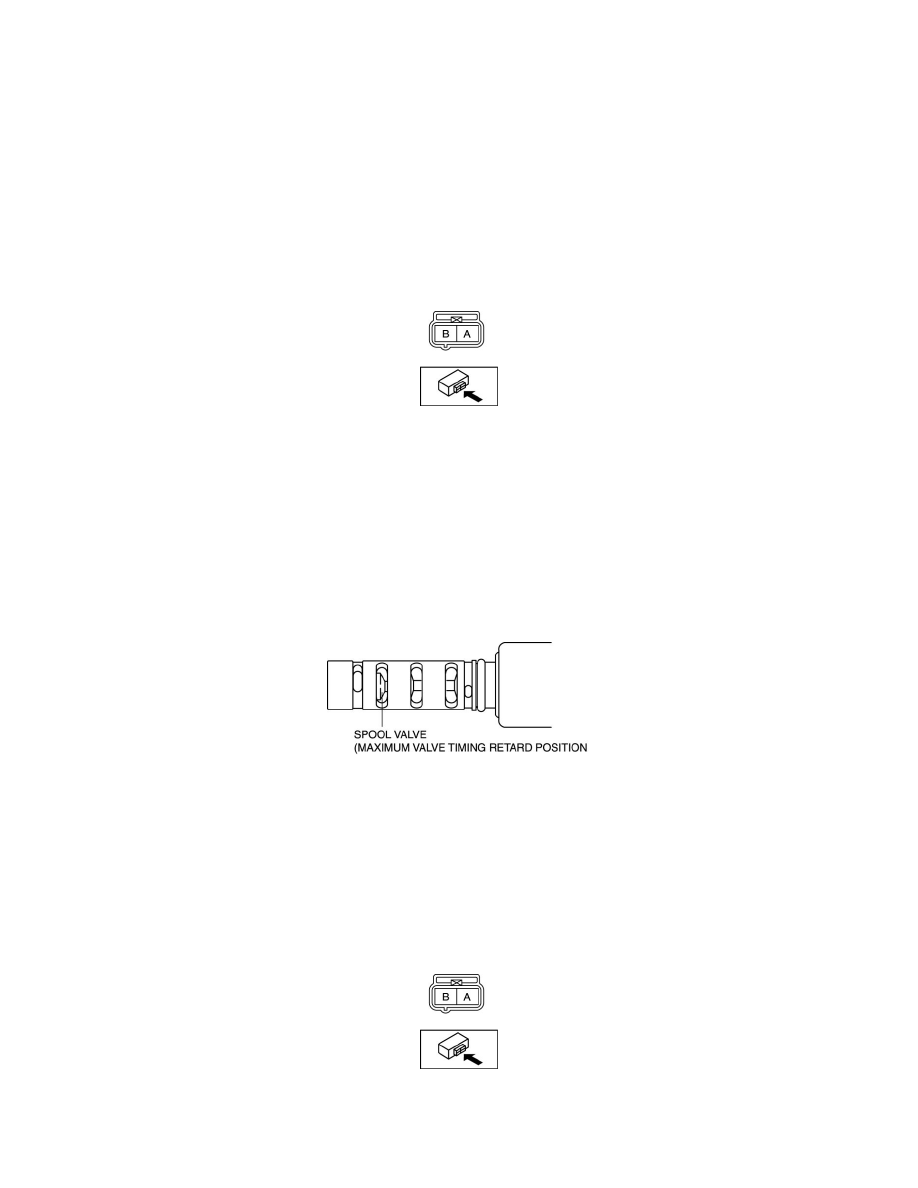
4. Disconnect the OCV connector.
5. Measure the resistance between terminals A and B using an ohmmeter.
OCV coil resistance
-
6.9-7.9 ohms [20°C {68°F}]
-
If not as specified, replace the OCV. See: Service and Repair
6. Install in the reverse order of removal.
Spool Valve Operation Inspection
1. Remove the OCV. See: Service and Repair
2. Verify that the spool valve in the OCV is in the maximum valve timing retard position as indicated in the figure.
-
If not as specified, replace the OCV. See: Service and Repair
3. Verify that the battery is fully charged. See: Starting and Charging/Battery/Testing and Inspection
-
If not as specified, recharge the battery. See: Starting and Charging/Battery/Service and Repair/Procedures
NOTE:
-
When applying battery positive voltage between the OCV terminals, the connection can be either of the following:
-
Positive battery cable to terminal A, negative battery cable to terminal B
-
Positive battery cable to terminal B, negative battery cable to terminal A
4. Apply battery positive voltage between the OCV terminals and verify that the spool valve operates and moves to the maximum valve timing
advance position.