
3 L4-2.5L (2010)
Air Door Actuator / Motor: Service and Repair
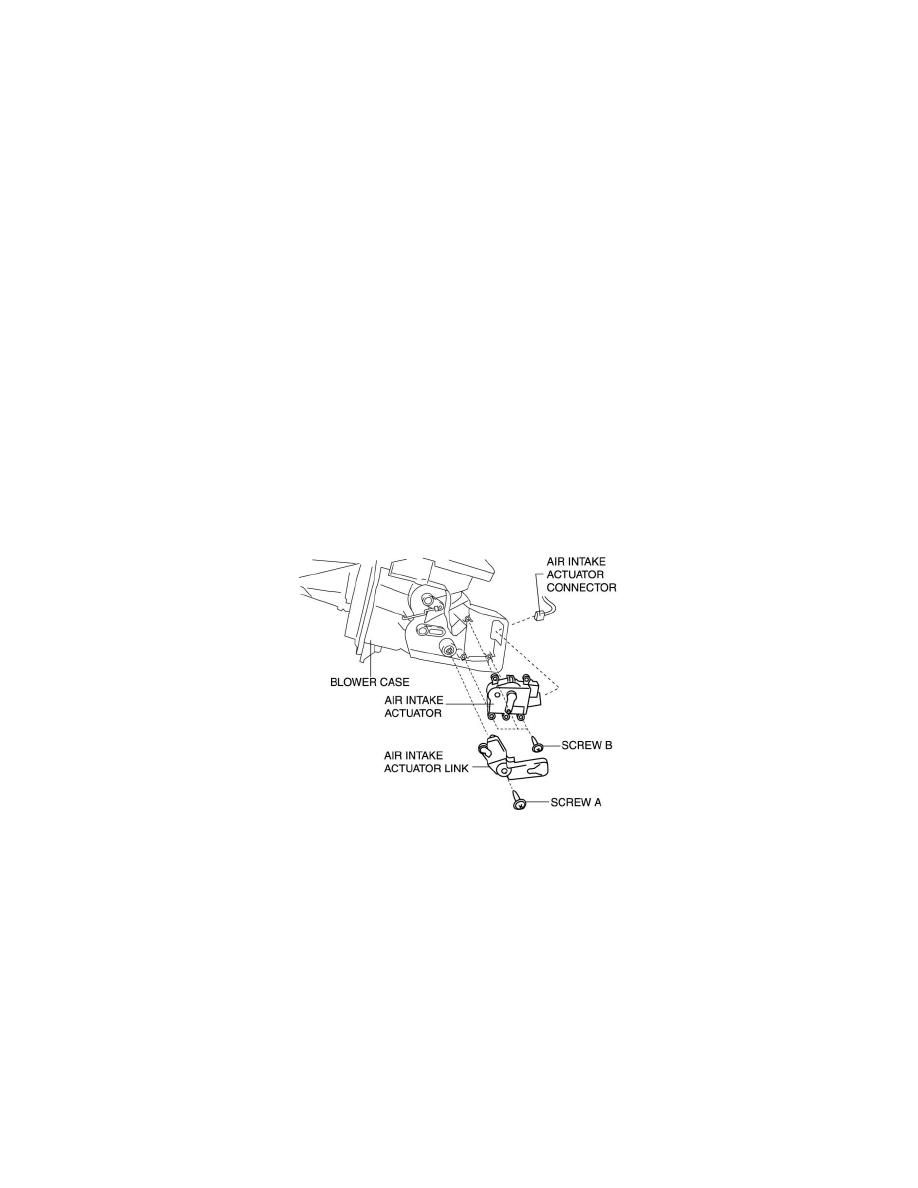
Air Intake Actuator Removal/Installation - Manual Air Conditioner
AIR INTAKE ACTUATOR REMOVAL/INSTALLATION [MANUAL AIR CONDITIONER]
1. Set the air intake mode to FRESH.
2. Disconnect the negative battery cable.
3. Remove the following parts:
a. Front scuff plate (Passenger side) See: Body and Frame/Interior Moulding / Trim/Scuff Plate/Service and Repair/Front Scuff Plate
Removal/Installation
b. Front side trim (Passenger side) See: Body and Frame/Interior Moulding / Trim/Trim Panel/Service and Repair/Front Side Trim
Removal/Installation
c. Dashboard under cover See: Body and Frame/Interior Moulding / Trim/Dashboard / Instrument Panel/Service and Repair/Removal and
Replacement/Dashboard Under Cover Removal/Installation
d. Glove compartment See: Body and Frame/Interior Moulding / Trim/Glove Compartment/Service and Repair
e. Lower panel (Passenger side) See: Body and Frame/Interior Moulding / Trim/Dashboard / Instrument Panel/Service and Repair/Removal and
Replacement/Lower Panel Removal/Installation
f.
Shower duct (Passenger side) See: Evaporator Core/Service and Repair/Removal and Replacement
4. Disconnect the harness clip from the blower case.
5. Disconnect the air intake actuator connector.
6. Remove the blower case. See: Blower Motor/Service and Repair/Blower Motor Removal - Manual Air Conditioner See: Blower Motor/Service
and Repair/Blower Motor Installation - Manual Air Conditioner
7. Remove the screw A.
8. Remove the air intake actuator link.
9. Remove the screw B.
10. Remove the air intake actuator.
11. Install in the reverse order of removal.