
3 L4-2.5L (2010)
Driver/Vehicle Information Display: Service and Repair
Information Display Removal/Installation
INFORMATION DISPLAY REMOVAL/INSTALLATION
1. Disconnect the negative battery cable.
2. Remove the following parts:
a. Upper column cover See: Steering and Suspension/Steering/Steering Column/Steering Column Cover/Service and Repair
b. Instrument cluster See: Instrument Cluster / Carrier/Service and Repair/Removal and Replacement
c. Center panel See: Dashboard / Instrument Panel/Service and Repair/Removal and Replacement/Center Panel Removal/Installation
d. Audio unit See: Accessories and Optional Equipment/Radio, Stereo, and Compact Disc/Service and Repair/Removal and Replacement/Audio
Unit Removal/Installation
e. Center cover See: Dashboard / Instrument Panel/Service and Repair/Removal and Replacement/Center Cover Removal/Installation
f.
Dashboard upper panel See: Dashboard / Instrument Panel/Service and Repair/Removal and Replacement/Dashboard Upper Panel
Removal/Installation
g. Hole cover See: Dashboard / Instrument Panel/Service and Repair/Removal and Replacement/Hole Cover Removal/Installation
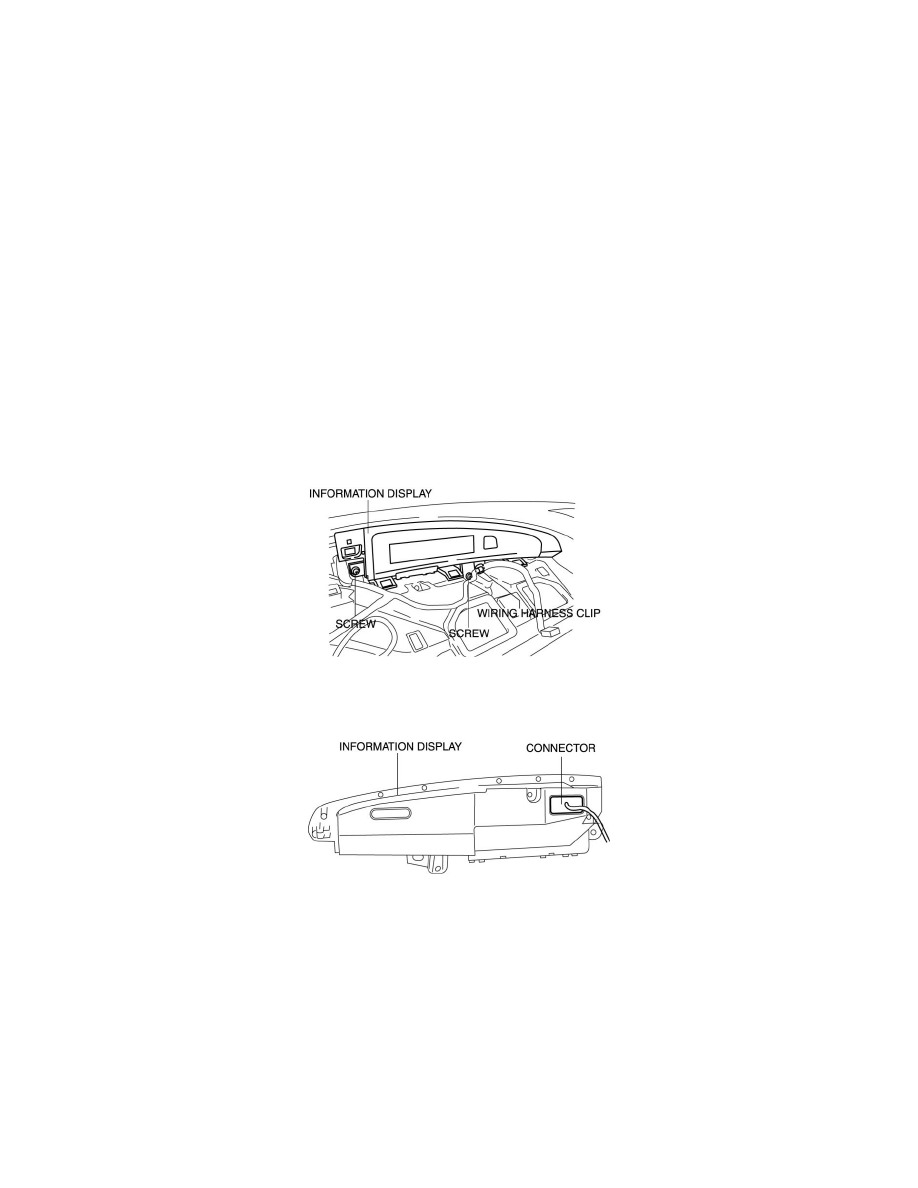
3. Remove the screws and wiring harness clip.
4. Remove the information display.
5. Disconnect the connector.
6. Install in the reverse order of removal.