
6 L4-2.5L (2010)
Radiator Support: Service and Repair
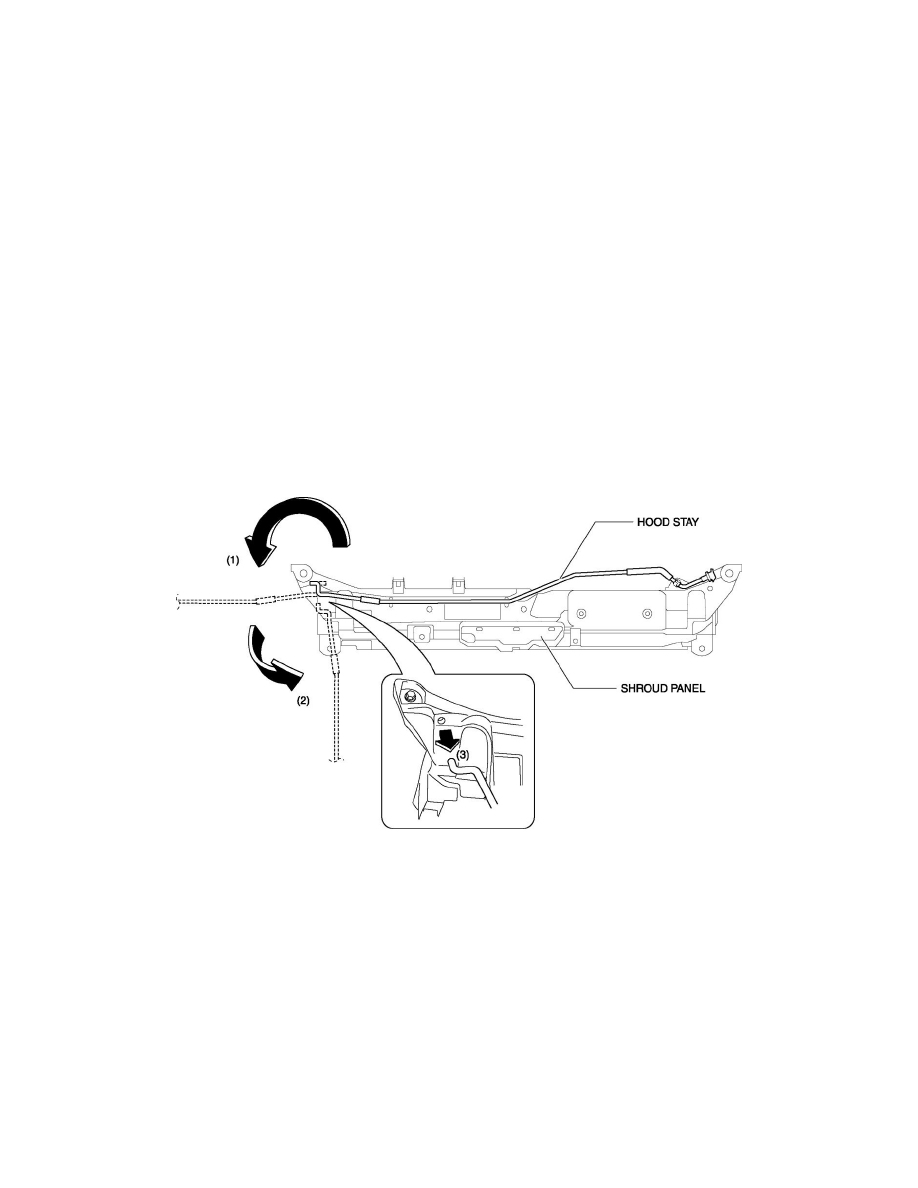
SHROUD PANEL REMOVAL/INSTALLATION
CAUTION:
-
Because the shroud panel is installed to the bumper reinforcement, support the shroud panel using a jack before removing the bumper
reinforcement so as not to apply excessive force to the shroud panel.
-
Since the servicing is performed with the hood open, secure the hood using a piece of wood to prevent it from falling.
1. Disconnect the negative battery cable.
2. Remove the following parts:
a. Front bumper See: Bumper/Front Bumper/Service and Repair/Removal and Replacement/Front Bumper Removal/Installation
b. Front combination lights See: Lighting and Horns/Headlamp/Service and Repair
c. Front energy-absorbing form See: Bumper/Front Bumper/Service and Repair/Removal and Replacement/Energy-Absorbing Form
Removal/Installation
d. Seal plate See: Bumper/Front Bumper/Service and Repair/Removal and Replacement/Seal Plate Removal/Installation
e. Front bumper reinforcement See: Bumper/Front Bumper/Front Bumper Reinforcement/Service and Repair
f.
Hood latch See: Doors, Hood and Trunk/Hood/Hood Latch Release/Service and Repair
3. Rotate the hood stay in the direction of the arrow (1),(2), then remove the hood stay in the direction or the arrow (3).
4. Remove the hood stay from the shroud panel, wrap the hood stay with protective tape, and install it to the shroud side member to support the hood.