
6 L4-2.5L (2010)
Crankshaft Main Bearing Seal: Service and Repair
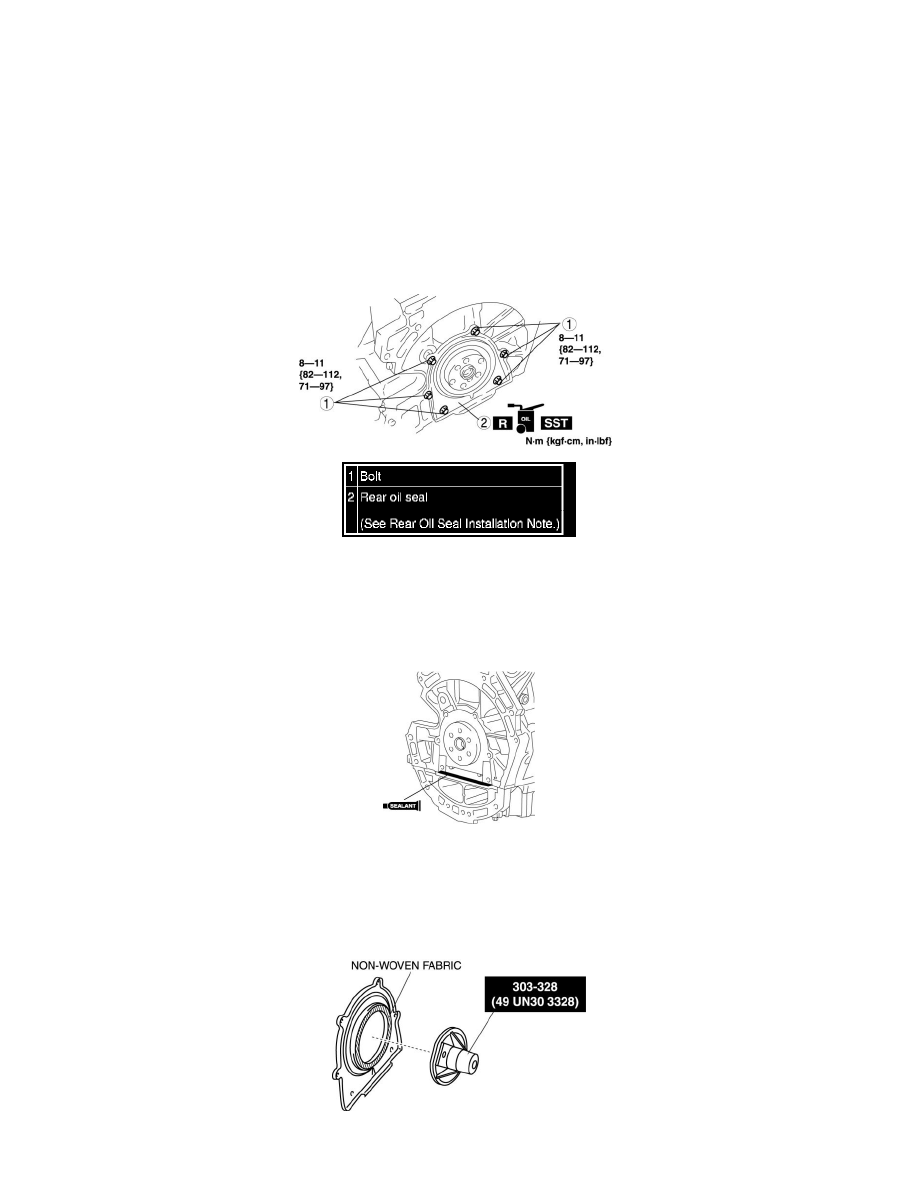
REAR OIL SEAL REPLACEMENT [L5]
1. Remove the transaxle. (See See: Transmission and Drivetrain/Automatic Transmission/Transaxle/Service and Repair/Removal and
Replacement/Automatic Transaxle Removal/Installation - FS5A-EL (ATX).) (See See: Transmission and Drivetrain/Manual
Transmission/Transaxle/Service and Repair/Removal and Replacement/Manual Transaxle Removal/Installation - G66M-R (MTX).)
2. Remove the drive plate (ATX) or the flywheel (MTX). (See See: Transmission and Drivetrain/Flex Plate/Service and Repair/Drive Plate
Removal/Installation - FS5A-EL (ATX).) (See See: Transmission and Drivetrain/Clutch/Service and Repair (MTX).)
3. Remove in the order indicated in the table.
4. Install in the reverse order of removal.
Rear Oil Seal Installation Note
CAUTION:
-
Install the rear oil seal before the applied silicone sealant starts to harden.
1. Apply silicone sealant to the mating faces as shown in the figure.
Thickness
-
2.2-3.2 mm {0.09-0.12 in}
2. Apply clean engine oil to the new oil seal lip.
3. Install the SST to the non-woven fabric side of the rear oil seal.
4. From the back side of the rear oil seal, verify that there is no damage or separation in the lip area of the rear oil seal.