
6 L4-2.5L (2010)
28. With No.1 cylinder cam aligned at TDC of the compression stroke, install the variable valve timing actuator and the camshaft on the intake air side
as a single unit.
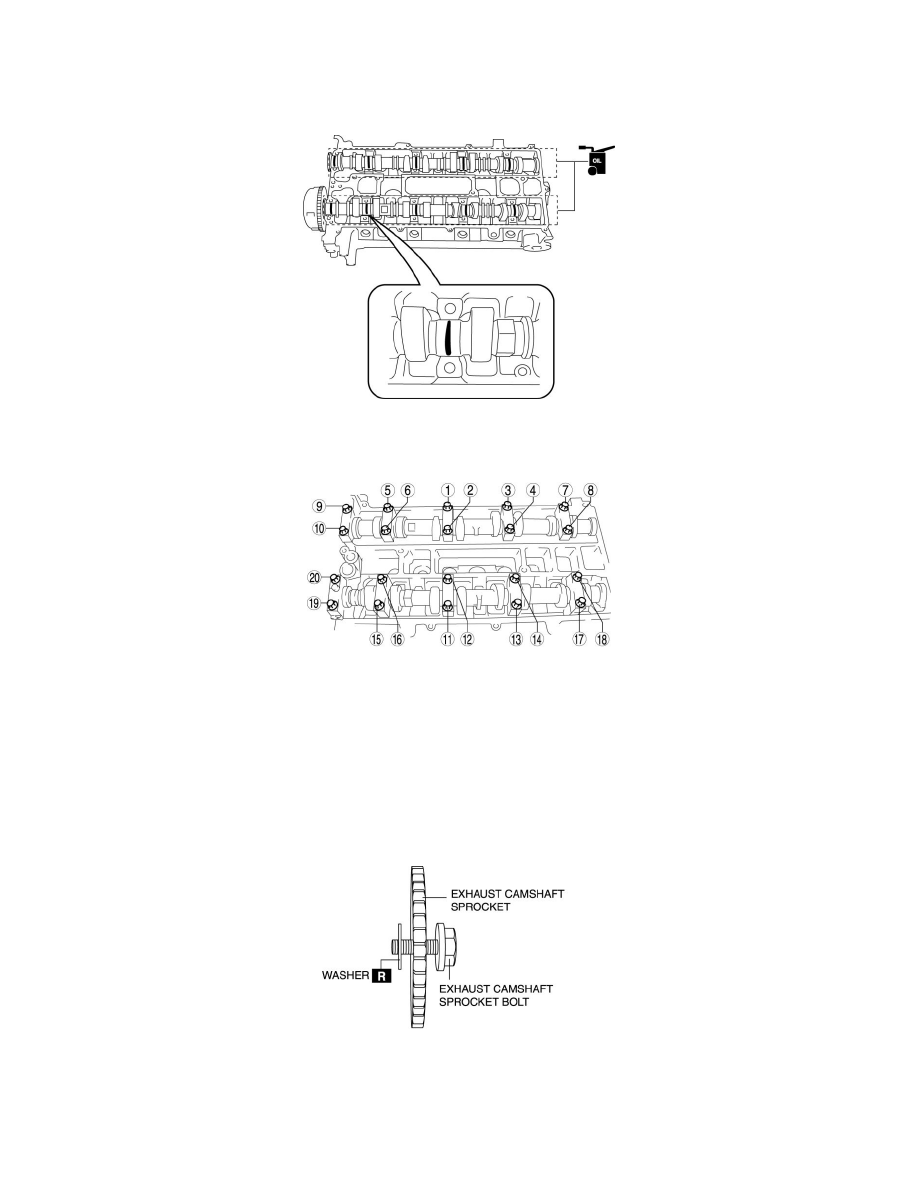
29. Apply the gear oil (SAE No.90 or equivalent) to each journal of the camshaft as shown in the figure.
30. Temporarily tighten the camshaft cap bolts evenly in 2-3 steps.
31. Tighten the camshaft cap bolts in the order shown in the following two steps.
Tightening procedure
-
5.0-9.0 Nm {51-91 kgf-cm, 45-79 in-lbf}
-
14-17 Nm {1.5-1.7 kgf-m, 11-12 ft-lbf
32. Install the OCV. See: Engine Lubrication/Engine Oil Control Valve/Service and Repair
CAUTION:
-
Install a washer to the fourth or fifth thread of the exhaust camshaft sprocket bolt being careful not to drop the washer.
-
Do not tighten the camshaft sprocket bolt at this stage. Verify the valve timing before performing the bolt tightening.
33. Install the exhaust camshaft sprocket bolt, exhaust camshaft sprocket, and a new washer as a single unit.
34. Install the SST on the camshaft as shown in the figure.