
6 L4-2.5L (2010)
6. Inspect for leakage again.
-
If there is no leakage after tightening the joint, go to next step.
-
If there is still a leakage at the same joint, discharge the refrigerant and then repair the joint. Repeat the charging procedure from evacuation.
WARNING:
-
If charging the system with refrigerant using service cans, running the engine with the high-pressure side valve open is dangerous. Pressure
within the service cans will increase and the cans could explode, scattering metal fragments and liquid refrigerant that can seriously injure you.
Therefore, do not open the high-pressure side valve while the engine is running.
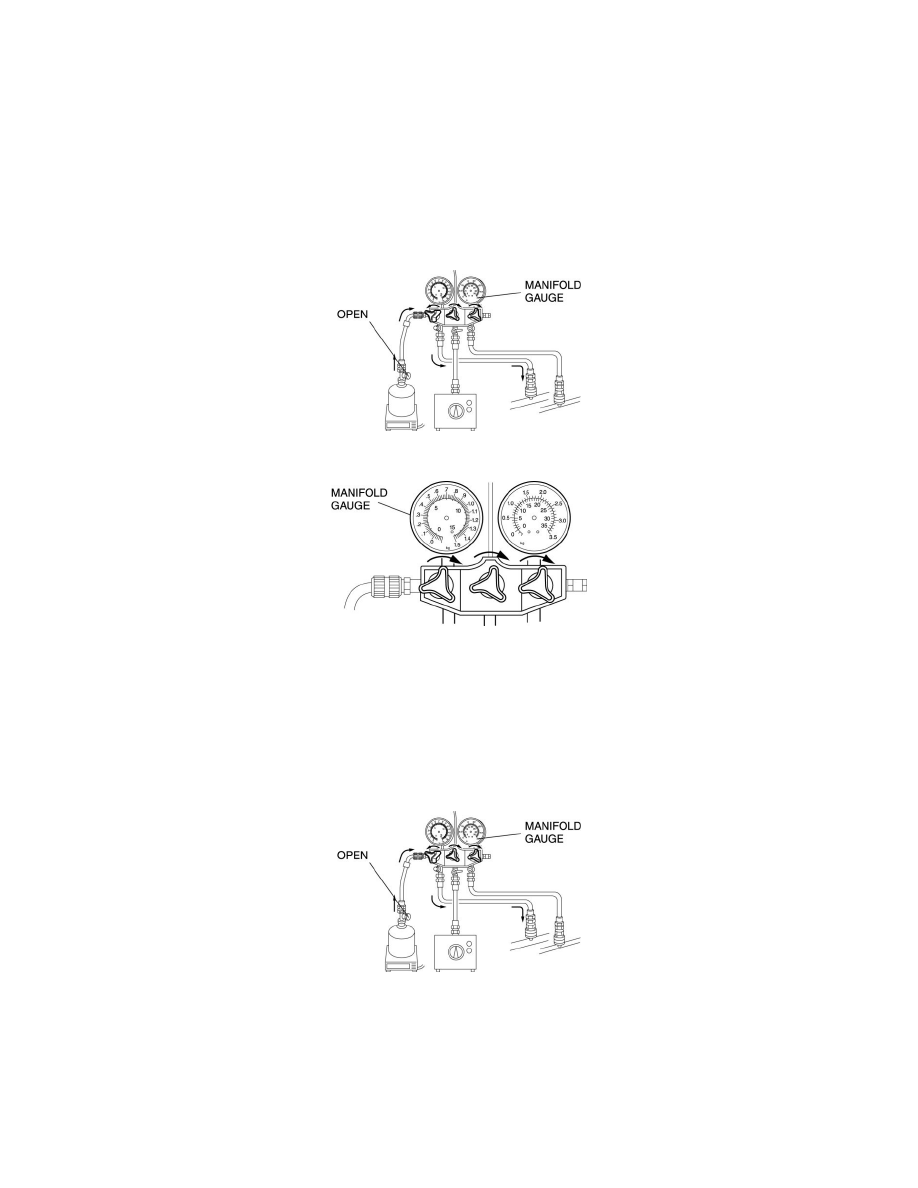
7. Open the low-pressure side valve of the manifold gauge and charge with refrigerant until the weight of refrigerant tank has decreased 250 g {8.82
oz} from the amount in Step 2.
8. Close the low-pressure side valve of the manifold gauge.
WARNING:
-
If charging the system with refrigerant using service cans, running the engine with the high-pressure side valve open is dangerous. Pressure
within the service cans will increase and the cans could explode, scattering metal fragments and liquid refrigerant that can seriously injure you.
Therefore, do not open the high-pressure side valve while the engine is running.
9. Start the engine and actuate the A/C compressor.
10. Open the low-pressure side valve of the manifold gauge and charge with refrigerant until the weight of the refrigerant tank has decreased regular
amount from the amount in Step 2.
11. Close the low-pressure side valve of the manifold gauge and the valve of the refrigerant tank.
12. Stop the engine and A/C compressor.
Leak Test
1. Inspect for leakage using the gas leak tester.
-
If there is no leakage, go to Step 3.