
6 L4-2.5L (2010)
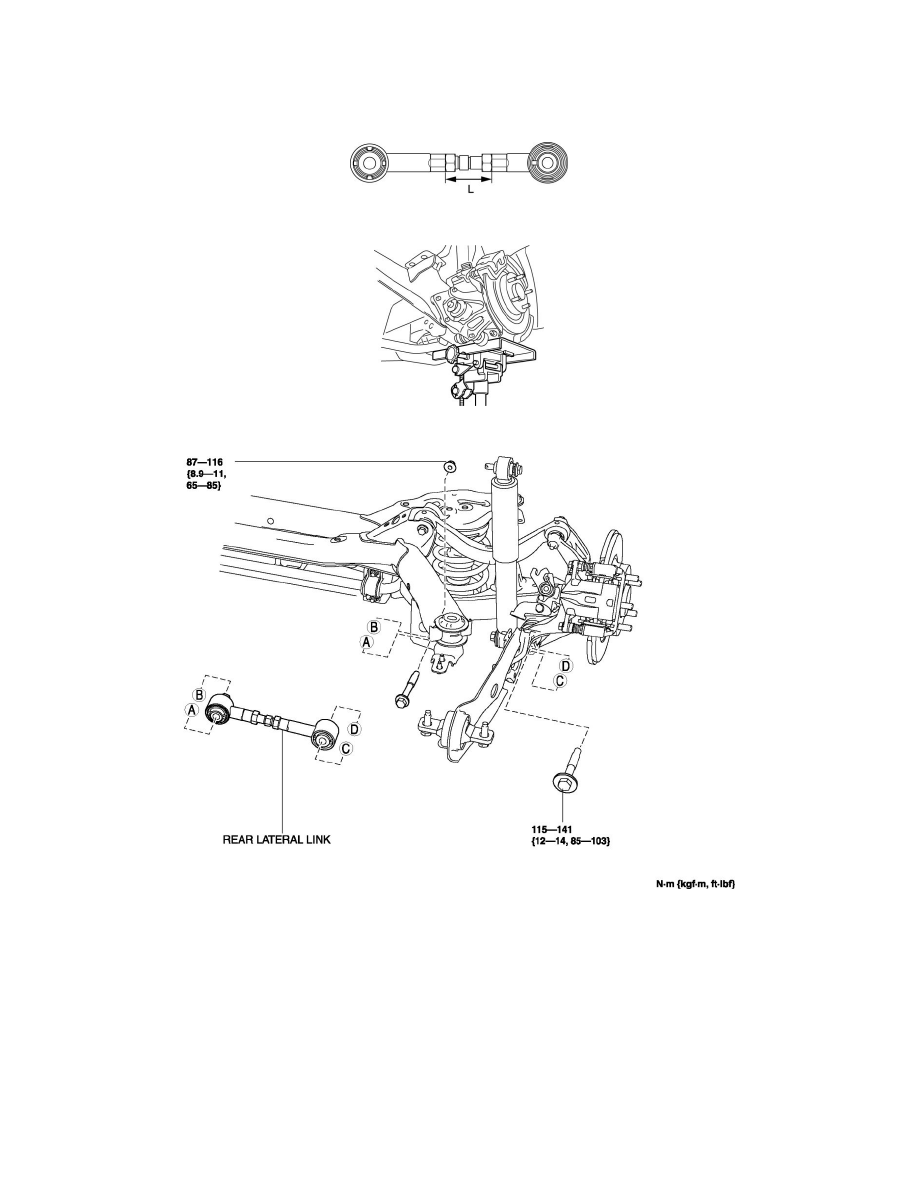
Lateral Stabilizer Rod: Service and Repair
REAR LATERAL LINK REMOVAL/INSTALLATION
1. Measure the length L shown in the figure for proper installation.
2. Jack up the vehicle in an unloaded condition, and support the trailing link using a jack.
3. Remove the rear lateral link.
4. Temporarily loosen a locknut of the rear lateral link.
5. Temporarily install the rear lateral link.
6. Tighten the rear lateral link to the specified torque.
7. Adjust length L to the same as the length measured before removal.
Locknut tightening torque
-
61-98 Nm {6.3-9.9 kgf-m, 45-72 ft-lbf}
8. Inspect the rear wheel alignment. See: Alignment/Service and Repair/Rear Wheel Alignment