
6 L4-2.5L (2010)
Valve Body: Removal and Replacement
Control Valve Body Removal/Installation - AW6A-EL
CONTROL VALVE BODY REMOVAL/INSTALLATION [AW6A-EL]
On-Vehicle Removal
WARNING:
-
A hot transaxle and ATF can cause severe burns. Turn off the engine and wait until they are cool.
-
Using compressed air can cause dirt and other particles to fly out, causing injury to the eyes. Wear protective eyeglasses whenever using
compressed air.
1. Disconnect the negative battery cable.
2. Remove the air cleaner component. See: Engine, Cooling and Exhaust/Engine/Intake Manifold/Service and Repair
3. Remove the air cleaner bracket. See: Engine, Cooling and Exhaust/Engine/Intake Manifold/Service and Repair
4. Remove the aerodynamic under cover NO.1. See: Body and Frame/Splash Guard/Service and Repair/Aerodynamic Under Cover No.1
Removal/Installation
5. Clean the transaxle exterior throughout with a steam cleaner or cleaning solvents.
6. Drain the ATF into a separate suitable container. See: Service and Repair/Procedures/Automatic Transaxle Fluid (ATF) Replacement -
AW6A-EL
7. Disconnect the oil hose from the transaxle.
8. Remove the oil pipe. See: Transmission Cooler/Service and Repair/Removal and Replacement/Oil Cooler Removal/Installation - AW6A-EL
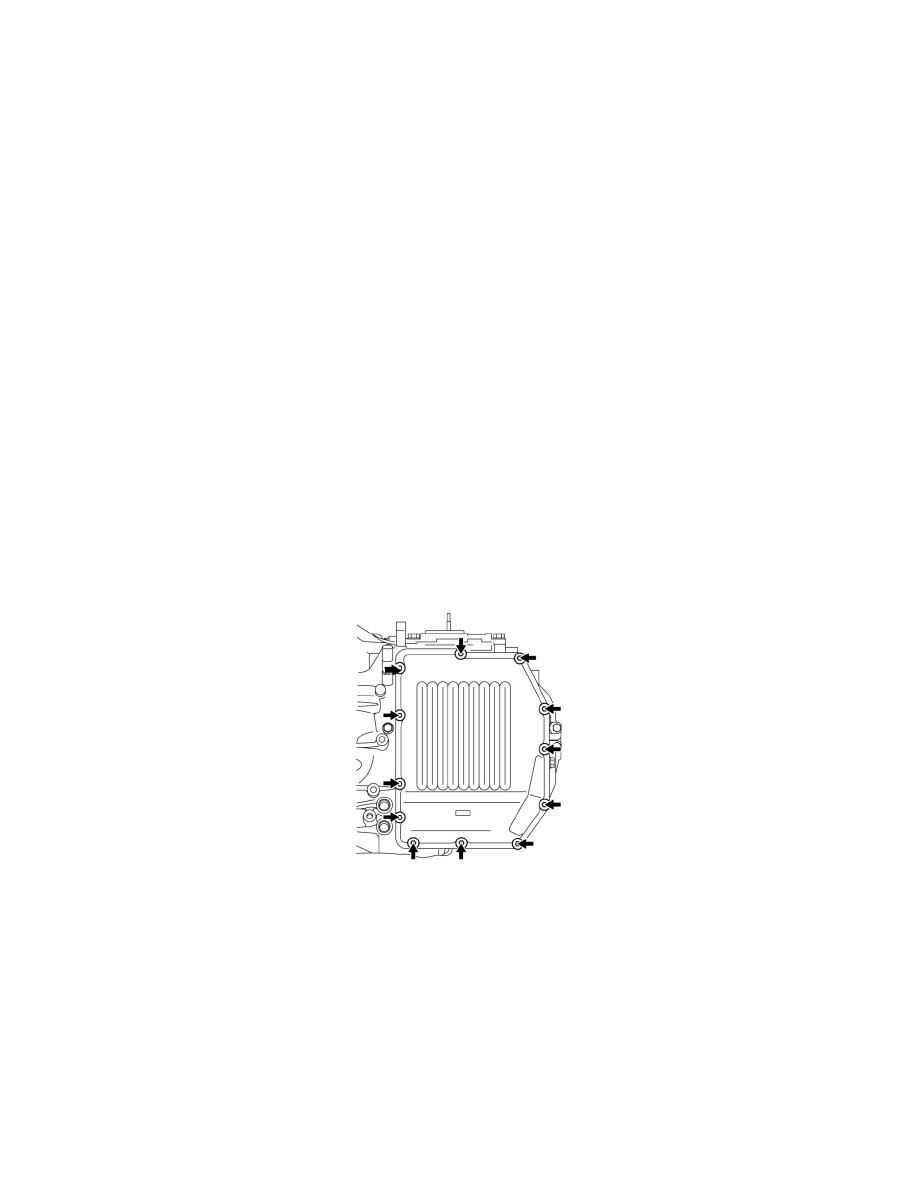
9. Remove the control valve body cover installation bolts.
CAUTION:
-
Do not damage the fitting surface of the transaxle case and the control valve body cover.
-
Do not deform the control valve body cover.
10. Using a plastic hammer, tap the control valve body cover to remove it.