
Flywheel: Specifications (page 5 of 6)
- Make
- Mazda
- Model
- 6
- Engine
- V6-3.7L
- Year
- 2009
- Section
- Flywheel
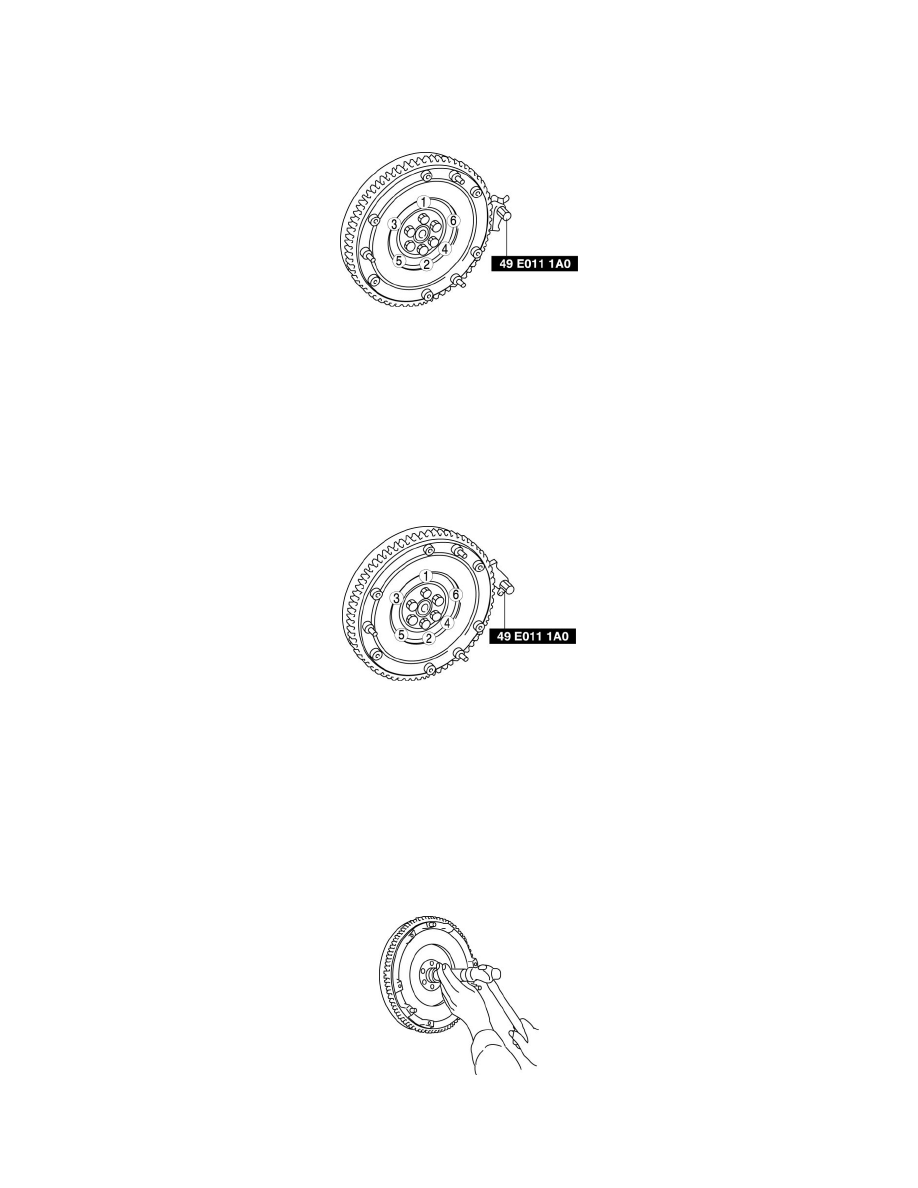
1. Hold the flywheel using the SST.
2. Remove the bolts evenly and gradually in a crisscross pattern.
3. Remove the flywheel.
Flywheel Installation Note
1. Clean the crankshaft thread holes.
2. Install the flywheel to the crankshaft.
3. Hand-tighten the new flywheel lock bolts.
4. Install the SST to the flywheel.
5. Gradually tighten the flywheel lock bolts in a crisscross pattern.
6. Tighten the lock bolts in three steps in the order shown in the figure.
Tightening torque
-
Tighten the lock bolts in three steps.
-
1st: 46-54 Nm {4.7-5.5 kgf-m, 34-39 ft-lbf}
-
2nd: 76-84 Nm {7.8-8.5 kgf-m, 57-61 ft-lbf}
-
3rd: 108-116 Nm {11.1-11.8 kgf-m, 80-85 ft-lbf}
Pilot Bearing Installation Note
1. Install the pilot bearing using the corresponding 20 mm {0.79 in} side of a Snap-on brand millimeter size bushing driver set A160M adapter
A160M7 (20-22 mm {0.79-0.86 in}) or substitution tool.
Substitution tool
-
Outer diameter: 21 mm {0.83 in}
-
Inner diameter: 19 mm {0.75 in}
Pinch or Ctrl + scroll to zoom. Double-tap to reset.
Parts & tools for this job For 2009 Mazda 6 3.7L
Links open Amazon search results in a new tab. As an Amazon Associate I earn from qualifying purchases.