
626 V6-2496cc 2.5L DOHC (1995)
Control Arm: Service and Repair
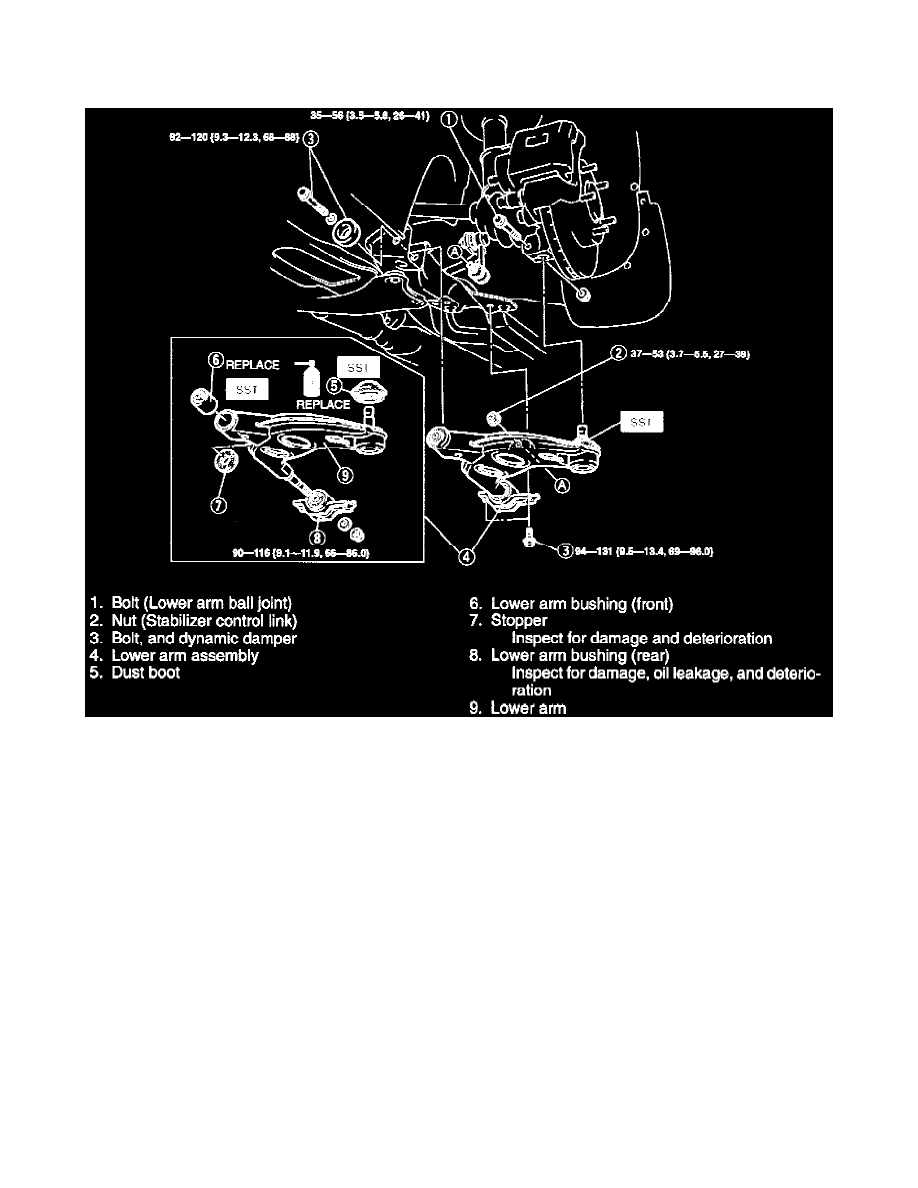
1. Raise and support vehicle, then remove front wheel.
2. Remove lower arm ball joint bolt and stabilizer nut, Fig. 5.
Fig. 5 Front Lower Arm Replacement
3. Remove dynamic damper and bolt, then lower arm assembly.
4. Carefully chisel off dust boot.
5. Cut away lower arm bushing projecting rubber, then use special bushing remover tool No. 49G0342A0, or equivalent, and remove bushing.
6. Reverse procedure to install, noting the following:
a. Use special tool and pull new bushing into arm.
b. Press new dust boot onto ball joint with special boot installer tool No. 498038785, or equivalent, and wipe away excess grease.
c. Using chisel, remove dust boot. Do not damage ball joint.
d. Loosely tighten lower arm bolts. Tighten all other nuts and bolts to specifications.
e. Lower vehicle, and tighten lower arm bolts to specifications with vehicle unloaded.