
Brake Bleeding: Service and Repair
- Make
- Mazda
- Model
- B2300
- Engine
- L4-2.3L VIN D
- Year
- 2004
- Section
- Brake Bleeding › Service and Repair
Brake Bleeding: Service and Repair
Manual Air Bleeding
Caution:
^
Do not allow the brake master cylinder reservoir to run dry during the bleeding operation. Keep the brake master cylinder reservoir filled with the
specified brake fluid. Never reuse the brake fluid that has been drained from the hydraulic system.
Note:
^
When any part of the hydraulic system has been disconnected for repair or replacement, air can get into the system and cause spongy brake pedal
action. This requires bleeding of the hydraulic system after it has been properly connected. The hydraulic system can be bled manually or with
pressure bleeding equipment.
1. Clean all dirt from and remove the brake master cylinder filler cap and fill the brake master cylinder reservoir with the specified brake fluid.
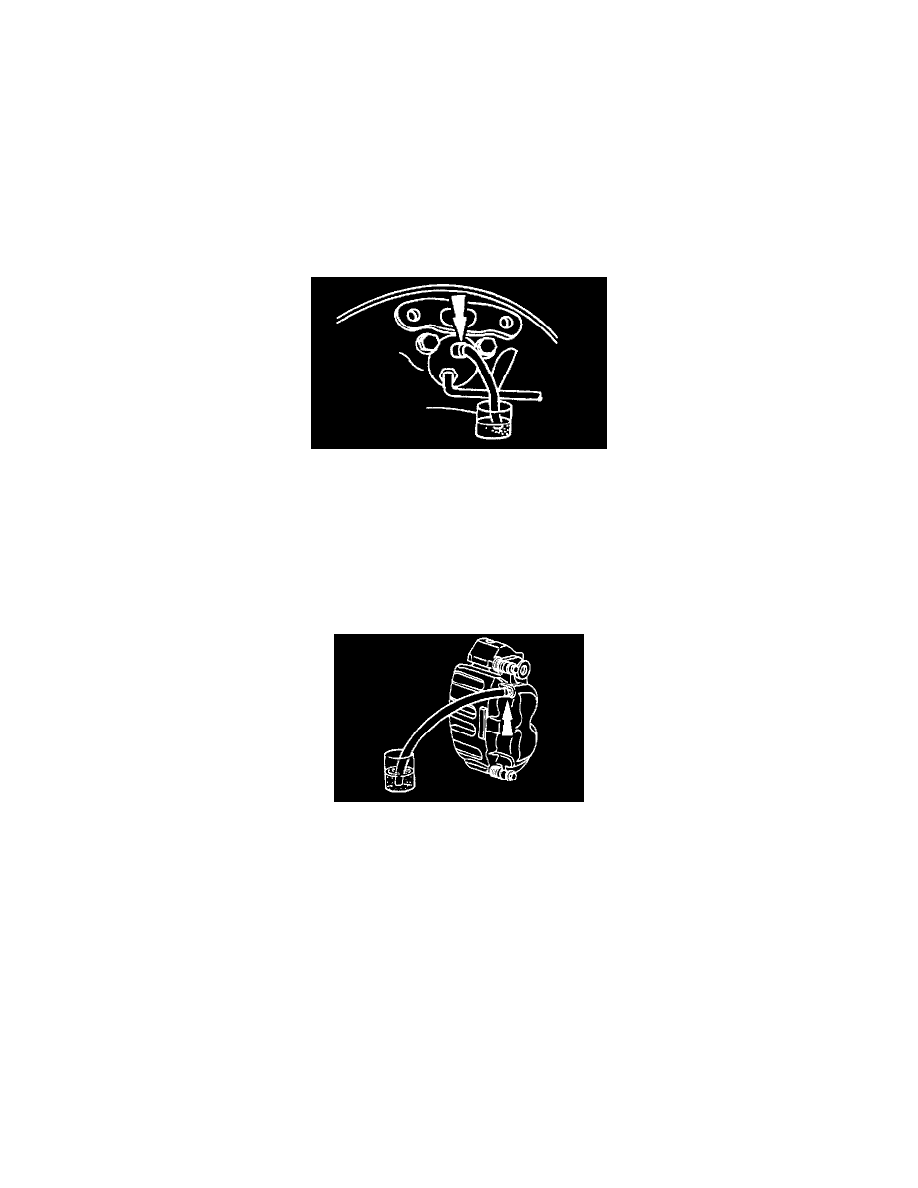
2. Place a box end wrench on the RH rear bleeder screw. Attach a rubber drain tube to the RH rear bleeder screw and submerge the free end of the
tube in a container partially filled with clean brake fluid.
3. Have an assistant pump, and then hold firm pressure on, the brake pedal.
4. Loosen the RH rear bleeder screw until a stream of brake fluid comes out. While an assistant maintains pressure on the brake pedal, tighten the RH
rear bleeder screw.
1. Repeat until clear, bubble free fluid comes out.
2. Ref II the brake master cylinder reservoir as necessary.
5. Tighten the RH rear bleeder screw.
6. Repeat Steps 2, 3, 4 and 5 for the LH rear bleeder screw.
7. Place a box end wrench on the RH front disc brake caliper bleeder screw. Attach a rubber drain tube to the RH front disc brake caliper bleeder
screw, and submerge the free end of the tube in a container partially filled with clean brake fluid.
8. Have an assistant pump, and then hold firm pressure on, the brake pedal.
9. Loosen the RH front disc brake caliper bleeder screw until a stream of brake fluid comes out. While an assistant maintains pressure on the brake
pedal, tighten the RH front disc brake caliper bleeder screw.
1. Repeat until clear, bubble free fluid comes out.
2. Refill the brake master cylinder reservoir as necessary.
10. Tighten the RH front disc brake caliper bleeder screw.
Tightening torque 12 - 18 Nm (1.2 - 1.8 kgf-cm, 9 - 13 ft. lbs.)
11. Repeat Steps 7, 8, 9, and 10 for the LH front disc brake caliper bleeder screw.
Pressure Air Bleeding
1. Clean all dirt from and remove the brake master cylinder filer cap and fill the brake master cylinder reservoir with the specified brake fluid.
Note:
^
Master cylinder pressure bleeder adapter tools are available from various manufacturers of pressure bleeding equipment. Follow the
instructions of the manufacturer when installing the adapter.
2. Install the bleeder adapter to the brake master cylinder reservoir, and attach the bleeder tank hose to the fitting on the adapter.
Pinch or Ctrl + scroll to zoom. Double-tap to reset.
Parts & tools for this job For 2004 Mazda B2300 2.3L
- PARTBrake padsSearch: Mazda B2300 2004 2.3L brake pads
- TOOLBrake bleeder kitSearch: one man brake bleeder kit
- FLUIDBrake fluidSearch: brake fluid
Links open Amazon search results in a new tab. As an Amazon Associate I earn from qualifying purchases.