
B3000 DS Cab Plus 2WD V6-3.0L OHV (2001)
Shift Solenoid: Service and Repair
TRANSMISSION SOLENOID REMOVAL / INSTALLATION
Removal Note
Note: When the battery has been disconnected and reconnected, some abnormal drive symptoms can occur while the vehicle relearns its adaptive
strategy. The customer needs to be notified that they may experience slightly different upshifts either soft or firm and this is a temporary condition and
will eventually return to normal operating condition.
1. Disconnect the negative battery cable.
2. Raise and support the vehicle.
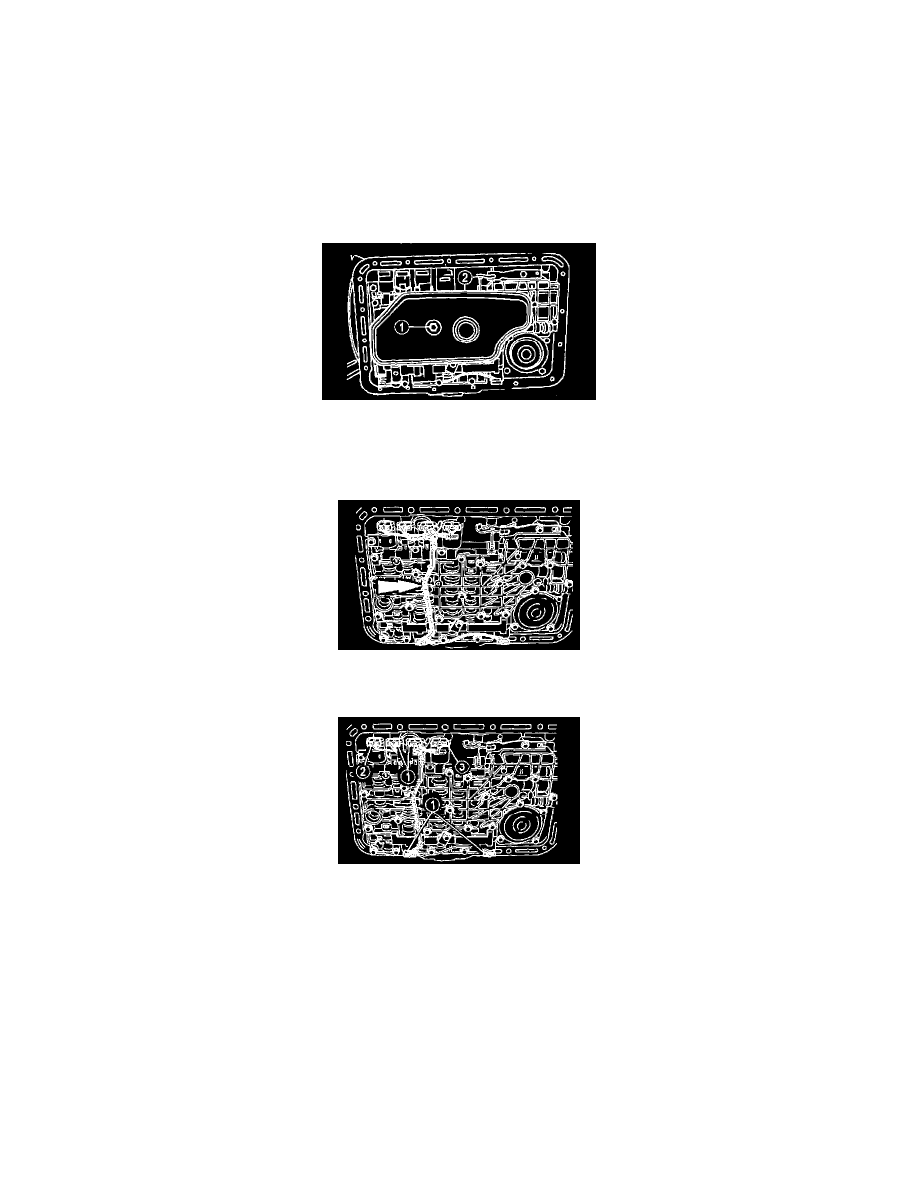
3. Remove the oil pan and gasket.
4. Remove the (1) bolt.
5. Remove the (2) oil strainer.
Note: Main control assembly does not need to be removed for solenoid service.
6. Remove wire loom guide and protector.
1. Carefully lift up on wire loom guide and protector and disengage the retaining pins from the solenoid clamps.
7. Disconnect shift solenoids (1) electrical connectors.
8. Disconnect the torque converter clutch (TCC) solenoid (2) electrical connector.
9. Disconnect the electronic pressure control (EPC) solenoid (3) electrical connector.
Caution:
-
The TCC solenoid and converter modulator valve may pop out of its bore. This may damage the solenoid or converter modulator valve.
SS3 may pop out of its bore. This may damage the solenoid.