
B3000 SE Regular Cab 4WD V6-3.0L OHV (1998)
Water Pump: Service and Repair
REMOVAL AND INSTALLATION
1. Disconnect the battery negative cable.
2. Drain engine coolant; refer to Engine Coolant Replacement.
3. Remove the air cleaner outlet tube; refer to Air Cleaner Outlet Tube Removal and Installation.
4. Remove the cooling fan and fan shroud.
5. Disconnect the bypass tube.
6. Remove the accessory drive belt; refer to Troubleshooting.
7. Remove the water pump pulley.
8. Remove the two bolts from the A/C compressor mounting bracket.
9. Disconnect the lower radiator hose.
10. Remove the bolts and position the mounting bracket and A/C compressor aside.
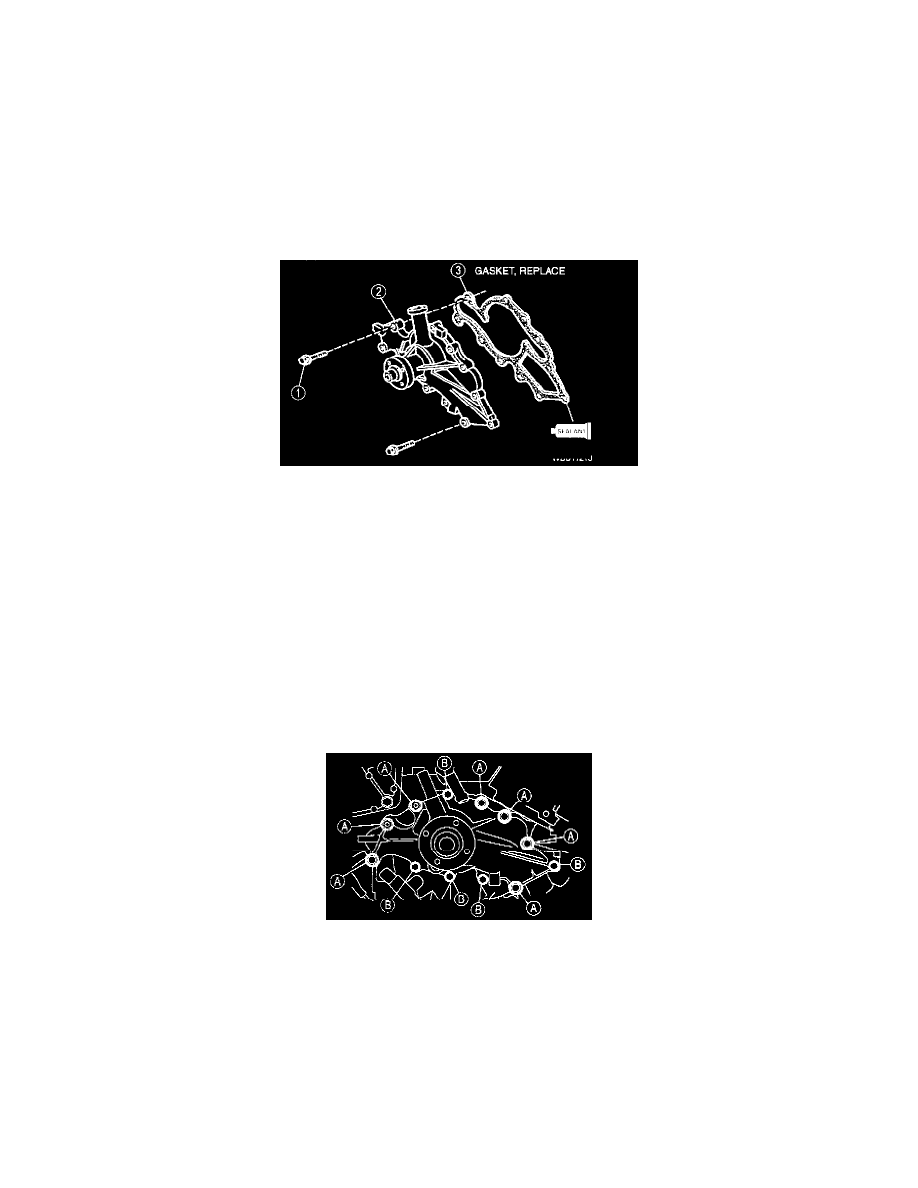
11. Remove in order shown in figure.
1) Bolt
2) Waster Pump
3) Gasket
12. Inspect all parts and repair or replace as necessary.
13. Install in reverse order of removal, referring to Installation Note.
Water Pump Gasket Installation Note
1. Clean the sealing surfaces.
NOTE: Use care when scraping aluminum surfaces because gouging could form leak paths.
2. Apply sealant to both sides of gasket and place it on water pump.
Water Pump Installation Note
1. Install the water pump bolts.
Bolt length
(A) M8 x 1.25
(B) M6 x 1.00
Tightening torque
(A) 25 Nm (18 ft. lbs.)
(B) 10 Nm (7 ft. lbs.)
Steps After Procedure
1. Fill the radiator with the specified amount and type of engine coolant.