
B3000 SE Regular Cab 4WD V6-3.0L OHV (1998)
2.
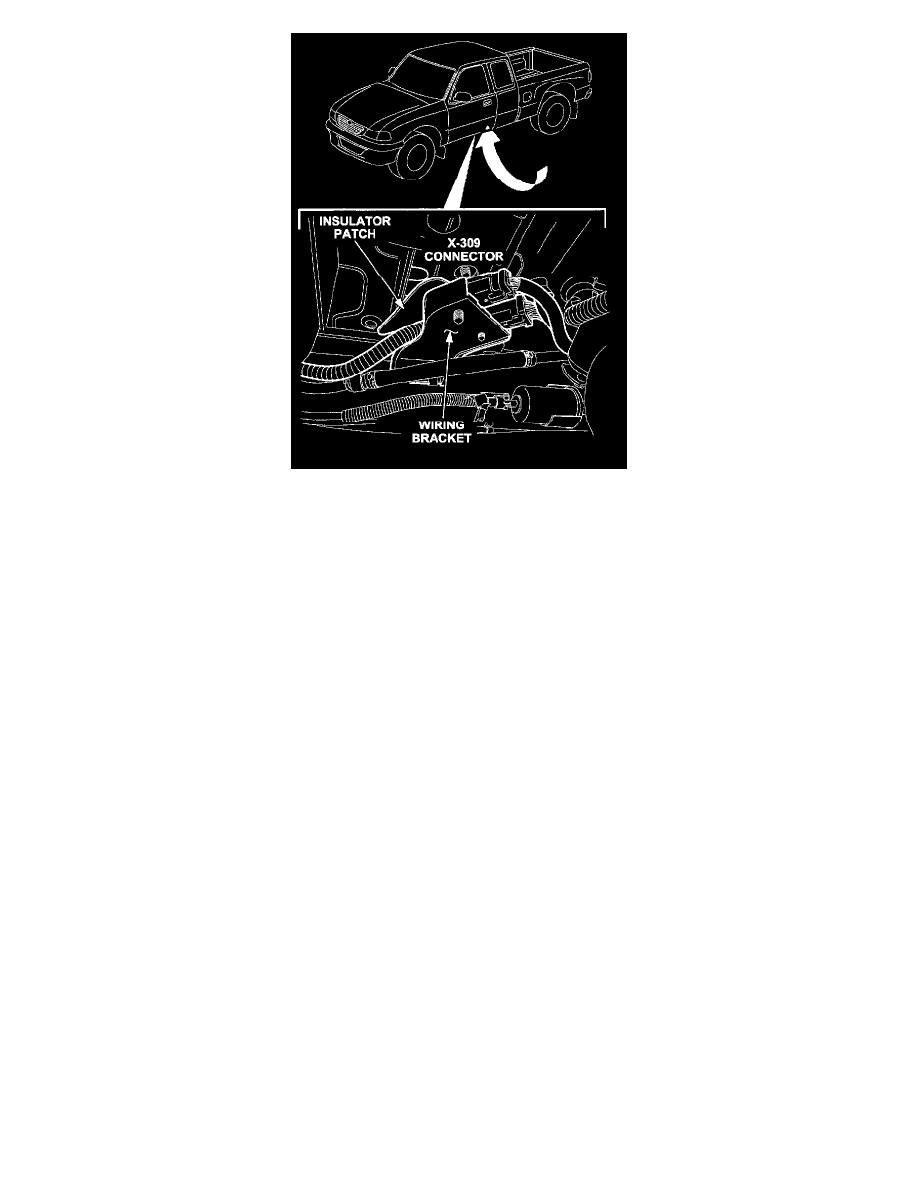
Inspect all wire harnesses outside the vehicle below driver's seat area near the X-309 connector for chafing.
-
If chafing is present, proceed to STEP 3.
-
If NO chafing is present, proceed with appropriate electrical/driveability diagnostics according to Workshop Manual (section 01-01
TROUBLESHOOTING).
NOTE:
On 1998 vehicles, chafing could be present forward of the connector (approximately 0.9m or 3' from the connection of X-309).
3.
Remove the wiring bracket, located at the X-309 connector.
4.
Repair damaged wire(s) as necessary.
5.
Protect repaired wire(s) by applying Flex Wrap to the affected area with electrical tape or equivalent.
6.
Verify Insulator Patch is present.
-
If Insulator Patch is NOT present, proceed to STEP 7. If Insulator Patch IS present, proceed to STEP 8.
7.
Clean surrounding area on underside floor pan reinforcement and apply Insulator Patch to clean area.
8.
Reinstall wiring bracket.
NOTE:
If bracket is damaged, install new bracket.
Tightening torque: 8 N.m (6 lb-ft)
9.
Verify repair.