
B3000 SE Regular Cab 4WD V6-3.0L OHV (1998)
Alternator: Service and Repair
1. Disconnect the battery ground cable.
2. Remove the air cleaner outlet tube.
3. Remove the drive belt.
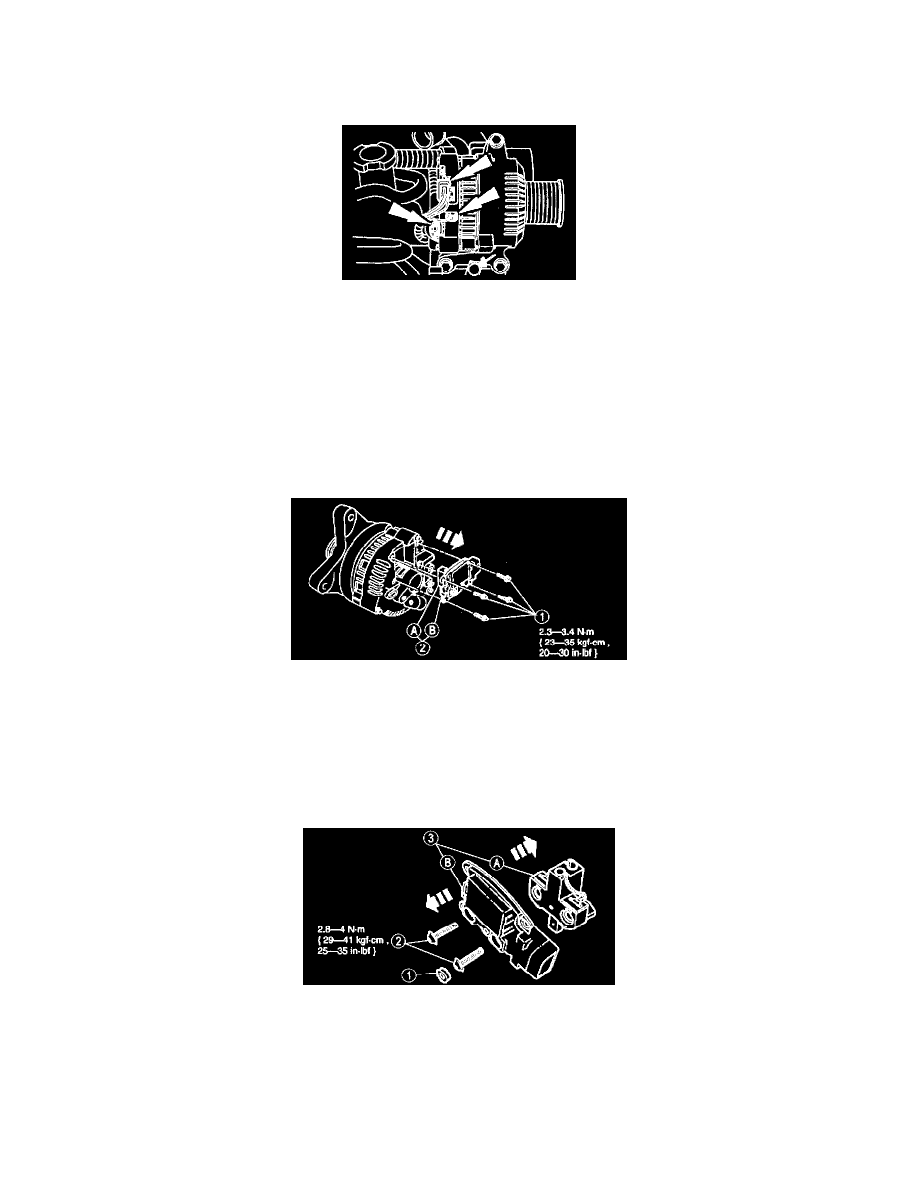
4. Disconnect the electrical connectors.
5. Remove the wiring harness to generator pushpin.
6. Remove the generator.
1. Remove the bolts.
2. Remove the generator.
7. Install in reverse order of removal.
Tightening torque: 40 - 50 N.m (4.1 - 5.1 kgf.m, 30 - 40 ft.lbf).
GENERATOR BRUSH AND TERMINAL HOLDER REMOVAL/INSTALLATION
1. Remove the generator.
2. Remove the (A) generator brush and terminal holder and the (B) voltage regulator assembly.
1. Remove the screws.
2. Remove the (A) generator brush and terminal holder and the (B) voltage regulator assembly.
3. Separate the (A) generator brush and terminal holder from the (B) voltage regulator.
1. Remove the screw cap.
2. Remove the generator brush and terminal holder screws.
3. Separate the (A) generator brush and terminal holder from the (B) voltage regulator.
4. Install the brush and terminal holder on the voltage regulator.
1. Position the brush and terminal holder on the voltage regulator.
2. Install the generator brush and terminal holder screws.
CAUTION:
- Make sure screw cap is installed over the proper screw to prevent accidental shorting of the battery positive connection.