
B3000 SE Regular Cab 4WD V6-3.0L OHV (1998)
-
This kit is not intended for retail sale.
Note:
This kit can be used on up to 24 vehicles. Retain brushes and etching cream until all stencils have been used or all vehicles have been completed.
1. Wear rubber or neoprene gloves and safety glasses.
2. Perform work in well-ventilated area.
3. Use drop cloth or equivalent to protect hood and leaf screen from accidental drips/spillage of etching cream.
4. Allow windshield to reach room temperature (approximately 70°F).
Caution
Failure to allow windshield to reach room temperature will affect transfer of stencil and could neutralize etching cream.
5. Clean and dry outside surface of windshield, in area of trademark.
Caution
Moisture on windshield will neutralize etching cream.
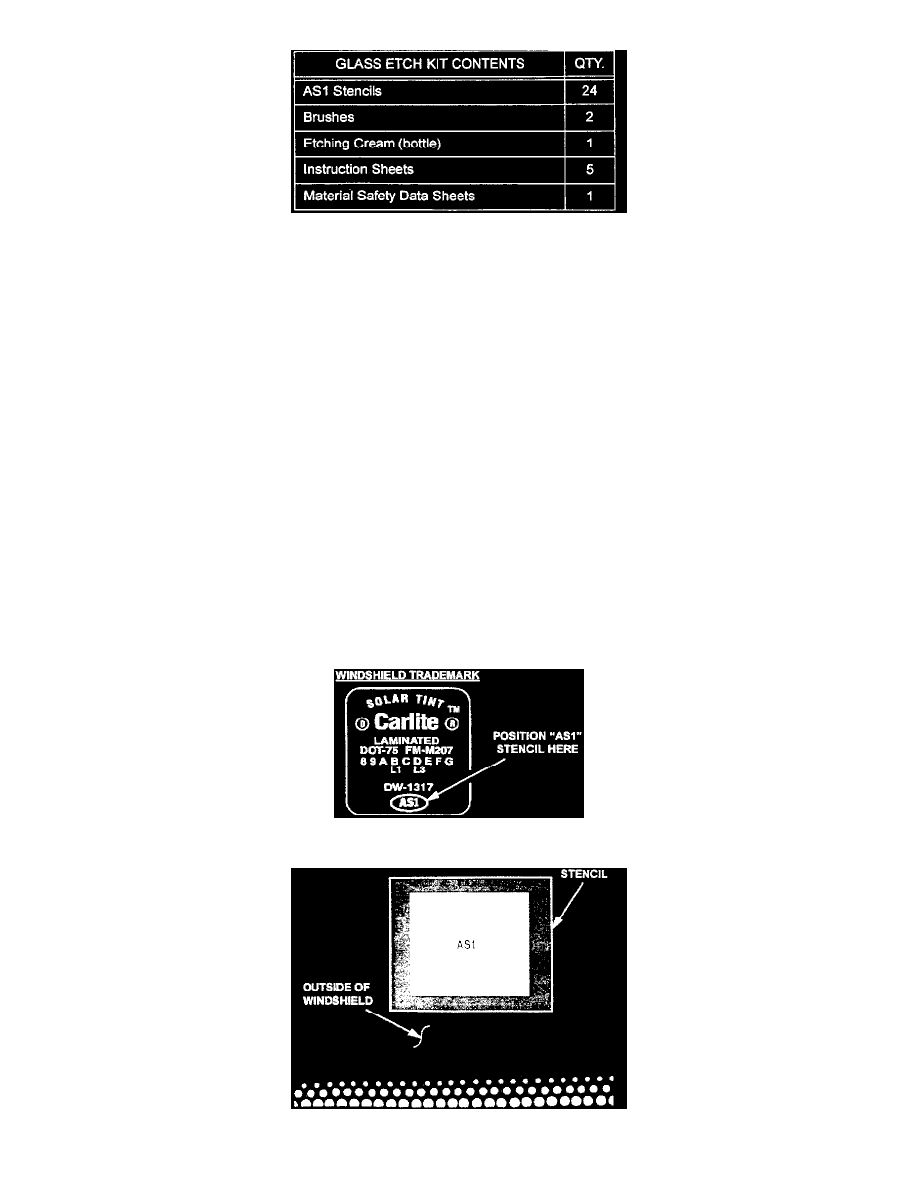
APPLICATION OF STENCIL
1. Remove the white backing sheet from the frosted AS1, blue field stencil.
2. Position AS1 stencil on windshield in the illustration.
Place stencil on outside surface of windshield with blue (tacky) side touching windshield as shown in the illustration.