
B4000 4WD V6-4.0L OHV (1995)
3.
Cut the rivet head off with a hammer and flat chisel. Fig. 4
4.
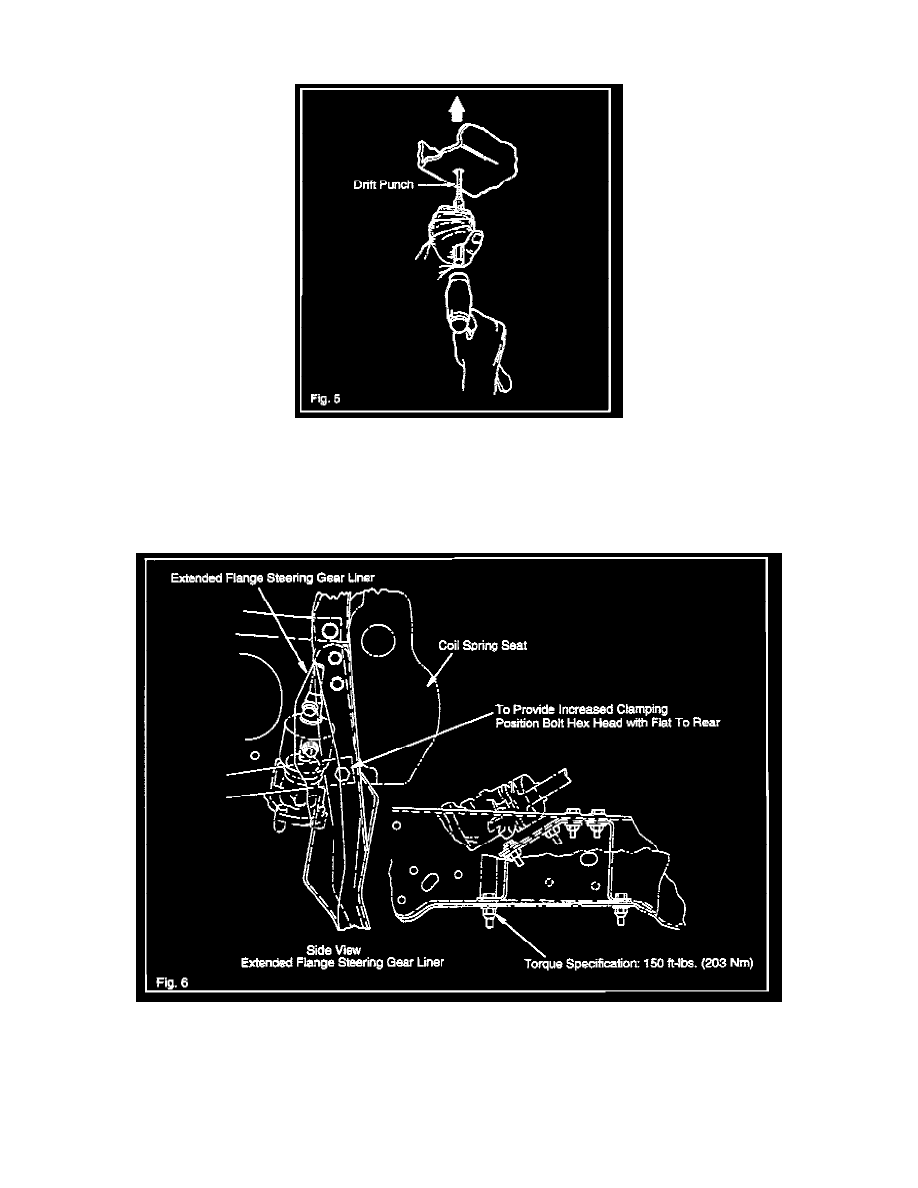
Knock the sleeve out of the blind side with a 3.8 in, (9.5 mm) drift punch and hammer. Fig. 5
CAUTION:
Do not remove huck rivet with a cutting torch. Using a cutting torch may result in frame damage.
5.
Line ream the existing hole through the frame flange, and crossmember to 9/16 in. (14.23 mm).
6.
Install a grade 8 nut, bolt and washer (see Parts Information) with the nut and washer on the bottom using the following procedure. Refer to Fig. 6
^
Push the bolt into place using a braze rod to hold the bolt.
^
Position the bolt so that one of the flats face rearward.
^
Slide the bolt into the opening between the front face of the crossmember and the frame liner.
^
Tighten the nut.
Tightening torque: 150 ft-lbs. (203 Nm)