
B Series Truck L4-2184cc 2.2L 2200 (1988)
Carburetor Float: Adjustments
1.
Remove air cleaner and plug vacuum hoses.
2.
Visually check fuel level through sight glass on side of carburetor float bowl. Float bowl should be full to the mark on the sight glass.
If not, continue.
3.
Remove carburetor from engine.
4.
Remove air horn from carburetor body.
Checking/Adjusting Float Level
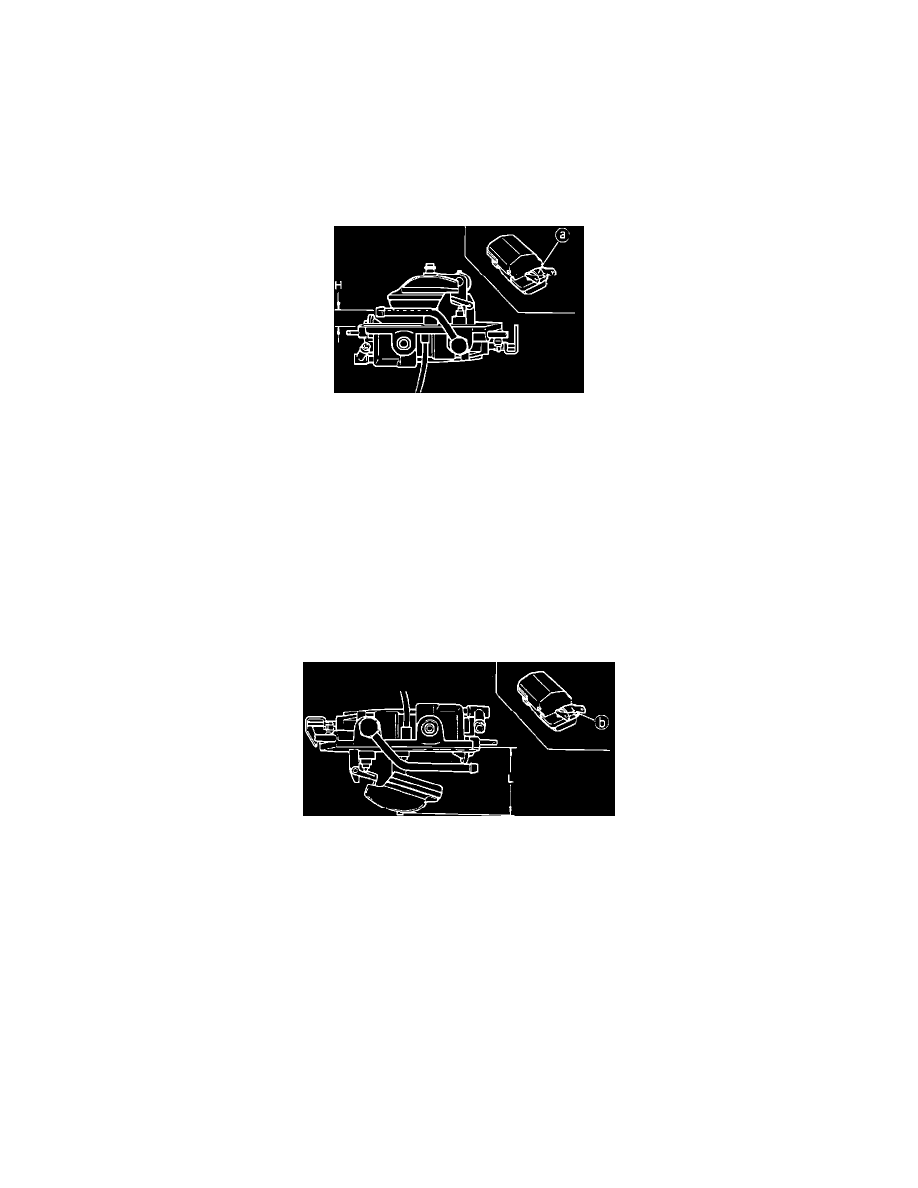
5.
Invert air horn on a bench and check the distance "H" (see illustration) between the top of the float and the gasket surface of the air horn (measure
to the air horn, NOT to the gasket. IF MEASURING TO THE GASKET, ADD THE THICKNESS OF THE GASKET MATERIAL).
W/Auto Trans ... 0.457" - 0.496" (11.6mm - 12.6mm)
W/Manual Trans ... 0.421" - 0.461" (10.7mm - 11.7mm)
If float level is not within specified range, adjust by bending float seat tab "a" (see illustration).
6.
Turn air horn upright and allow float to hang under its own weight.
Checking/Adjusting Float Drop
7.
Check float drop (distance "L", see illustration) between bottom of float and gasket surface of air horn.
1.811" - 1.850" (46.0mm - 47.0mm)
If not within specified range, adjust by bending float drop stop tab "b" (see illustration).
8.
After making necessary adjustments, re-assemble carburetor with air horn and install on engine.
9.
Start engine and check that fuel level is now at the level of the mark on the sight glass.