
CX-7 L4-2.3L Turbo (2007)
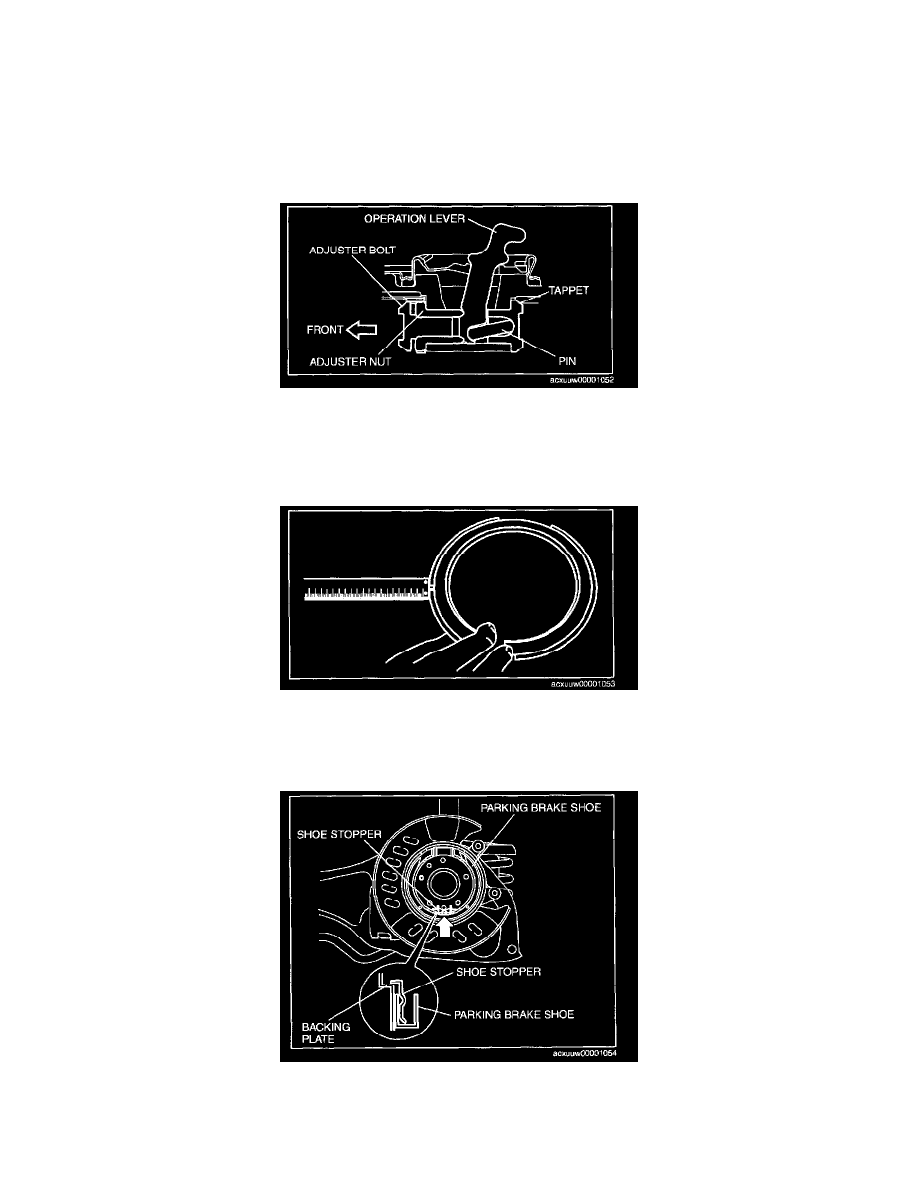
1. Pull the parking brake shoe downward and disengage it from the shoe stopper.
2. Press the adjuster bolt and tappet by hand, and slowly remove the parking brake shoe.
Note:
^
When removing the parking brake shoe, firmly press the adjuster bolt and tappet by hand and slowly remove the parking brake shoe to prevent
the adjuster bolt, tappet, operation lever and other parts from flying off.
Operation lever, Pin, Adjuster Bolt and Nut, Tappet Installation Note
1. Install the operation lever, pin, adjuster bolt and nut, and tappet so that the adjuster nut is facing toward the vehicle front.
2. Completely tighten the adjuster bolt and nut.
3. Move the operation lever by hand and verify that it operates properly. If proper operation cannot be verified, reinstall.
Parking Brake Shoe Installation Note
1. Measure the parking brake lining thickness with a vernier caliper or measuring scale.
^
If it is less than the minimum thickness, install a new parking brake shoe.
Minimum parking brake shoe thickness 1.0 mm (0.04 in)
2. After installing the opening of the parking brake shoe to the adjuster bolt and tappet, push the brake shoe upward and attach it to the shoe stopper.
Disc Plate, Screw Installation Note