
CX-7 L4-2.3L Turbo (2007)
7. Complete the "AFTER REPAIR PROCEDURE". (See AFTER REPAIR PROCEDURE[L3 WITH TC].) See: Powertrain
Management/Computers and Control Systems/Testing and Inspection/Initial Inspection and Diagnostic Overview/After Repair Procedure
Resonance Chamber Removal Note
1. Remove the mudguard (LF).
2. Remove the resonance chamber.
Air Hose Removal Note
1. Disconnect the variable swirl shutter valve switch connector.
2. Disconnect the fuel injector harness connector.
3. Disconnect the ventilation hose connected to the air hose.
4. Remove the air hose.
Air Duct Removal Note
1. Disconnect the wastegate control solenoid valve connector.
2. Disconnect the purge solenoid valve connector.
3. Disconnect the EGR valve connector.
4. ATF gage pipe out of the way.
5. Remove the air duct.
Throttle Body Removal Note
1. Disconnect the throttle body connector.
2. Drain the engine coolant before removing the water hose. (See ENGINE COOLANT REPLACEMENT[L3 WITH TC].)
3. Remove the throttle body.
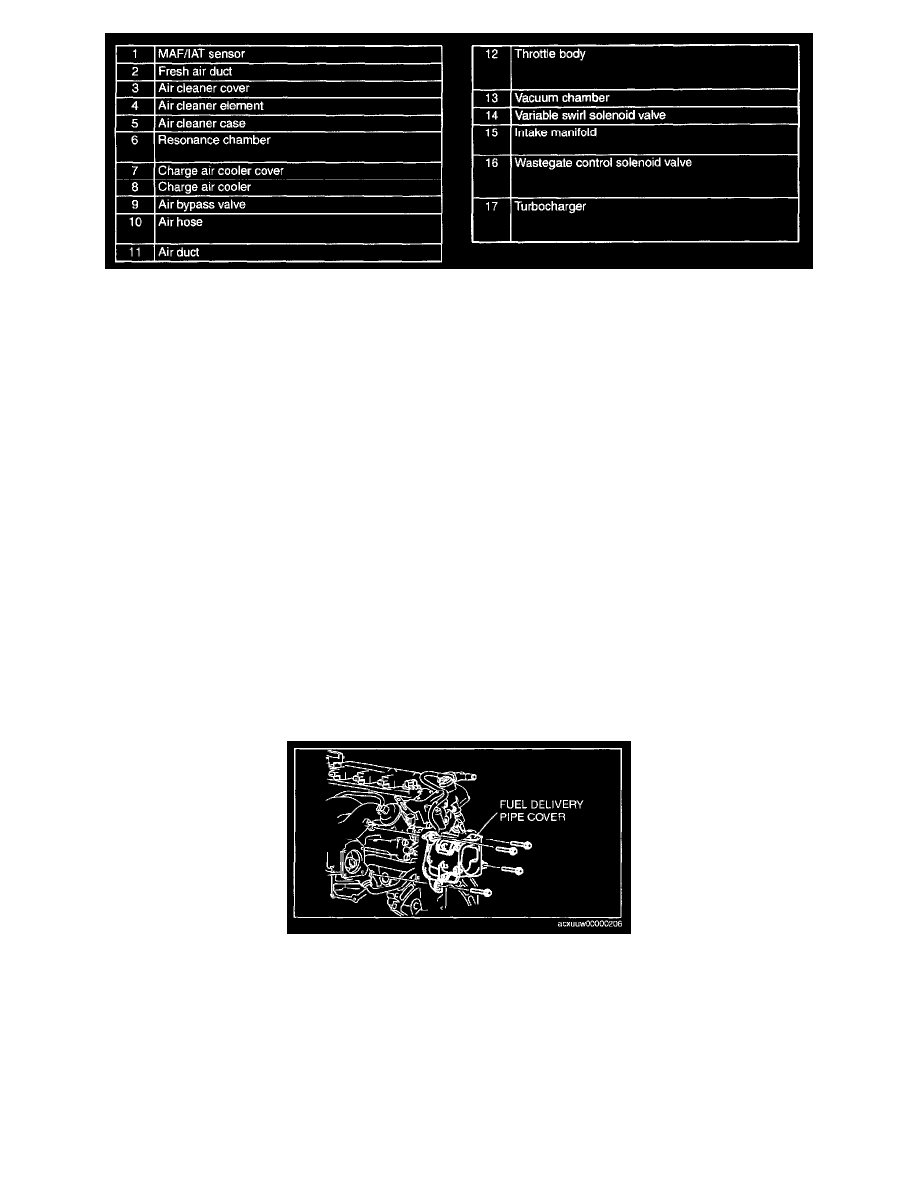
Intake Manifold Removal Note
1. Remove the fuel delivery pipe cover.
2. Disconnect the quick connector connected to the intake manifold.
3. Remove the EGR pipe.
4. Disconnect the variable swirl solenoid valve connector.
5. Disconnect the OCV connector.
6. Disconnect the PSP switch connector.
7. Remove the oil level gauge pipe.
8. Remove the splash shield (RF).
9. Remove the drive belt.
10. Set the power steering oil pump out of the way.
11. Disconnect the fuel pressure sensor connector.