
CX-7 L4-2.3L Turbo (2007)
Housing Assembly HVAC: Removal and Replacement
A/C UNIT REMOVAL/INSTALLATION
1. Disconnect the negative battery cable.
2. Discharge the refrigerant from the system. (See REFRIGERANT RECOVERY.) (See REFRIGERANT CHARGING.)
3. Drain the engine coolant. (See ENGINE COOLANT REPLACEMENT [L3 WITH TC].)
4. Remove the following parts:
1. Console panel
2. Console
3. Front scuff plate inner
4. Front side trim
5. Dashboard under cover
6. Glove compartment
7. Hood release lever
8. Lower panel
9. Center panel
10. Audio unit
11. Climate control unit
12. Knee bolster
13. Meter hood
14. Column cover
15. Instrument cluster
16. Driver-side air bag module
17. Steering wheel
18. Combination switch
19. Steering shaft
20. A-pillar lower trim
21. A-pillar trim
22. Dashboard
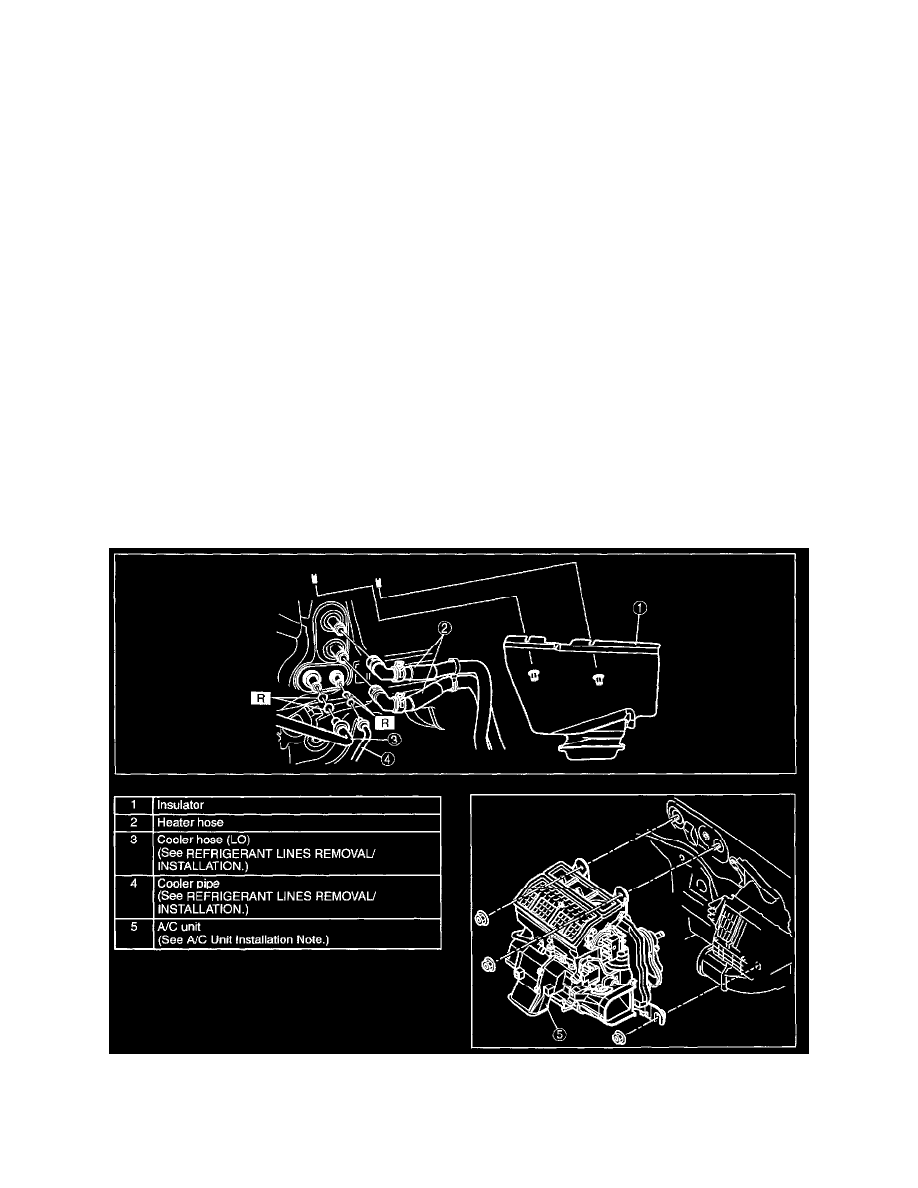
5. Remove in the order indicated in the table. Do not allow compressor oil to spill.
6. Install in the reverse order of removal.
7. Perform the refrigerant system performance test. (See REFRIGERANT SYSTEM PERFORMANCE TEST.) See: Testing and
Inspection/Component Tests and General Diagnostics/Refrigerant System Performance Test