
CX-7 L4-23L Turbo (2007) Engine Performance Checks | Valve Clearance Spec
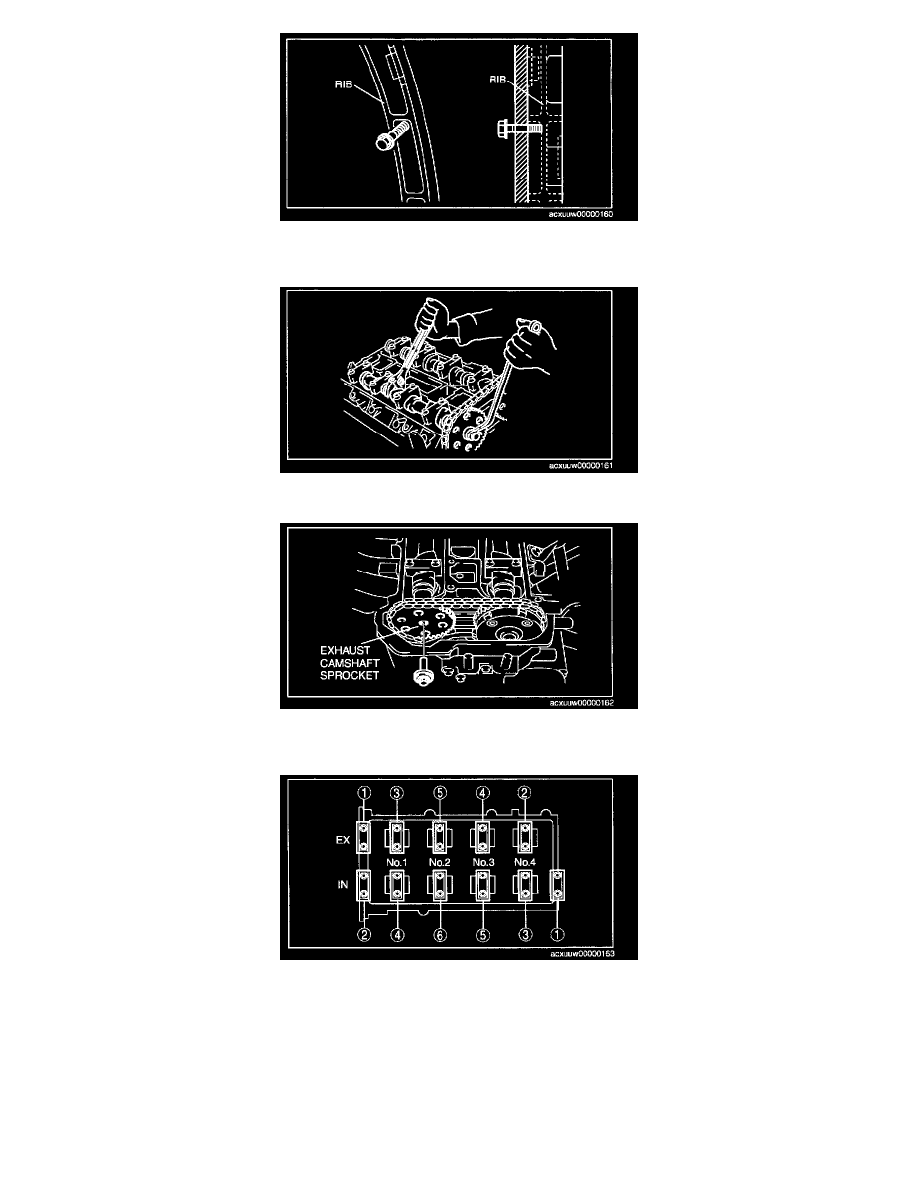
(3) Using a suitable bolt (M6 X 1.0 length 25 mm - 35 mm (0.99 - 1.3 in)) at the engine front cover upper blind plug, secure the tensioner arm
at the position where the tension is released.
15. Fix the exhaust camshaft using a wrench on the cast hexagon, and loosen the camshaft sprocket installation bolt.
16. Remove the installation bolt and remove the exhaust camshaft sprocket.
17. Remove the oil control valve (OCV).
18. Loosen the camshaft cap bolts in two or three passes in the order shown in the figure and remove the camshaft cap.
Note:
^
The camshaft caps are to be kept ordered for correct reassembly in their original positions. Do not mix the caps.
19. Remove the camshafts for the intake and exhaust sides.
20. Remove the tappet.
21. Install an appropriate tappet based on the results of the valve clearance inspection. Selected tappet = Removed tappet thickness + Measured valve
clearance - Standard valve clearance